This is the twenty-fifth of a new series of posts on ASP .NET Core 3.1 for 2020. In this series, we’ll cover 26 topics over a span of 26 weeks from January through June 2020, titled ASP .NET Core A-Z! To differentiate from the 2019 series, the 2020 series will mostly focus on a growing single codebase (NetLearner!) instead of new unrelated code snippets week.
Previous post:
NetLearner on GitHub:
- Repository: https://github.com/shahedc/NetLearnerApp
- v0.25-alpha release: https://github.com/shahedc/NetLearnerApp/releases/tag/v0.25-alpha
In this Article:
- YAML-defined CI/CD for ASP .NET Core
- Getting Started with Pipelines
- OS/Environment and Runtime
- Restore and Build
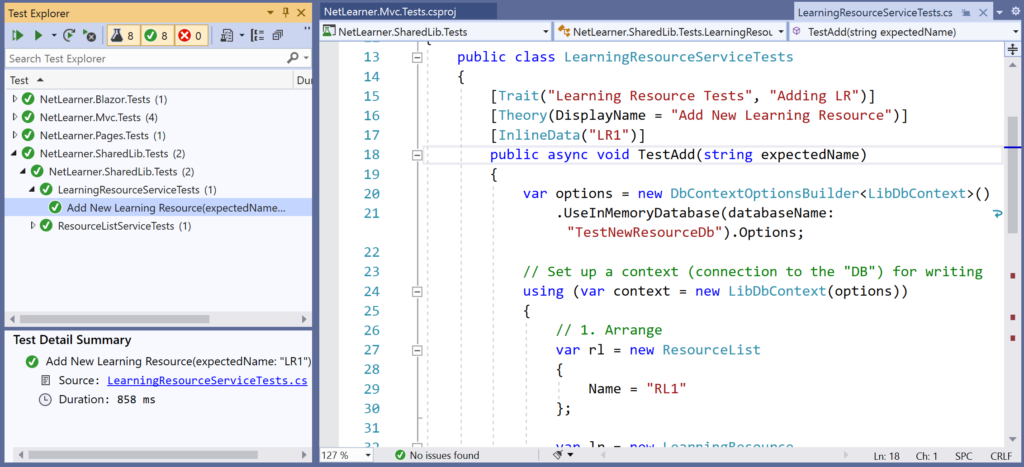
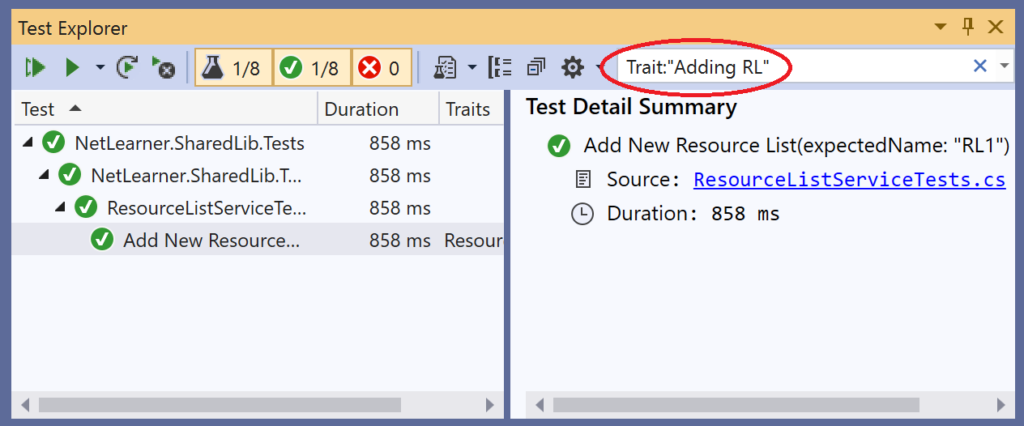
- Unit Testing and Code Coverage
- Publish and Deploy
- Triggers, Tips & Tricks
- References
Y is for YAML-defined CI/CD for ASP .NET Core
If you haven’t heard of it yet, YAML is yet another markup language. No really, it is. YAML literally stands for Yet Another Markup Language. If you need a reference for YAML syntax and how it applies to Azure DevOps Pipelines, check out the official docs:
- YAML schema – Azure Pipelines: https://docs.microsoft.com/en-us/azure/devops/pipelines/yaml-schema
In the NetLearner repository, check out the sample YAML code:
NOTE: Before using the aforementioned YAML sample in an Azure DevOps project, please replace any placeholder values and rename the file to remove the .txt suffix.
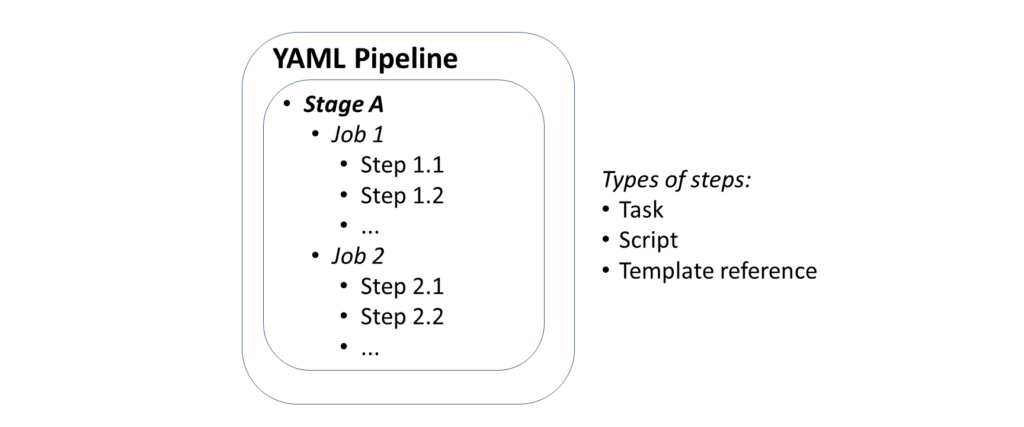
In the context of Azure DevOps, you can use Azure Pipelines with YAML to make it easier for you set up a CI/CD pipeline for Continuous Integration and Continuous Deployment. This includes steps to build and deploy your app. Pipelines consist of stages, which consist of jobs, which consists of steps. Each step could be a script or task. In addition to these options, a step can also be a reference to an external template to make it easier to create your pipelines.
Getting Started With Pipelines
To get started with Azure Pipelines in Azure DevOps:
- Log in at: https://dev.azure.com
- Create a Project for your Organization
- Add a new Build Pipeline under Pipelines | Builds
- Connect to your code location, e.g. GitHub repo
- Select your repo, e.g. a specific GitHub repository
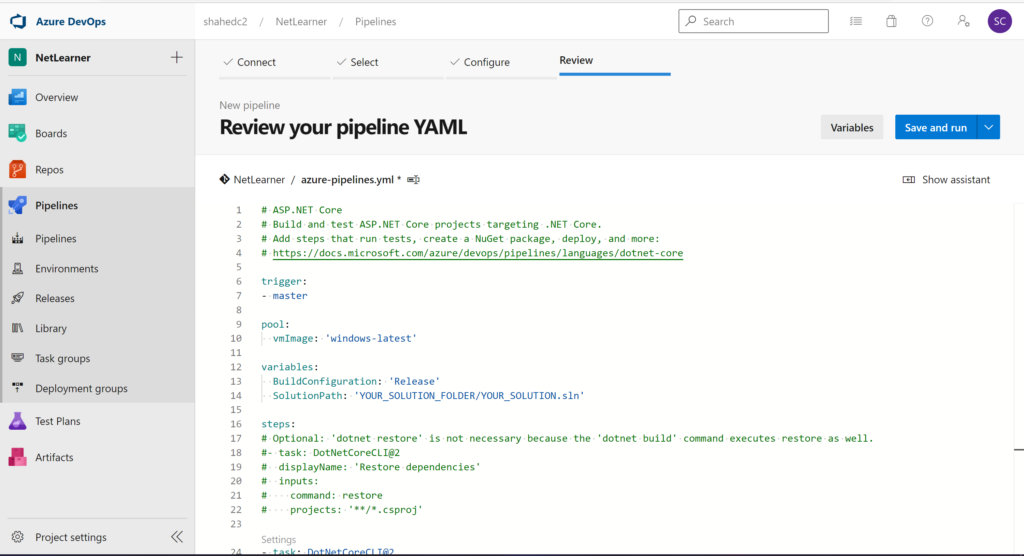
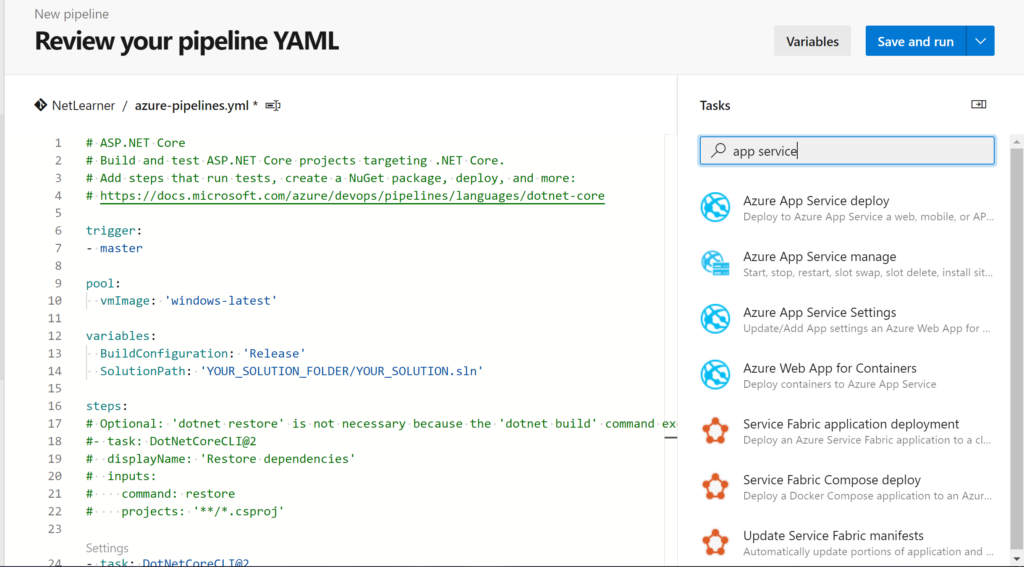
- Configure your YAML
- Review your YAML and Run it
From here on forward, you may come back to your YAML here, edit it, save it, and run as necessary. You’ll even have the option to commit your YAML file “azure-pipelines.yml” into your repo, either in the master branch or in a separate branch (to be submitted as a Pull Request that can be merged).
If you need more help getting started, check out the official docs and Build 2019 content at:
- Create your first pipeline: https://docs.microsoft.com/en-us/azure/devops/pipelines/create-first-pipeline
- Build, test, and deploy .NET Core apps: https://docs.microsoft.com/en-us/azure/devops/pipelines/languages/dotnet-core
- From Build 2019, “YAML Release Pipelines in Azure DevOps”: https://youtu.be/ORy3OeqLZlE
To add pre-written snippets to your YAML, you may use the Task Assistant side panel to insert a snippet directly into your YAML file. This includes tasks for .NET Core builds, Azure App Service deployment and more.
OS/Environment and Runtime
From the sample repo, take a look at the sample YAML code sample “azure-pipelines.yml.txt“. Near the top, there is a definition for a “pool” with a “vmImage” set to ‘windows-latest’.
pool:
 vmImage: 'windows-latest'
If I had started off with the default YAML pipeline configuration for a .NET Core project, I would probably get a vmImage value set to ‘ubuntu-latest’. This is just one of many possible values. From the official docs on Microsoft-hosted agents, we can see that Microsoft’s agent pool provides at least the following VM images across multiple platforms, e.g.
- Windows Server 2019 with Visual Studio 2019 (windows-latest OR windows-2019)
- Windows Server 2016 with Visual Studio 2017 (vs2017-win2016)
- Ubuntu 18.04 (ubuntu-latest OR ubuntu-18.04)
- Ubuntu 16.04 (ubuntu-16.04)
- macOS X Mojave 10.14 (macOS-10.14)
- macOS X Catalina 10.15 (macOS-latest OR macOS-10.15)
In addition to the OS/Environment, you can also set the .NET Core runtime version. This may come in handy if you need to explicitly set the runtime for your project.
steps:
- task: DotNetCoreInstaller@0
 inputs:
 version: '3.1.0'
Restore and Build
Once you’ve set up your OS/environment and runtime, you can restore (dependencies) and build your project. Restoring dependencies with a command is optional since the Build step will take care of the Restore as well. To build a specific configuration by name, you can set up a variable first to define the build configuration, and then pass in the variable name to the build step.
variables:
  BuildConfiguration: 'Release'
  SolutionPath: 'YOUR_SOLUTION_FOLDER/YOUR_SOLUTION.sln'

steps:
# Optional: 'dotnet restore' is not necessary because the 'dotnet build' command executes restore as well.
#- task: DotNetCoreCLI@2
#  displayName: 'Restore dependencies'
#  inputs:
#    command: restore
#    projects: '**/*.csproj'

- task: DotNetCoreCLI@2
  displayName: 'Build web project'
  inputs:
    command: 'build'
    projects: $(SolutionPath)
In the above snippet, the BuildConfiguration is set to ‘Release’ so that the project is built for its ‘Release’ configuration. The displayName is a friendly name in a text string (for any step) that may include variable names as well. This is useful for observing logs and messages during troubleshooting and inspection.
NOTE: You may also use script steps to make use of dotnet commands with parameters you may already be familiar with, if you’ve been using .NET Core CLI Commands. This makes it easier to run steps without having to spell everything out.
variables:
 buildConfiguration: 'Release'

steps:
- script: dotnet restore

- script: dotnet build --configuration $(buildConfiguration)
 displayName: 'dotnet build $(buildConfiguration)'
From the official docs, here are some more detailed steps for restore and build, if you wish to customize your steps and tasks further:
- Restore: https://docs.microsoft.com/en-us/azure/devops/pipelines/languages/dotnet-core?view=azure-devops#restore-dependencies
- Build: https://docs.microsoft.com/en-us/azure/devops/pipelines/languages/dotnet-core?view=azure-devops#build-your-project
steps:
- task: DotNetCoreCLI@2
 inputs:
 command: restore
 projects: '**/*.csproj'
 feedsToUse: config
 nugetConfigPath: NuGet.config
 externalFeedCredentials: <Name of the NuGet service connection>
Note that you can set your own values for an external NuGet feed to restore dependencies for your project. Once restored, you may also customize your build steps/tasks.
steps:
- task: DotNetCoreCLI@2
 displayName: Build
 inputs:
 command: build
 projects: '**/*.csproj'
 arguments: '--configuration Release'
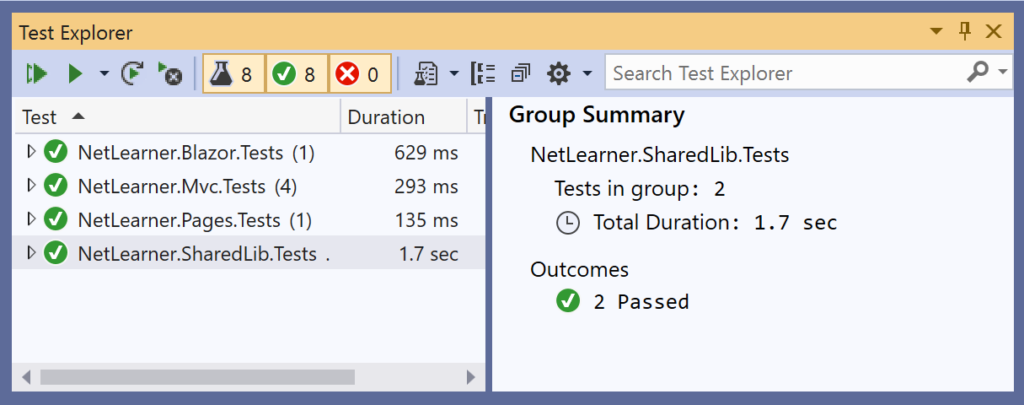
Unit Testing and Code Coverage
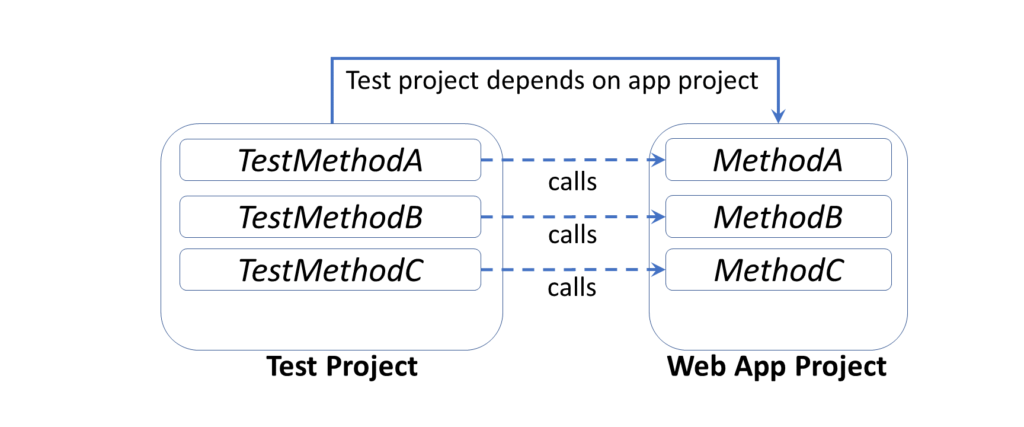
Although unit testing is not required for a project to be compiled and deployed, it is absolutely essential for any real-world application. In addition to running unit tests, you may also want to measure your code coverage for those unit tests. All these are possible via YAML configuration.
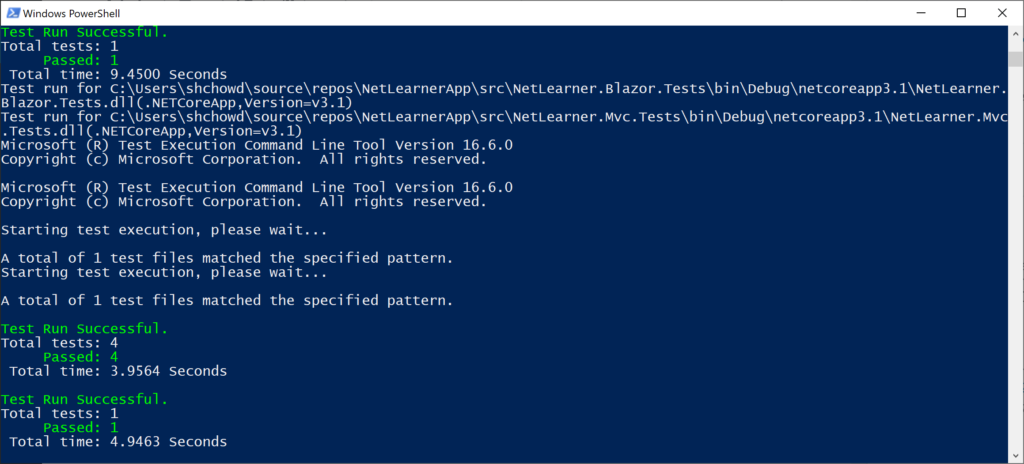
From the official docs, here is a snippet to run your unit tests, that is equivalent to a “dotnet test” command for your project:
steps:
- task: DotNetCoreCLI@2
 inputs:
 command: test
 projects: '**/*Tests/*.csproj'
 arguments: '--configuration $(buildConfiguration)'
Also, here is another snippet to collect code coverage:
steps:
- task: DotNetCoreCLI@2
 inputs:
 command: test
 projects: '**/*Tests/*.csproj'
 arguments: '--configuration $(buildConfiguration) --collect "Code coverage"'
Once again, the above snippet uses the “dotnet test” command, but also adds the –collect option to enable the data collector for your test run. The text string value that follows is a friendly name that you can set for the data collector. For more information on “dotnet test” and its options, check out the docs at:
- dotnet test command – .NET Core CLI: https://docs.microsoft.com/en-us/dotnet/core/tools/dotnet-test#options
Publish and Deploy
Finally, it’s time to package and deploy your application. In this example, I am deploying my web app to Azure App Service.
- task: DotNetCoreCLI@2
  displayName: 'Publish and zip'
  inputs:
    command: publish
    publishWebProjects: False
    projects: $(SolutionPath)
    arguments: '--configuration $(BuildConfiguration) --output $(Build.ArtifactStagingDirectory)'
    zipAfterPublish: True

- task: AzureWebApp@1
  displayName: 'Deploy Azure Web App'
  inputs:
    azureSubscription: '<REPLACE_WITH_AZURE_SUBSCRIPTION_INFO>'
    appName: <REPLACE_WITH_EXISTING_APP_SERVICE_NAME>
    appType: 'webApp'
    package: $(Build.ArtifactStagingDirectory)/**/*.zip
The above snippet runs a “dotnet publish” command with the proper configuration setting, followed by an output location, e.g. Build.ArtifactStagingDirectory. The value for the output location is one of many predefined build/system variables, e.g. System.DefaultWorkingDirectory, Build.StagingDirectory, Build.ArtifactStagingDirectory, etc. You can find out more about these variables from the official docs:
- Predefined variables – Azure Pipelines: https://docs.microsoft.com/en-us/azure/devops/pipelines/build/variables
Note that there is a placeholder text string for the Azure Subscription ID. If you use the Task Assistant panel to add a “Azure App Service Deploy” snippet, you will be prompted to select your Azure Subscription, and a Web App location to deploy to, including deployment slots if necessary.
The PublishBuildArtifacts task uploads the package to a file container, ready for deployment. After your artifacts are ready, a zip file will become available in a named container, e.g. ‘drop’.
# Optional step if you want to deploy to some other system using a Release pipeline or inspect the package afterwards
- task: PublishBuildArtifacts@1
  displayName: 'Publish Build artifacts'
  inputs:
    PathtoPublish: '$(Build.ArtifactStagingDirectory)'
    ArtifactName: 'drop'
    publishLocation: 'Container'
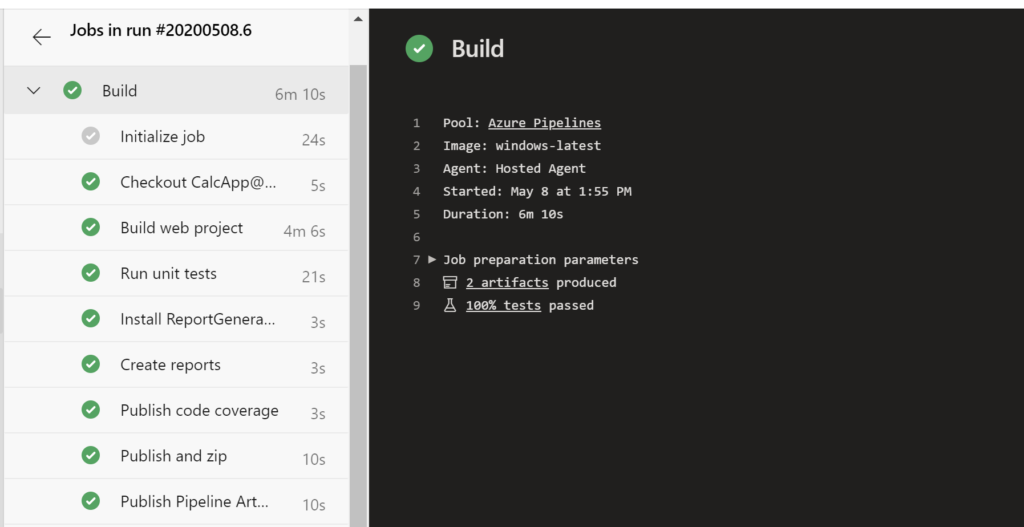
You may use the Azure DevOps portal to inspect the progress of each step and troubleshoot any failed steps. You can also drill down into each step to see the commands that are running in the background, followed by any console messages.
NOTE: to set up a release pipeline with multiple stages and optional approval conditions, check out the official docs at:
- Release pipelines: https://docs.microsoft.com/en-us/azure/devops/pipelines/release
- (2019) Announcement: https://devblogs.microsoft.com/devops/whats-new-with-azure-pipelines/
Triggers, Tips & Tricks
Now that you’ve set up your pipeline, how does this all get triggered? If you’ve taken a look at the sample YAML file, you will notice that the first command includes a trigger, followed by the word “master”. This ensures that the pipeline will be triggered every time code is pushed to the corresponding code repository’s master branch. When using a template upon creating the YAML file, this trigger should be automatically included for you.
trigger:
- master
To include more triggers, you may specify triggers for specific branches to include or exclude.
trigger:
 branches:
 include:
 - master
 - releases/*
 exclude:
 - releases/old*
Finally here are some tips and tricks when using YAML to set up CI/CD using Azure Pipelines:
- Snippets: when you use the Task Assistant panel to add snippets into your YAML, be careful where you are adding each snippet. It will insert it wherever your cursor is positioned, so make sure you’ve clicked into the correction location before inserting anything.
- Order of tasks and steps: Verify that you’ve inserted (or typed) your tasks and steps in the correct order. For example: if you try to deploy an app before publishing it, you will get an error.
- Indentation: Whether you’re typing your YAML or using the snippets (or some other tool), use proper indentation. You will get syntax errors of the steps and tasks aren’t indented correctly.
- Proper Runtime/OS: Assign the proper values for the desired runtime, environment and operating system.
- Publish: Don’t forget to publish before attempting to deploy the build.
- Artifacts location: Specify the proper location(s) for artifacts when needed.
- Authorize Permissions: When connecting your Azure Pipeline to your code repository (e.g. GitHub repo) and deployment location (e.g. Azure App Service), you will be prompted to authorize the appropriate permissions. Be aware of what permissions you’re granting.
- Private vs Public: Both your Project and your Repo can be private or public. If you try to mix and match a public Project with a private Repo, you may get the following warning message: “You selected a private repository, but this is a public project. Go to project settings to change the visibility of the project.”
References
- YAML schema: https://docs.microsoft.com/en-us/azure/devops/pipelines/yaml-schema
- Deploy an Azure Web App: https://docs.microsoft.com/en-us/azure/devops/pipelines/targets/webapp
- [VIDEO] YAML Release Pipelines in Azure DevOps: https://www.youtube.com/watch?v=ORy3OeqLZlE
- Microsoft-hosted agents for Azure Pipelines: https://docs.microsoft.com/en-us/azure/devops/pipelines/agents/hosted
- Build, test, and deploy .NET Core apps: https://docs.microsoft.com/en-us/azure/devops/pipelines/languages/dotnet-core
- Create your first pipeline: https://docs.microsoft.com/en-us/azure/devops/pipelines/create-first-pipeline
- Getting Started with YAML: https://docs.microsoft.com/en-us/azure/devops/pipelines/get-started-yaml
- Job and step templates: https://docs.microsoft.com/en-us/azure/devops/pipelines/process/templates
- Build pipeline triggers: https://docs.microsoft.com/en-us/azure/devops/pipelines/build/triggers
- Release variables and debugging: https://docs.microsoft.com/en-us/azure/devops/pipelines/release/variables
- Make your project public or private: https://docs.microsoft.com/en-us/azure/devops/organizations/public/make-project-public
- Azure App Service Deploy task: https://docs.microsoft.com/en-us/azure/devops/pipelines/tasks/deploy/azure-rm-web-app-deployment
- Publish Build Artifacts task: https://docs.microsoft.com/en-us/azure/devops/pipelines/tasks/utility/publish-build-artifacts
- YAML for Azure DevOps: https://github.com/shahedc/YamlForAzureDevOps
- Multi-stage YAML Example: https://github.com/shahedc/YamlForAzureDevOps/blob/master/azure-pipelines-multistage.yml