This is the seventeenth of a new series of posts on ASP .NET Core 3.1 for 2020. In this series, we’ll cover 26 topics over a span of 26 weeks from January through June 2020, titled ASP .NET Core A-Z! To differentiate from the 2019 series, the 2020 series will mostly focus on a growing single codebase (NetLearner!) instead of new unrelated code snippets week.
Previous post:
NetLearner on GitHub:
- Repository: https://github.com/shahedc/NetLearnerApp
- v0.17-alpha release: https://github.com/shahedc/NetLearnerApp/releases/tag/v0.17-alpha
In this Article:
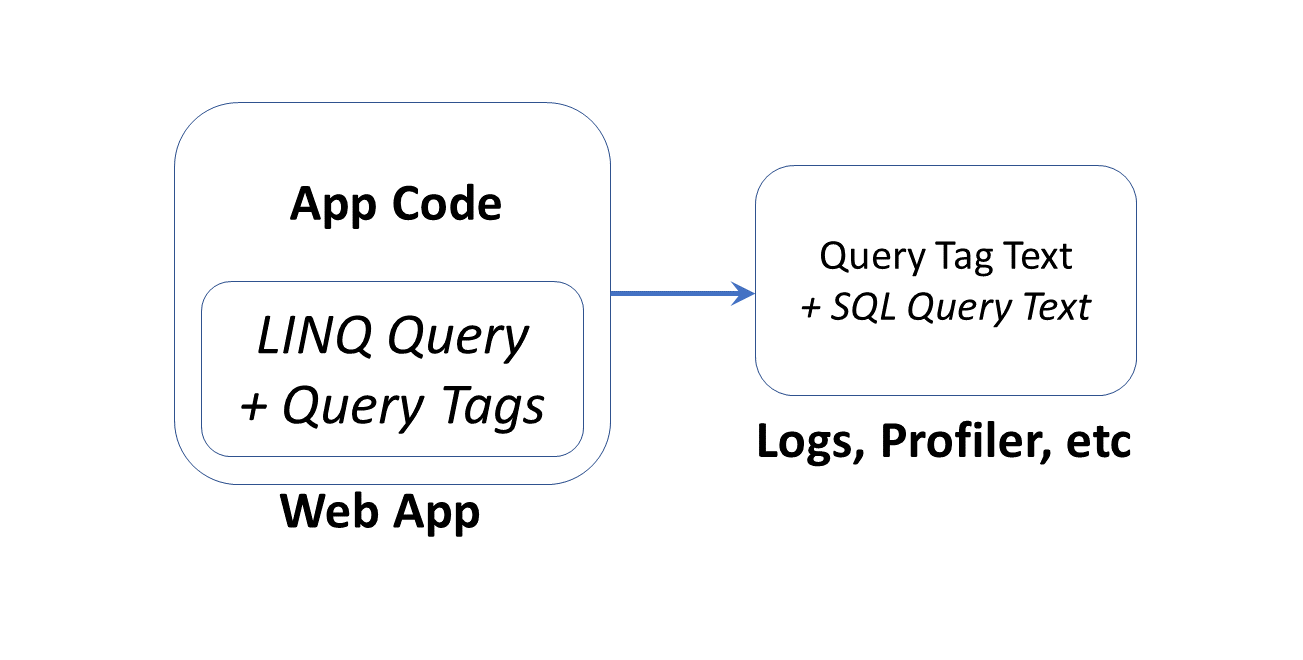
- Q is for Query Tags in EF Core
- Implementing Query Tags
- Observing Query Tags in Logs
- Formatting Query Tag Strings
- References
Q is for Query Tags in EF Core
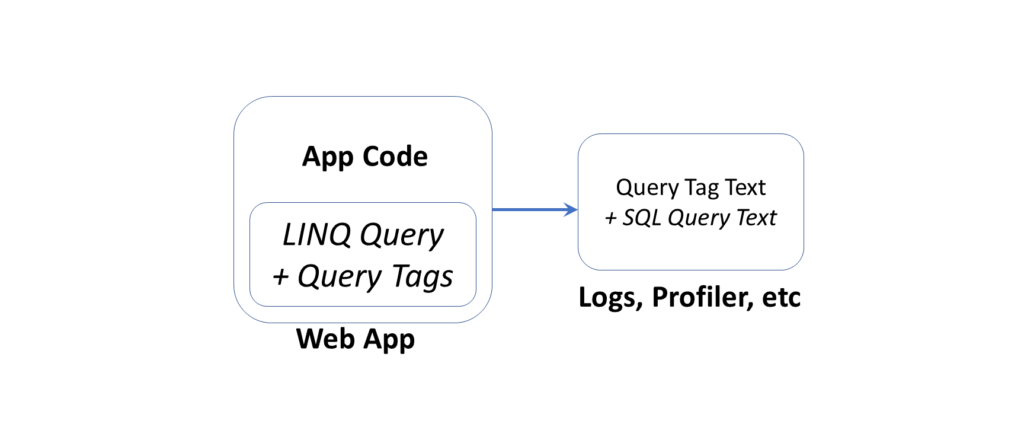
Query Tags were introduced in Entity Framework (EF) Core 2.2, as a way to associate your LINQ Queries with SQL Queries. This can be useful when browsing log files during debugging and troubleshooting. This article explains how Query Tags work, how to find the output and how to format the text strings before displaying them.
NOTE: You may have read that Query Types have been renamed to entities without keys, but please note that Query Types (introduced in EF Core 2.1) are not the same thing as Query Tags.
As of ASP .NET Core 3.0 Preview 1, EF Core must be installed separately via NuGet (e.g. v3.0.0-preview4.19216.3), as it is no longer included with the ASP .NET Core shared framework. Also, the dotnet ef tool has to be installed as a global/local tool, as it is no longer part of the .NET Core SDK. For more information, see the official announcement for Preview 4, where it was first mentioned:
- Announcing Entity Framework Core 3.0 Preview 4: https://devblogs.microsoft.com/dotnet/announcing-entity-framework-core-3-0-preview-4/
Implementing Query Tags
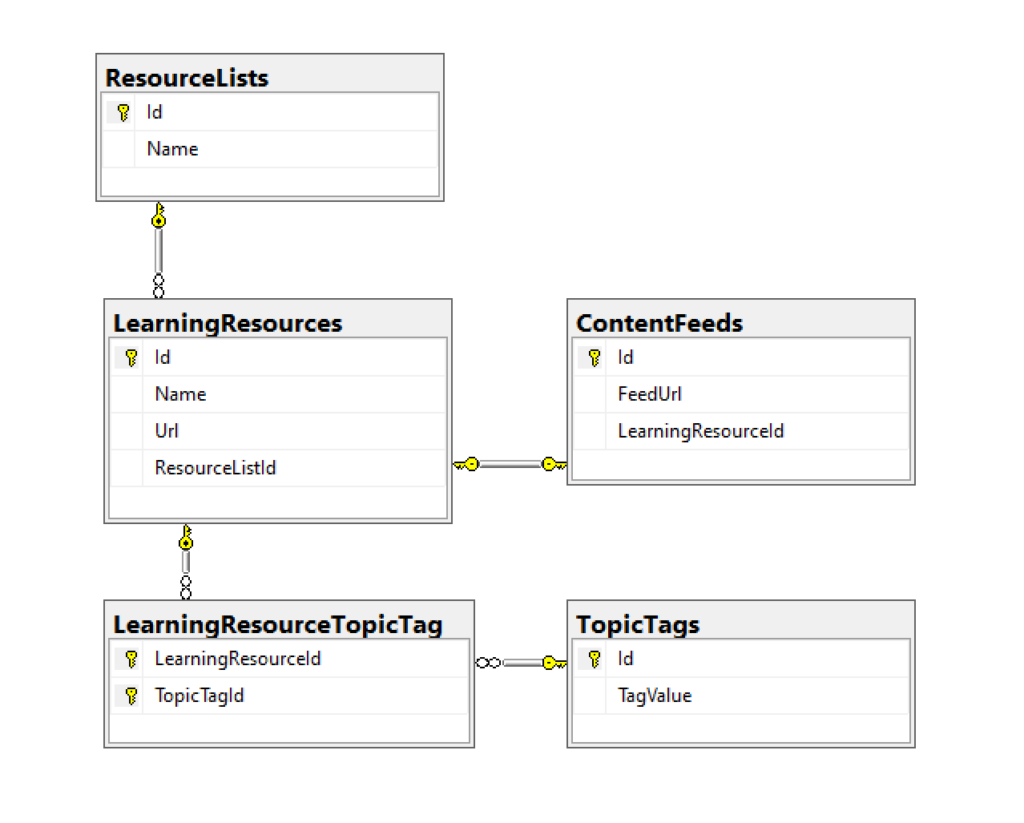
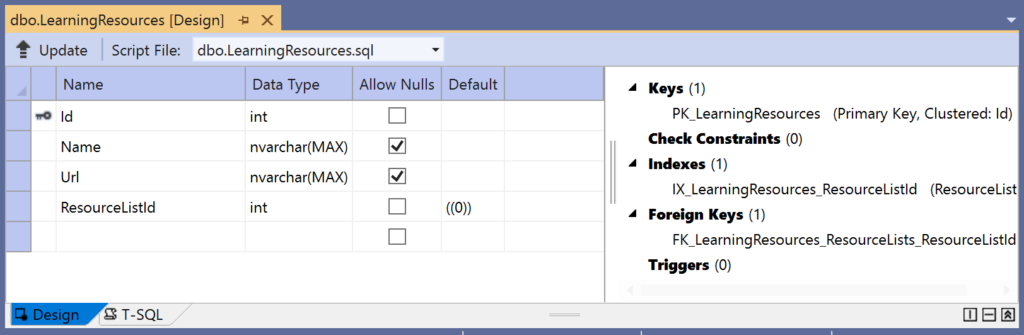
The NetLearner source code includes a C# model called LearningResource, with a few basic fields:
public class LearningResource
{
public int Id { get; set; }
[DisplayName("Resource")]
public string Name { get; set; }
[DisplayName("URL")]
[DataType(DataType.Url)]
public string Url { get; set; }
public int ResourceListId { get; set; }
[DisplayName("In List")]
public ResourceList ResourceList { get; set; }
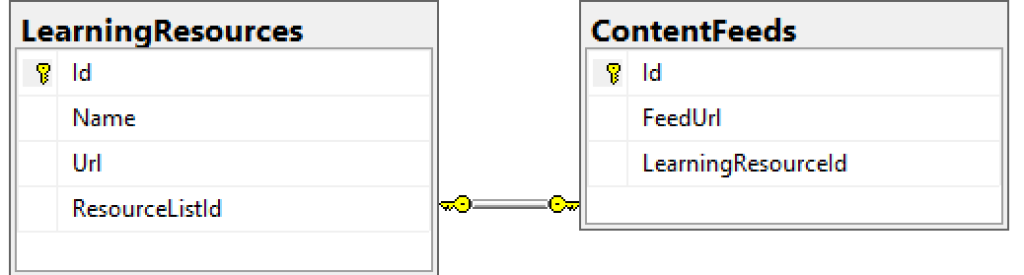
[DisplayName("Feed Url")]
public string ContentFeedUrl { get; set; }
public List<LearningResourceTopicTag> LearningResourceTopicTags { get; set; }
}
A collection of LearningResource objects are defined as a DbSet in the LibDbContext database context class:
public DbSet<LearningResource> LearningResources { get; set; }
The GetTop() service method in the LearningResourceService class defines a Query Tag with the TagWith() method, as shown below:
public async Task<List<LearningResource>> GetTop(int topX)
{
    var myItems =
    (from m in _context.LearningResources
        .Include(r => r.ResourceList)
        .TagWith($"This retrieves top {topX} Items!")
        orderby m.Id ascending
        select m)
    .Take(topX);

    return (await myItems.ToListAsync());
}
In the above query, the TagWith() method takes a single string value that can they be stored along with wherever the resultant SQL Queries are logged. This may include your persistent SQL Server database logs or Profiler logs that can be observed in real-time. It doesn’t affect what gets displayed in your browser.
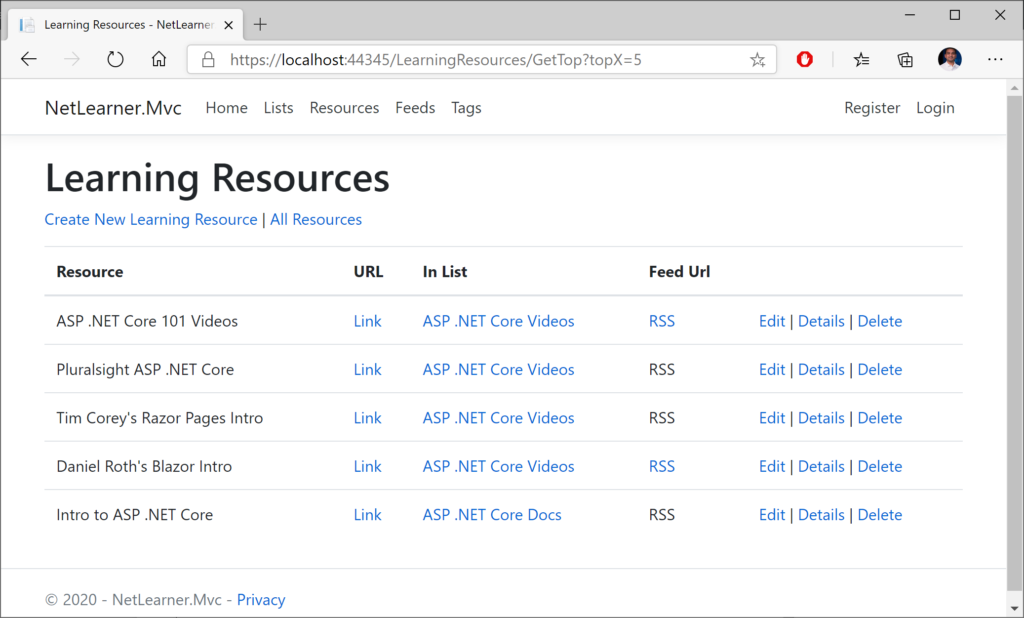
This can be triggered by visiting the LearningResourcesController’s GetTop method, while passing in an integer value for topX. This causes the Index view to return the top “X” learning resources in a list. For example: if topX is set to 5, the resulting view will display 5 items in the displayed list.
Observing Query Tags in Logs
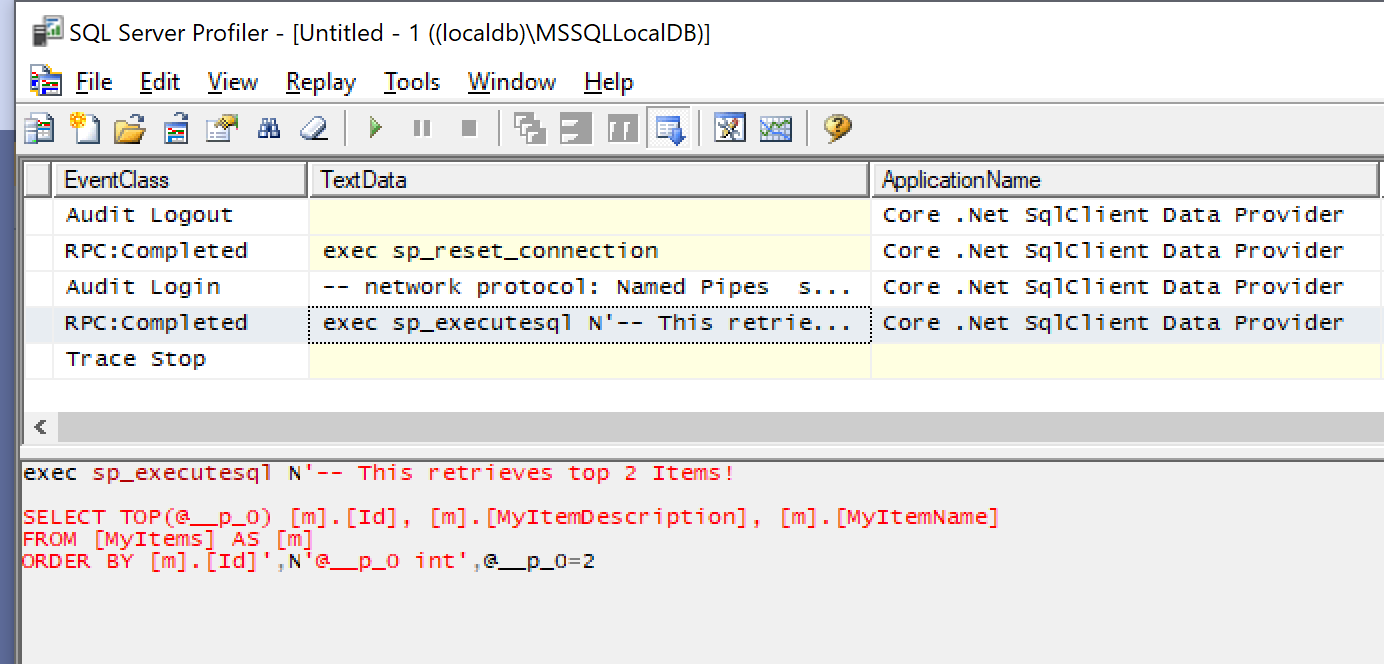
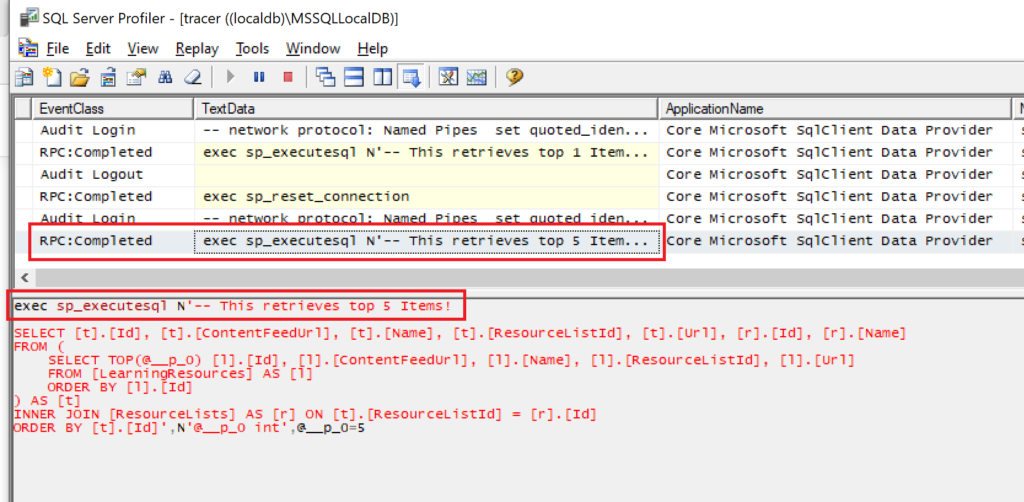
Using the SQL Server Profiler tool, the screenshot below shows how the Query Tag string defined in the code is outputted along with the SQL Query. Since topX is set to 5 in this example, the final string includes the value of topX inline within the logged text (more on formatting later).
From the code documentation, the TagWith() method “adds a tag to the collection of tags associated with an EF LINQ query. Tags are query annotations that can provide contextual tracing information at different points in the query pipeline.”
Wait a minute… does it say “collection of tags”…? Yes, you can add a collection of tags! You can call the method multiple times within the same query. In your code, you could call a string of methods to trigger cumulative calls to TagWith(), which results in multiple tags being stored in the logs.
Formatting Query Tag Strings
You may have noticed that I used the $ (dollar sign) symbol in my Query Tag samples to include variables inline within the string. In case you’re not familiar with this language feature, the string interpolation feature was introduced in C# 6.
$"This retrieves top {topX} Items!"
You may also have noticed that the profiler is showing the first comment in the same line as the leading text “exec sp_executesql” in the Profiler screenshot. If you want to add some better formatting (e.g. newline characters), you can use the so-called verbatim identifier, which is essentially the @ symbol ahead of the string.
@"This string has more
than 1 line!"
While this is commonly used in C# to allow newlines and unescaped characters (e.g. backslashes in file paths), some people may not be aware that you can use it in Query Tags for formatting. This operator allows you to add multiple newlines in the Query Tag’s string value. You can combine both operators together as well.
@$"This string has more than 1 line
and includes the {topX} items!"
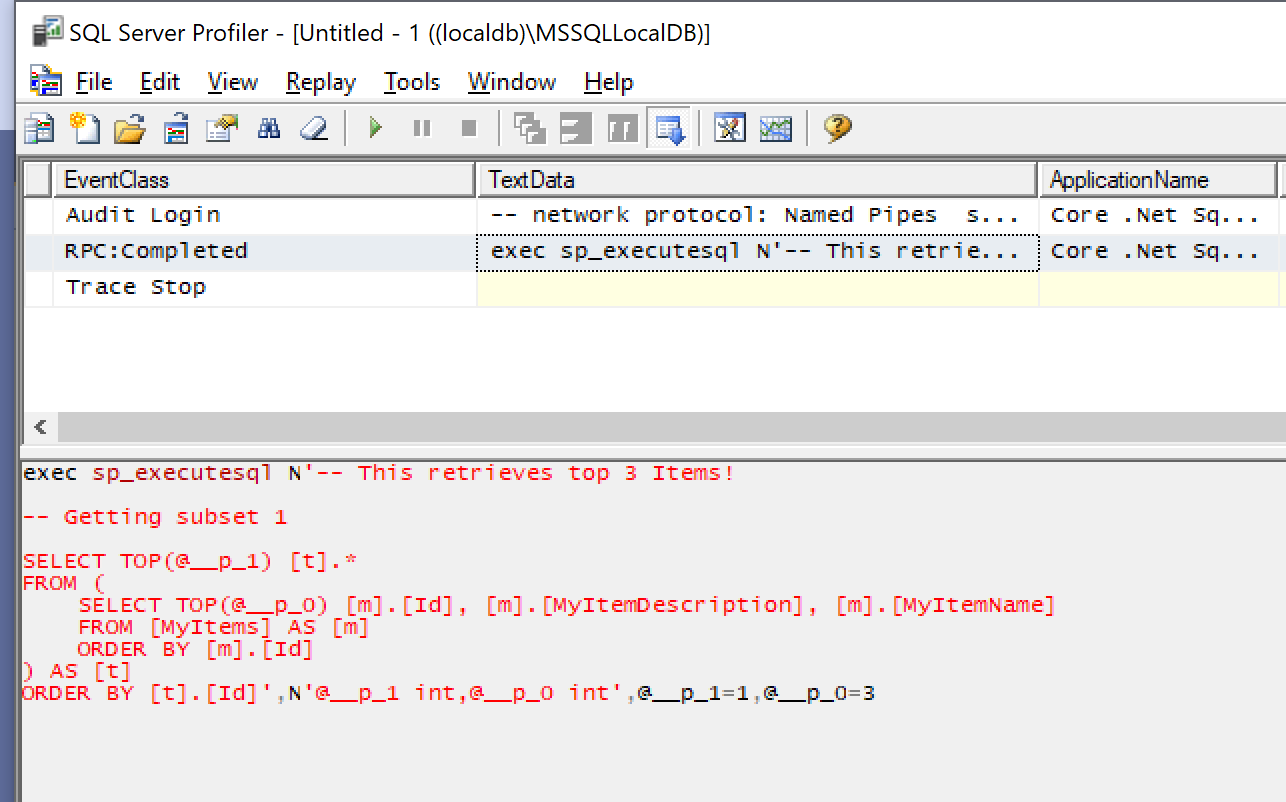
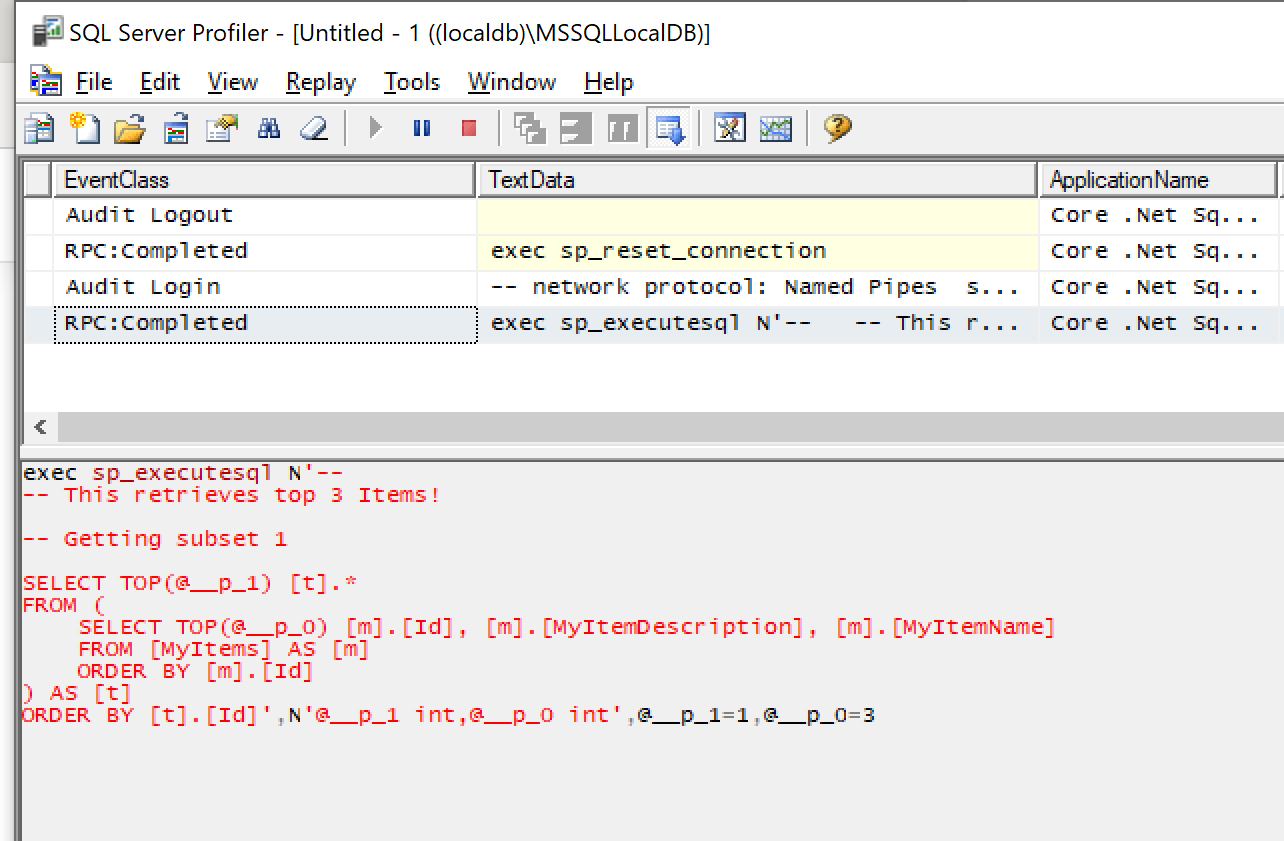
In an actual example, a newline produces the following results:
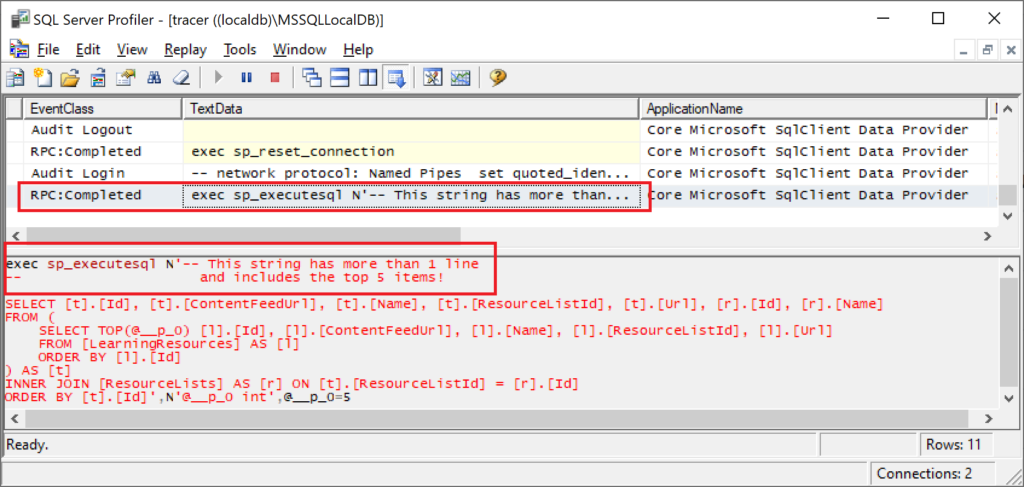
The above screenshot now shows multiline text from a Query Tag using newlines within the text string.
References
- Query Tags – EF Core: https://docs.microsoft.com/en-us/ef/core/querying/tags
- Basic Queries – EF Core: https://docs.microsoft.com/en-us/ef/core/querying/basic
- Raw SQL Queries – EF Core: https://docs.microsoft.com/en-us/ef/core/querying/raw-sql
- Announcing Entity Framework Core 3.0 Preview 4: https://devblogs.microsoft.com/dotnet/announcing-entity-framework-core-3-0-preview-4/

 A – Z of ASP .NET Core!