Tag Archives: mvc

Authentication & Authorization in ASP .NET Core 3.1

By Shahed C on January 6, 2020
ASP .NET Core A-Z Series

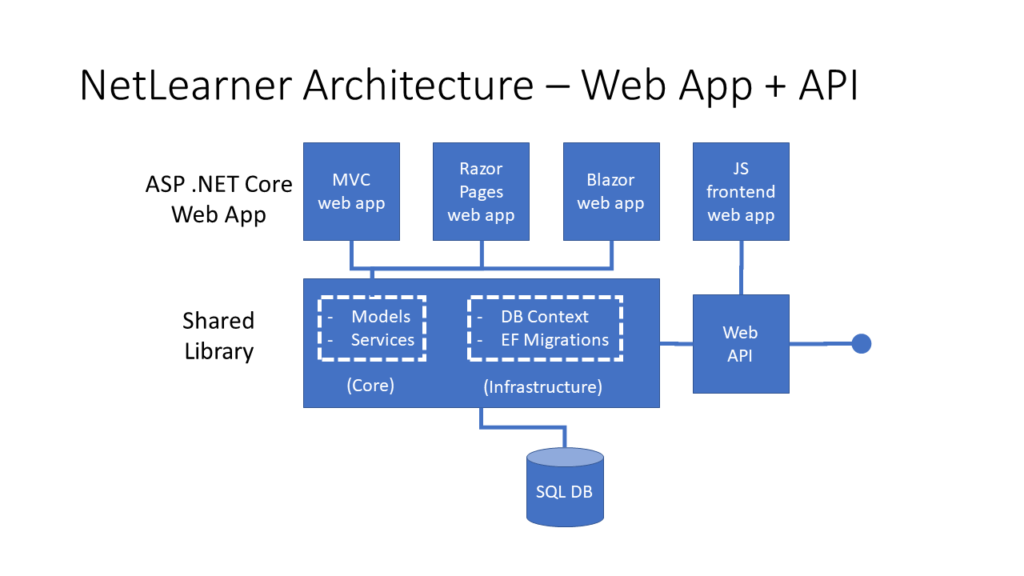
This is the first of a new series of posts on ASP .NET Core 3.1 for 2020. In this series, we’ll cover 26 topics over a span of 26 weeks from January through June 2020, titled ASP .NET Core A-Z! To differentiate from the 2019 series, the 2020 series will mostly focus on a growing single codebase (NetLearner!) instead of new unrelated code snippets week.

If you need some guidance before you get started with this series, check out my late 2019 posts, which serve as a prelude to the 2020 series:

NetLearner on GitHub:

In this Article:

A is for Authentication & Authorization

Authentication and Authorization are two different things, but they also go hand in hand. Think of Authentication as letting someone into your home and Authorization as allowing your guests to do specific things once they’re inside (e.g. wear their shoes indoors, eat your food, etc). In other words, Authentication lets your web app’s users identify themselves to get access to your app and Authorization allows them to get access to specific features and functionality.

In this article, we will take a look at the NetLearner app, on how specific pages can be restricted to users who are logged in to the application. Throughout the series, I will try to focus on new code added to NetLearner or build a smaller sample app if necessary.

Authentication in ASP .NET Core

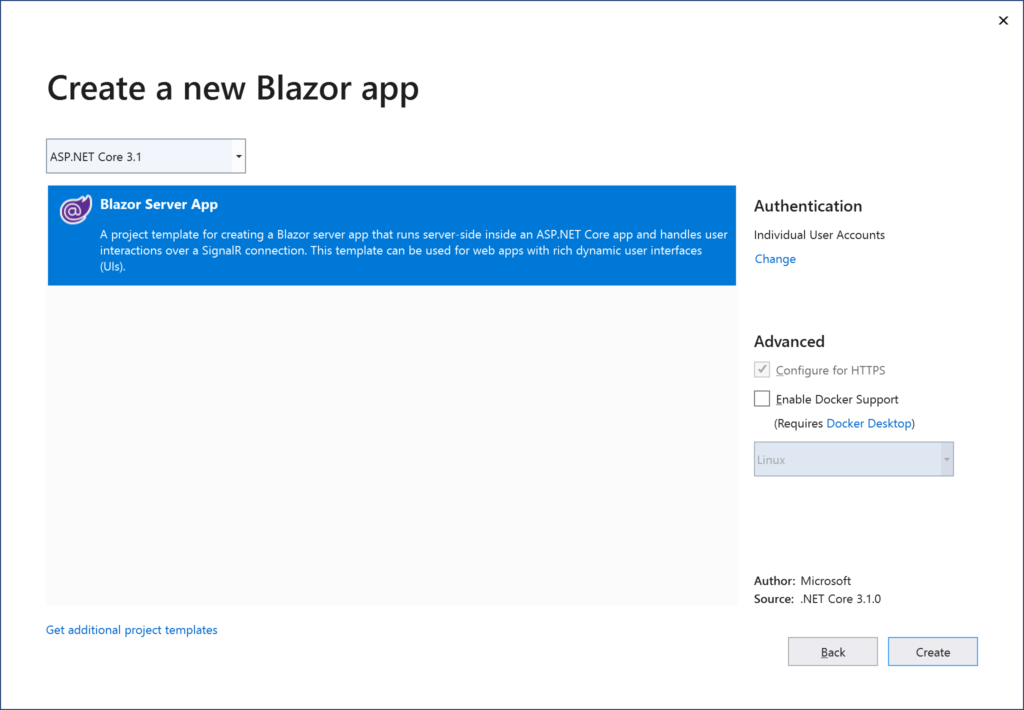
The quickest way to add authentication to your ASP .NET Core app is to use one of the pre-built templates with one of the Authentication options. The examples below demonstrate both the CLI commands and Visual Studio UI.

Here are the CLI Commands for MVC, Razor Pages and Blazor (Server), respectively:

> dotnet new mvc --auth Individual -o mvcsample
> dotnet new webapp --auth Individual -o pagessample
> dotnet new blazorserver --auth Individual -o blazorsample 

Things to note:

  • The dotnet new command is followed by the template name (mvc, webapp, blazorserver).
  • The –auth option allows you to specify the authentication type, e.g. Individual
  • The -o option is an optional parameter that provides the output folder name for the project to be created in.

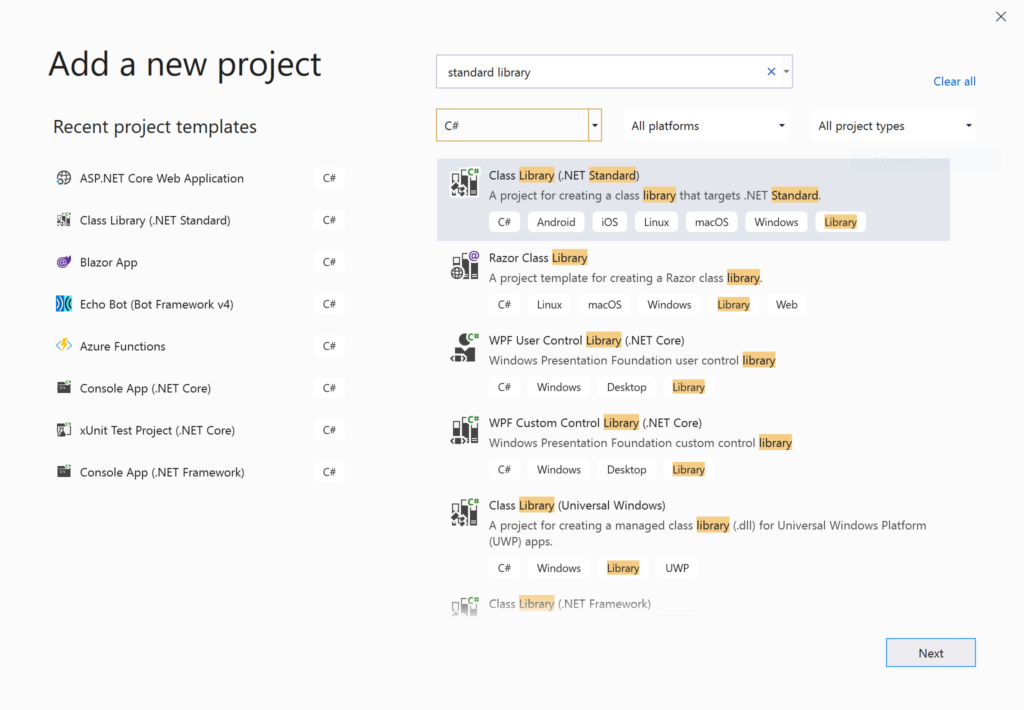
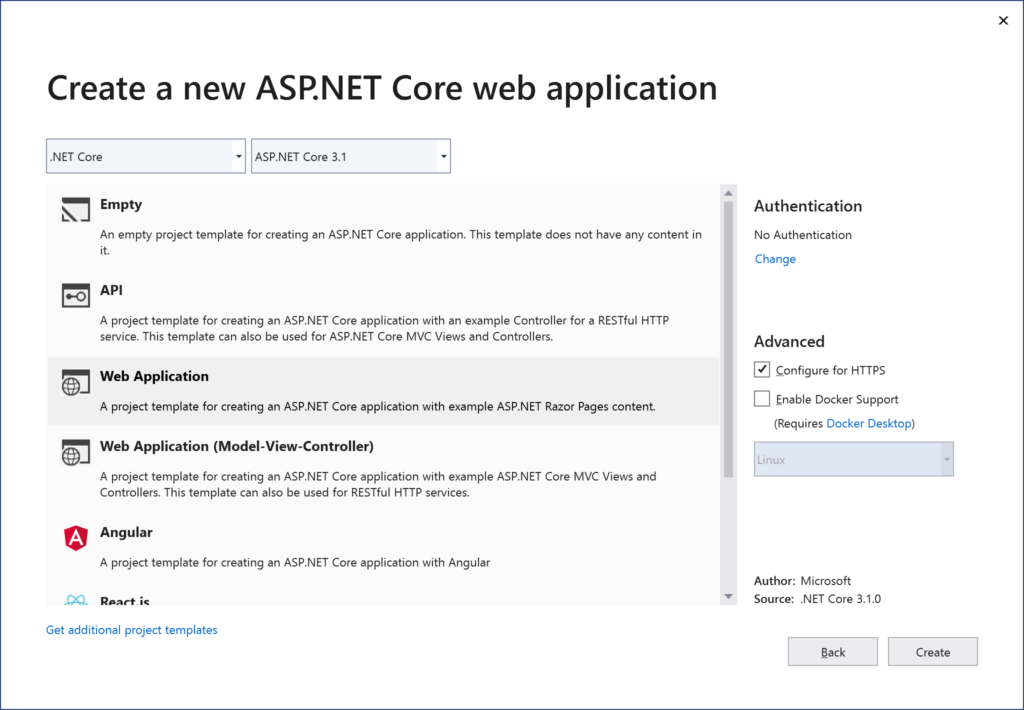
Here is the opening dialog in Visual Studio 2019, for creating a new project with Authentication:

Change Authentication upon creating a new project
 Select Authentication Type
Select Authentication Type

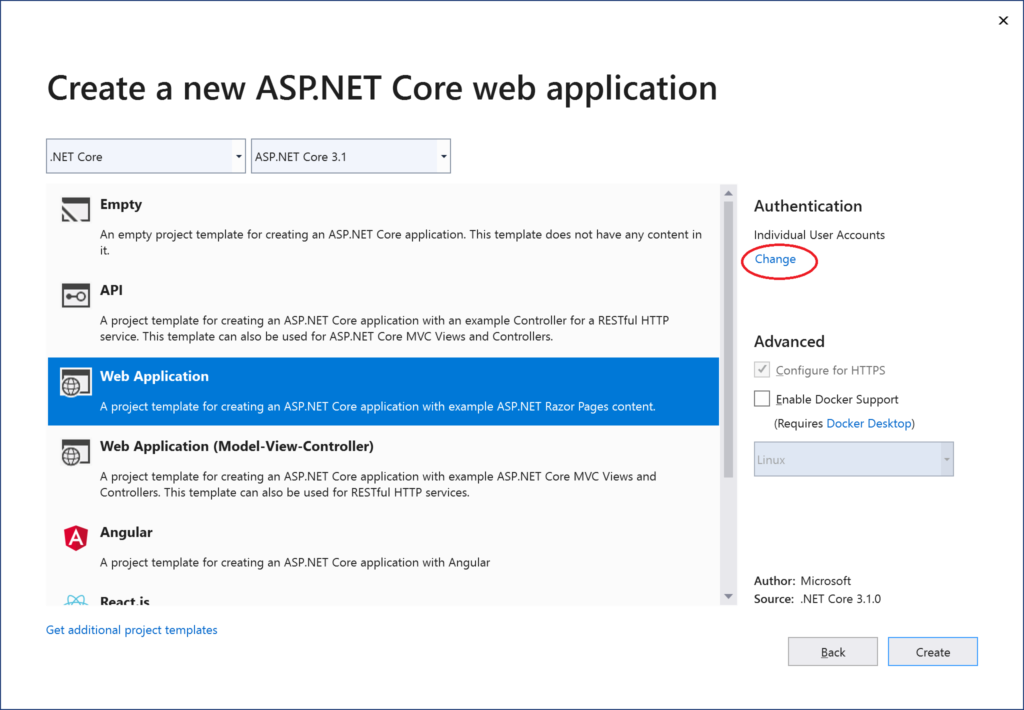
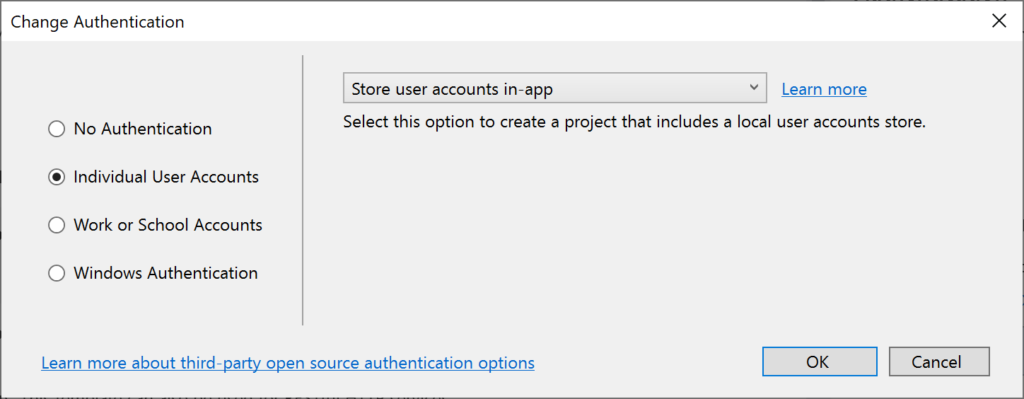
The above example uses “Individual” authentication, which offers a couple of options:

  • Store user accounts in-app: includes a local user accounts store
  • Connect to an existing user store in the cloud: connect to an existing Azure AD B2C application

Even if I choose to start with a local database, I can update the connection string to point to a SQL Server instance on my network or in the cloud, depending on which configuration is being loaded. If you’re wondering where your Identity code lives, check out my 2019 post on Razor UI Libraries, and jump to the last bonus section where Identity is mentioned.

From the documentation, the types of authentication are listed below.

  • None: No authentication
  • Individual: Individual authentication
  • IndividualB2C: Individual authentication with Azure AD B2C
  • SingleOrg: Organizational authentication for a single tenant
  • MultiOrg: Organizational authentication for multiple tenants
  • Windows: Windows authentication

To get help information about Authentication types, simply type ––help after the ––auth flag, e.g.

> dotnet new webapp --auth --help

Authentication in NetLearner

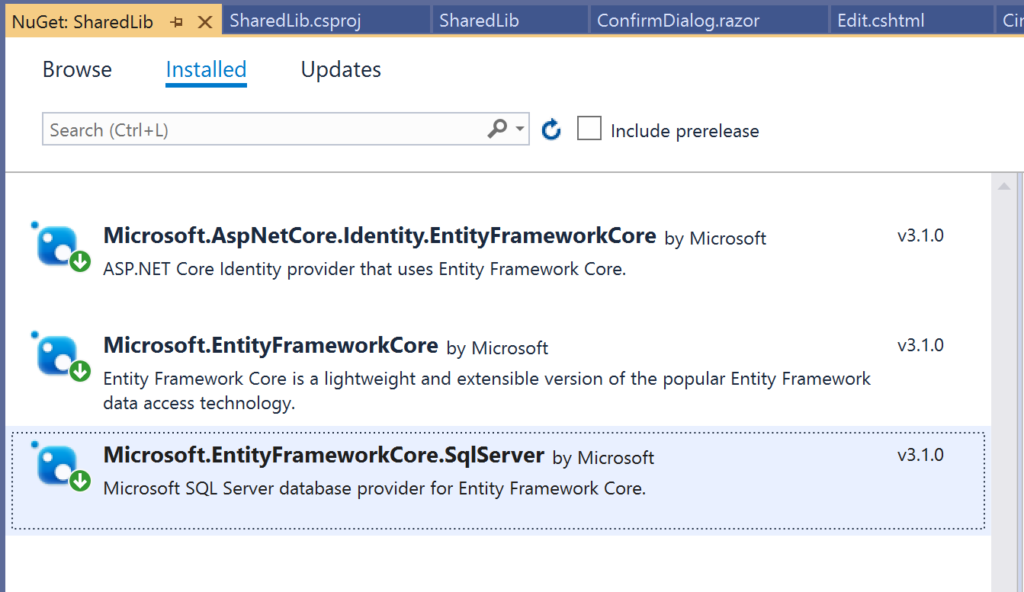
Within my NetLearner MVC app, the following snippets of code are added to the Startup.cs configuration:

public void ConfigureServices(IServiceCollection services)
{
...
   services.AddDbContext<LibDbContext>(options =>
   {
      options
         .UseSqlServer(Configuration.GetConnectionString("DefaultConnection"),
         assembly =>
         assembly.MigrationsAssembly
            (typeof(LibDbContext).Assembly.FullName));
   });

   services.AddDefaultIdentity<IdentityUser>(options => options.SignIn.RequireConfirmedAccount = true)
   .AddEntityFrameworkStores<LibDbContext>();
...
}
public void Configure(IApplicationBuilder app, IHostingEnvironment env)
{
...
 app.UseStaticFiles();
...
 app.UseAuthentication();
 app.UseAuthorization(); 
...
 app.Endpoints(...);
}

In the above, note that:

  • The ConfigureServices() method has calls to services.AddDbContext and server.AddDefaultIdentity. The call to add a DB Context will vary depending on which data store you choose for authentication. The call to AddDefaultIdentity ensures that your app calls AddIdentity, AddDefaultUI and AddDefaultTokenProviders to add common identity features and user Register/Login functionality.
  • The Configure() method has calls to app.UseAuthentication and app.UseAuthorization to ensure that authentication and authorization are used by your web app. Note that this appears after app.UseStaticFiles() but before app.UseEndpoints() to ensure that static files (html, css, js, etc) can be served without any authentication but MVC application-controlled routes and views/pages will follow authentication rules.
  • Similar to the MVC web project, you can also browse the Startup.cs file for the equivalent Razor Pages and Blazor web app projects.

Authorization in ASP.NET Core (MVC)

Even after adding authentication to a web app using the project template options, we can still access many parts of the application without having to log in. In order to restrict specific parts of the application, we will implement Authorization in our app.

If you’ve already worked with ASP .NET Core MVC apps before, you may be familiar with the [Authorize] attribute. This attribute can be added to a controller at the class level or even to specific action methods within a class.

[Authorize]
public class SomeController1: Controller
{
   // this controller class requires authentication
   // for all action methods
   public ActionResult SomeMethod()
   {
      //
   } 
}

public class SomeController2: Controller
{
   public ActionResult SomeOpenMethod()
   {
   }

   [Authorize]
   public ActionResult SomeSecureMethod()
   {
      // this action method requires authentication
   }
}

Well, what about Razor Pages in ASP .NET Core? If there are no controller classes, where would you add the [Authorize] attribute?

Authorization in ASP.NET Core (Razor Pages)

For Razor Pages, the quickest way to add Authorization for your pages (or entire folders of pages) is to update your ConfigureServices() method in your Startup.cs class, by calling AddRazorPagesOptions() after AddMvc(). The NetLearner configuration includes the following code:

services.AddRazorPages()
     .AddRazorPagesOptions(options =>
     {
         options.Conventions.AuthorizePage("/LearningResources/Create");
         options.Conventions.AuthorizePage("/LearningResources/Edit");
         options.Conventions.AuthorizePage("/LearningResources/Delete");
         options.Conventions.AuthorizePage("/ResourceLists/Create");
         options.Conventions.AuthorizePage("/ResourceLists/Edit");
         options.Conventions.AuthorizePage("/ResourceLists/Delete");
         options.Conventions.AllowAnonymousToPage("/Index");
     });

The above code ensures that the CRUD pages for Creating, Editing and Deleting any of the LearningResources are only accessible to someone who is currently logged in. Each call to AuthorizePage() includes a specific page name identified by a known route. In this case, the LearningResources folder exists within the Pages folder of the application.

Finally, the call to AllowAnonymousPage() ensures that the app’s index page (at the root of the Pages folder) is accessible to any user without requiring any login.

If you still wish to use the [Authorize] attribute for Razor Pages, you may apply this attribute in your PageModel classes for each Razor Page, as needed. If I were to add it to one of my Razor Pages in the LearningResources folder, it could look like this:

[Authorize]
public class CreateModel : PageModel
{
    ...
}

Authorization in Blazor

In a Blazor project, you can wrap elements in an <AuthorizeView> component, which may contain nested elements named <Authorized>, <NotAuthorized> and <Authorizing>.

<AuthorizeView>
   <Authorized Context="Auth">
     authorized elements go here
   </Authorized>
   <NotAuthorized>
     anonymous-accessed elements
   </NotAuthorized>
   <Authorizing>
     waiting message...
   </Authorizing>
</AuthorizeView>

The root element here has the following characteristics:

  • <AuthorizeView> element used as a container for nested elements
  • Optional role attribute, e.g. <AuthorizeView Roles=”Admin,RoleA”> used to set a comma-separated list roles that will be used to determine who can view the authorized nested elements
  • Optional context attribute, e.g. <AuthorizeView Context=”Auth”> to define a custom context, to avoid any conflicts with nested comments

The nested elements represent the following:

  • Authorized: shown to users who have been authorized to view and interact with these elements
  • NotAuthorized: shown to users who have not been authorized
  • Authorizing: temporary message shown while authorization is being processed

Testing Authorization in NetLearner

When I run my application, I can register and log in as a user to create new Learning Resources. On first launch, I have to apply migrations to create the database from scratch. Please refer to my 2018 post on EF Core Migrations to learn how you can do the same in your environment.

NOTE: the registration feature for each web app has been disabled by default. To enable registration, please do the following:

  1. Locate scaffolded Identity pages under /Areas/Identity/Pages/Account/
  2. In Register.cshtml, update the page to include environments in addition to Development, if desired.
  3. In Register.cshtml.cs, replace [Authorize] with [AllowAnonymous] to allow access to registration

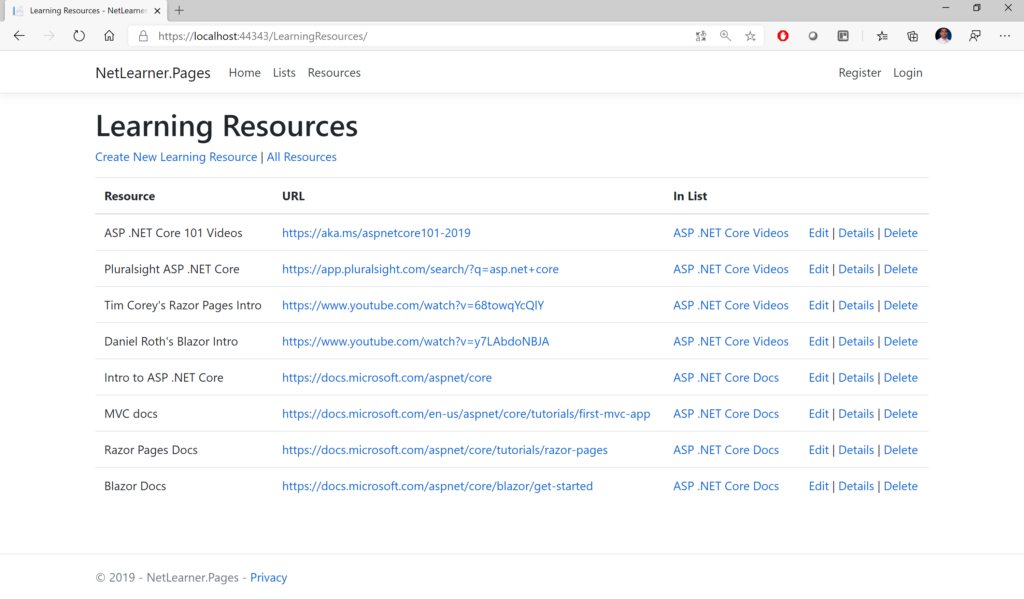
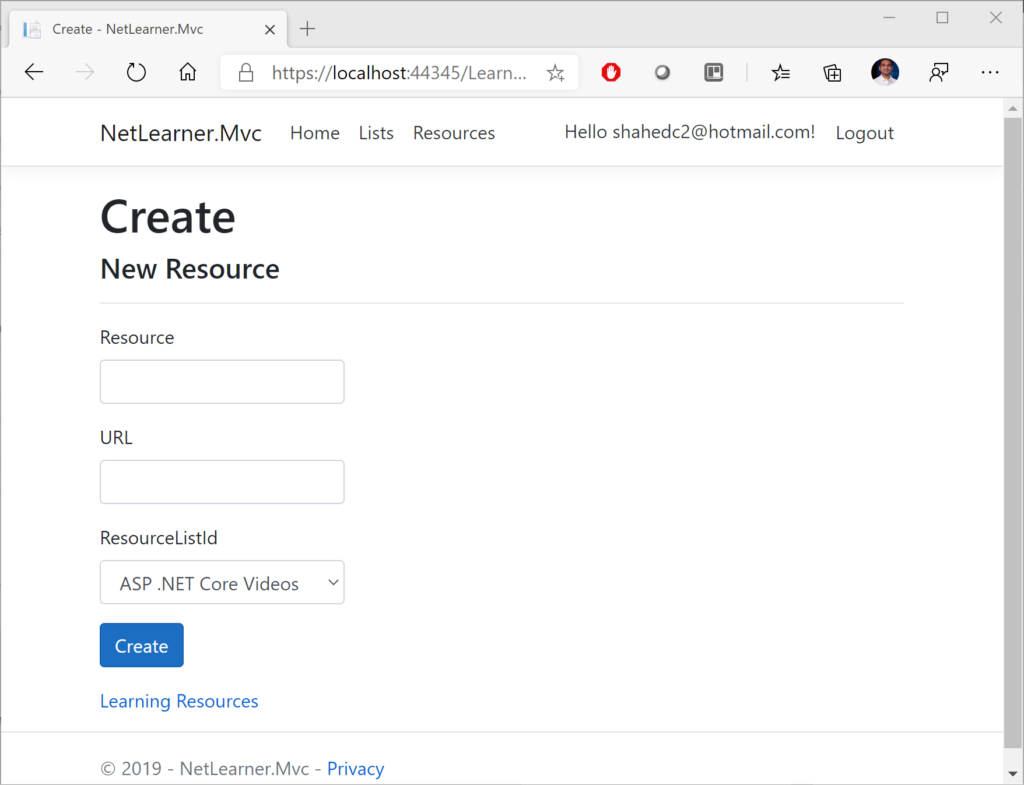
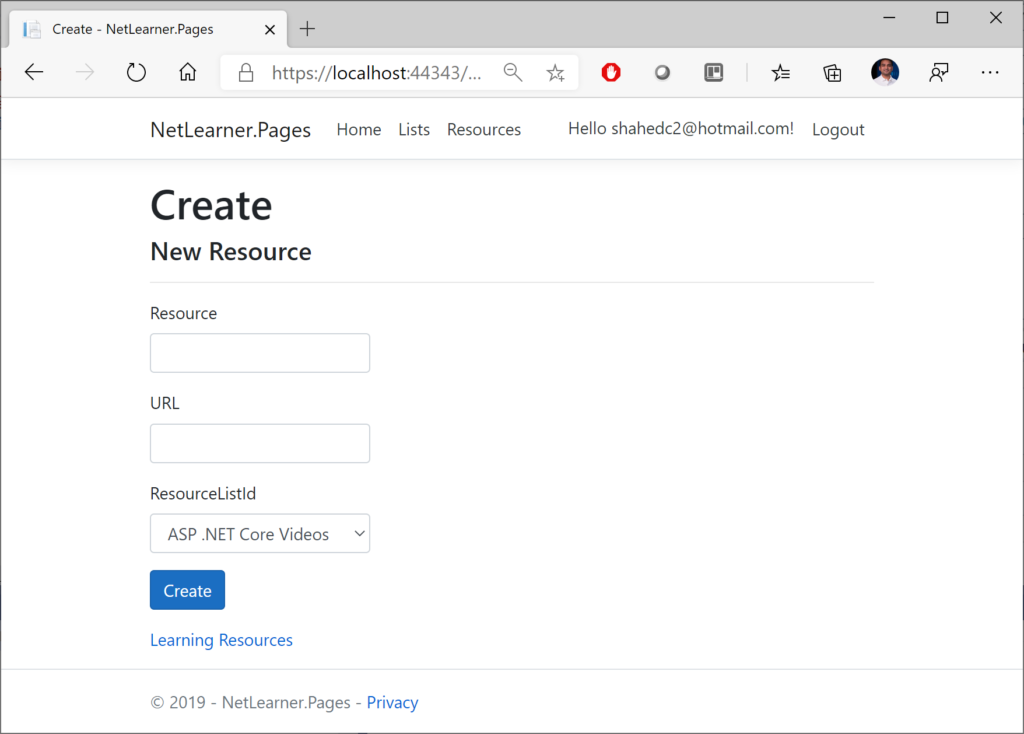
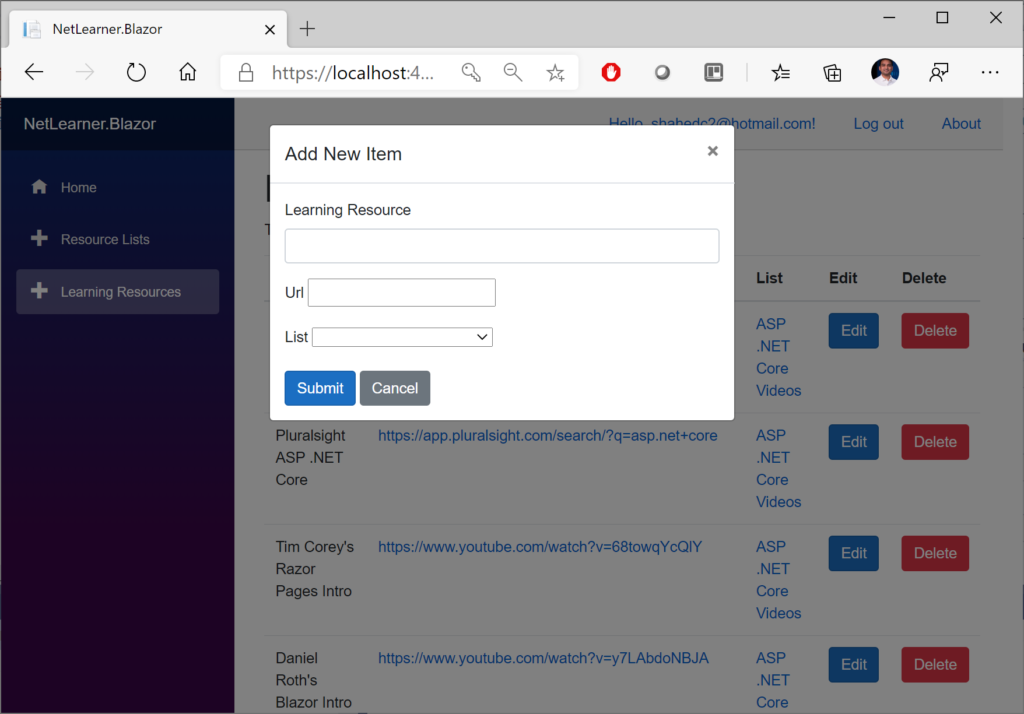
Here are the screenshots of the Create page for a user who is logged in:

NetLearner MVC: Create New Resource
 NetLearner Razor Pages: Create New Resource
NetLearner Razor Pages: Create New Resource
  NetLearner Blazor: Create New Resource
NetLearner Blazor: Create New Resource

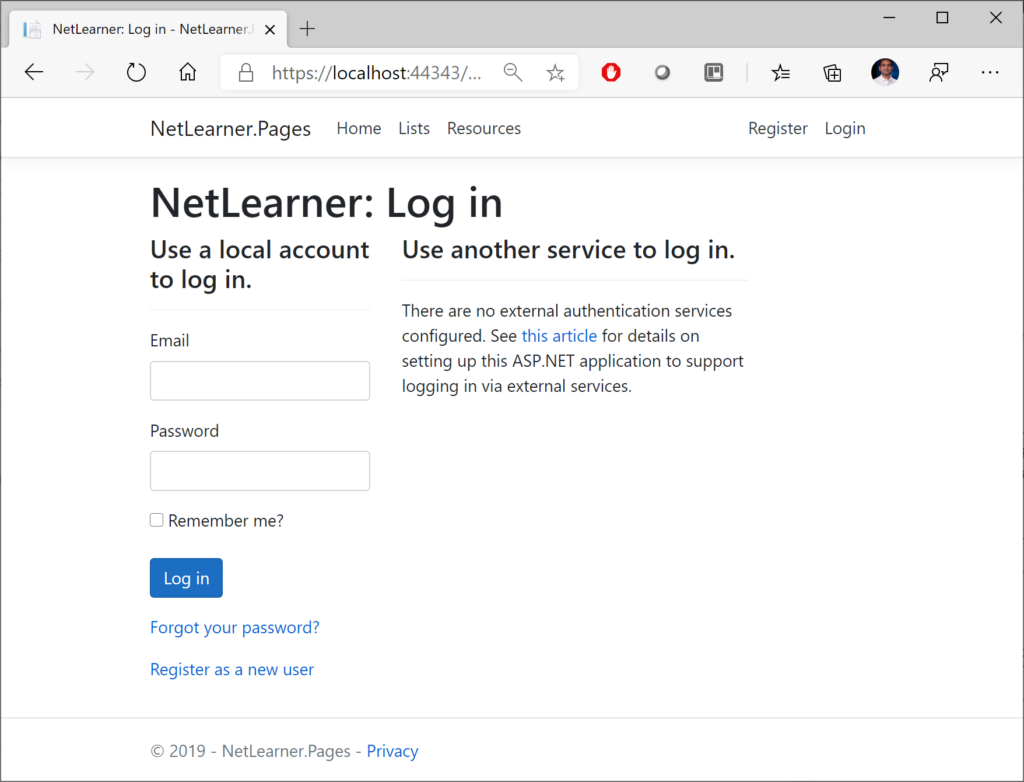
Here’s a screenshot of the page that an “anonymous” user sees when no one is logged in, indicating that the user has been redirected to the Login page. Note that all 3 web apps (MVC, Razor Pages and Blazor) have similar Identity pages. To allow manual customization, they were also auto-generated via scaffolding and included in all 3 projects.

NetLearner: Log in
NetLearner: Log in

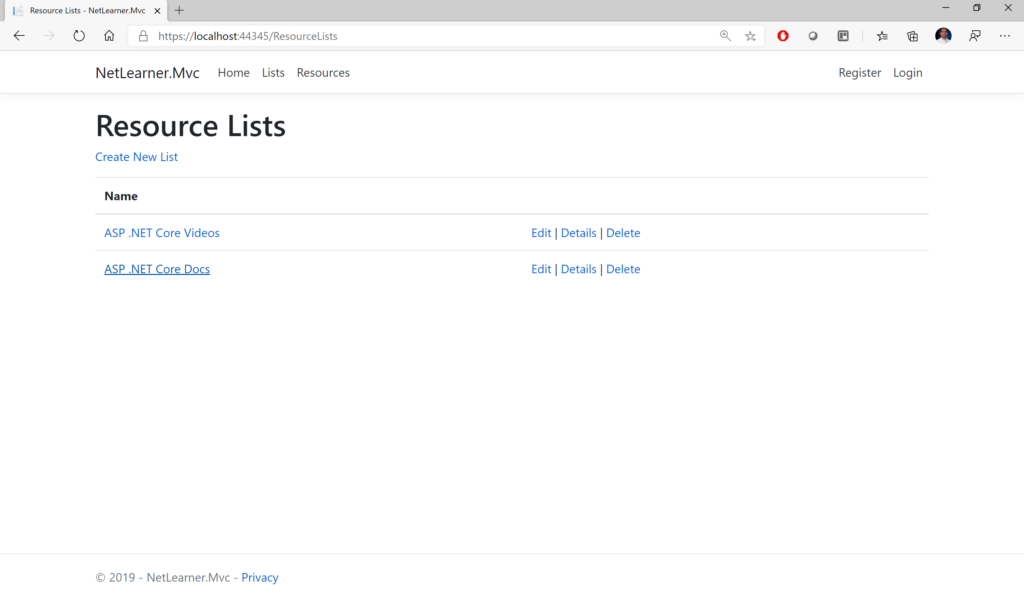
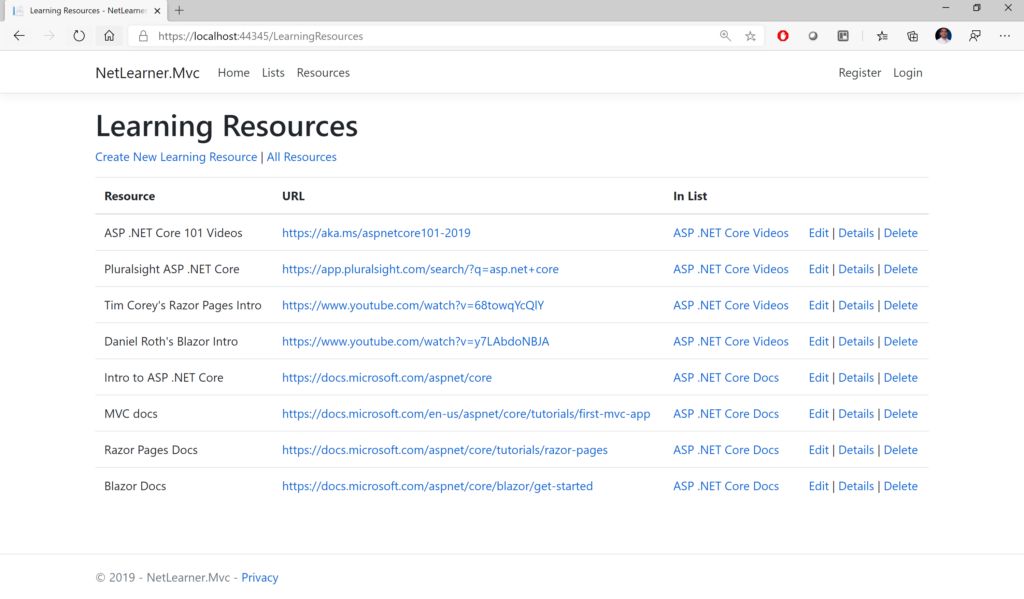
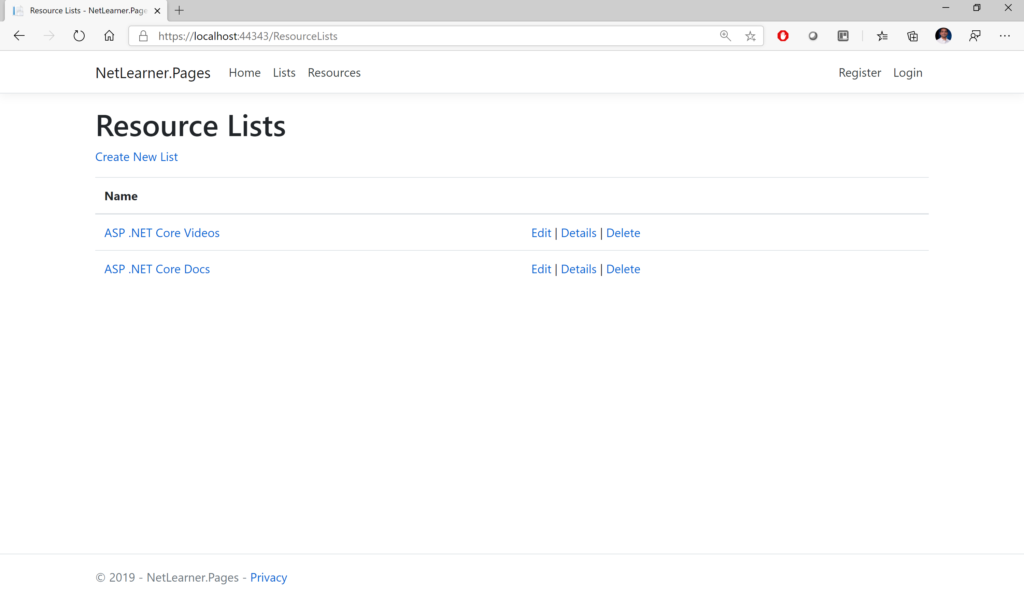
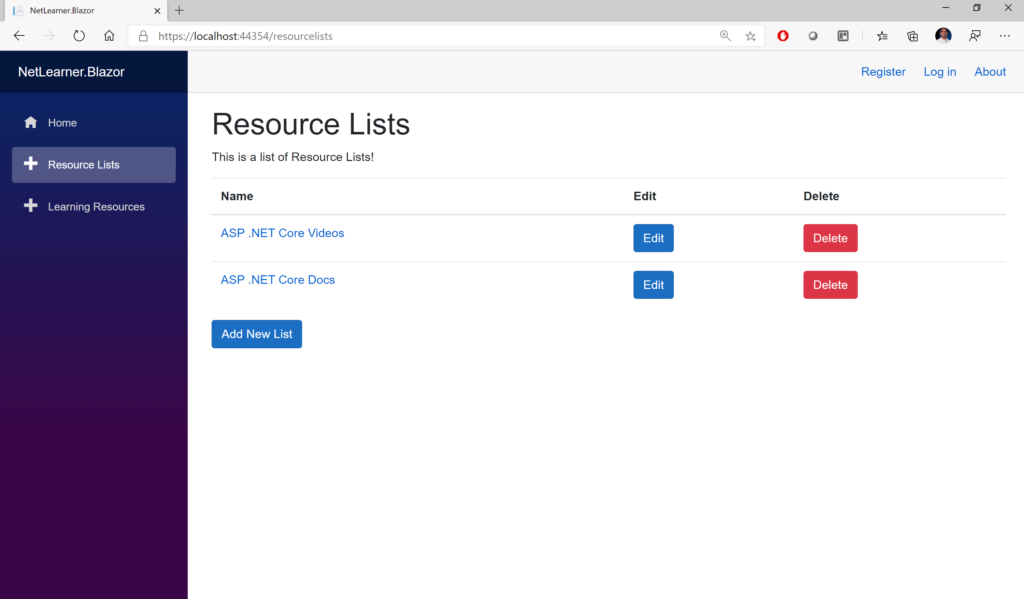
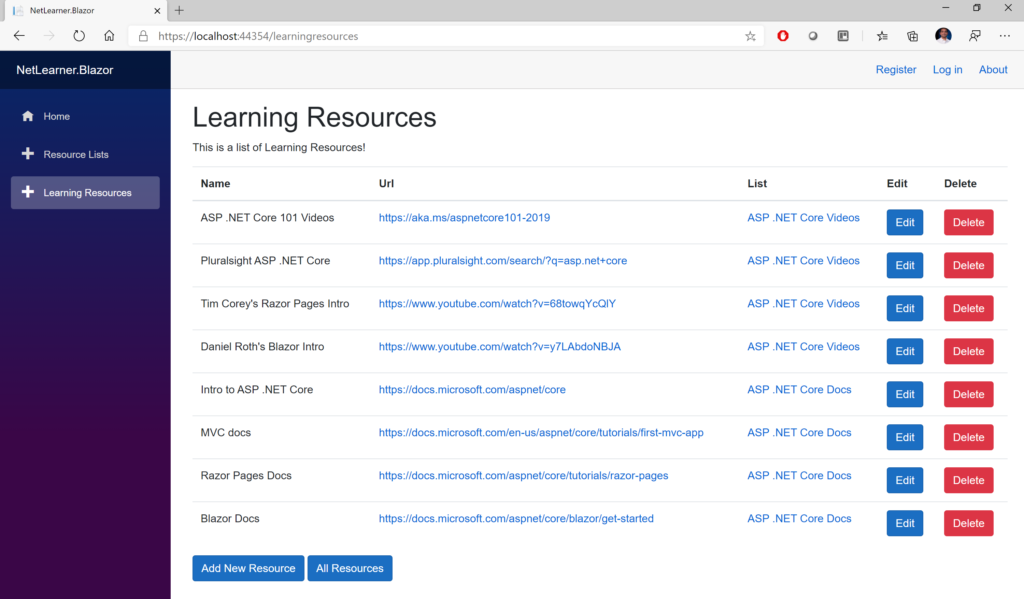
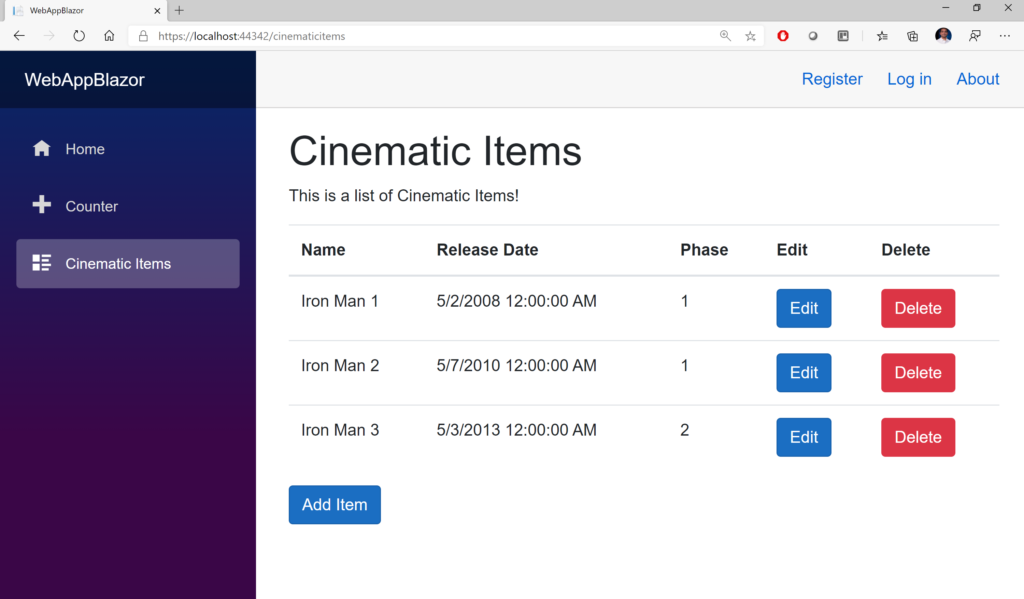
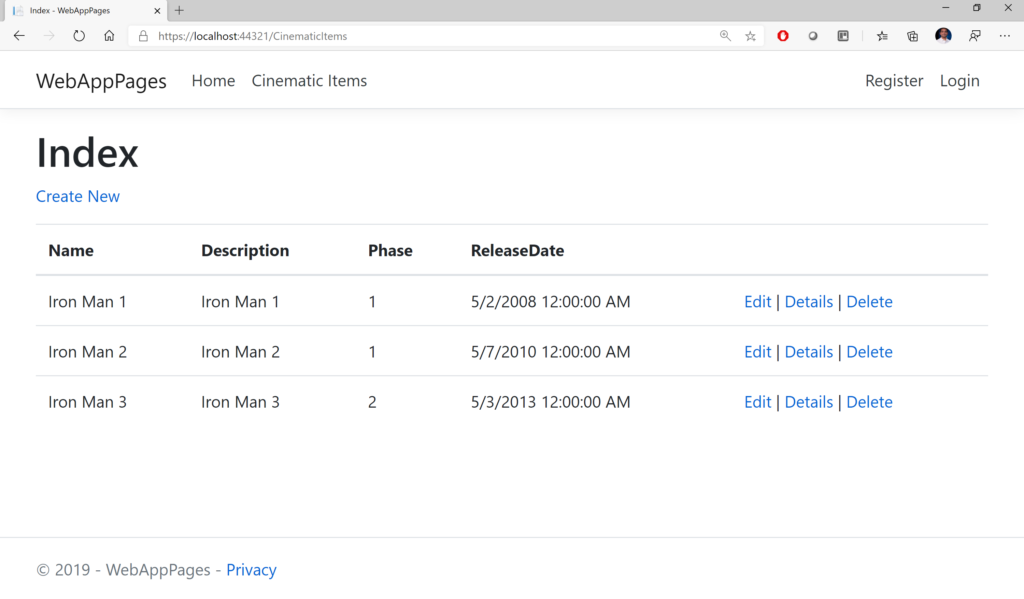
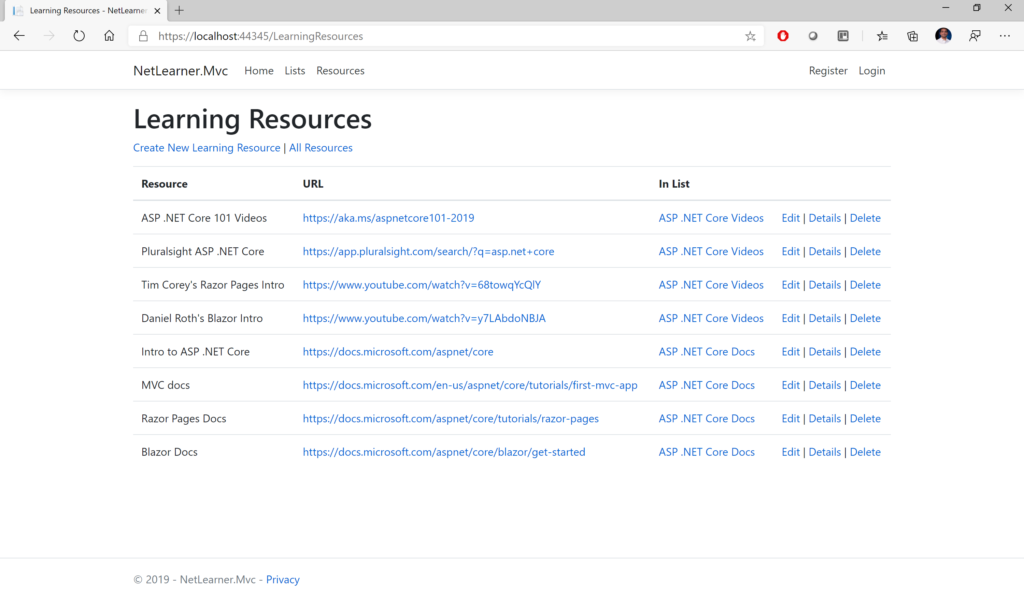
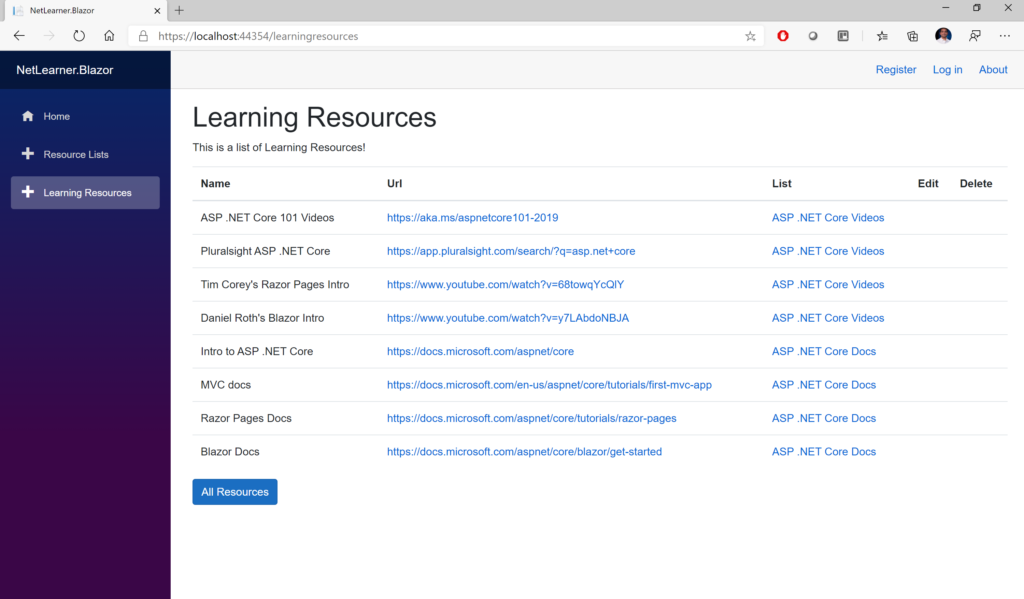
Here are the screenshots showing the list of Learning Resources, visible to anyone whether they’re logged in or not:

 NetLearner MVC: List of Learning Resources
NetLearner MVC: List of Learning Resources
  NetLearner Razor Pages: List of Learning Resources
NetLearner Razor Pages: List of Learning Resources
   NetLearner Blazor: List of Learning Resources
NetLearner Blazor: List of Learning Resources

Other Authorization Options

Razor Pages have multiple ways of restricting access to pages and folders, including the following methods (as described in the official docs):

  • AuthorizePage: Require authorization to access a page
  • AuthorizeFolder: Require authorization to access a folder of pages
  • AuthorizeAreaPage: Require authorization to access an area page
  • AuthorizeAreaFolder: Require authorization to access a folder of areas
  • AllowAnonymousToPage: Allow anonymous access to a page
  • AllowAnonymousToFolder: Allow anonymous access to a folder of pages

You can get more information on all of the above methods at the following URL:

References

To learn more about Authentication, Authorization and other related topics (e.g. Roles and Claims), check out the official docs:

NetLearner on ASP .NET Core 3.1

By Shahed C on December 30, 2019

In This Article:

NetLearner: What is it?

NetLearner is an ASP .NET Core web app to allow any user to consolidate multiple learning resources all under one umbrella. The codebase itself is a way for new/existing .NET developers to learn ASP .NET Core, while a deployed instance of NetLearner can be used as a curated link-sharing web application.

NetLearner on GitHub: https://github.com/shahedc/NetLearnerApp

Restrictions

Registration for each web app has been disabled by default. To enable registration, please do the following:

  1. Locate scaffolded Identity pages under /Areas/Identity/Pages/Account/
  2. In Register.cshtml, update the page to include environments in addition to Development, if desired.
  3. In Register.cshtml.cs, replace [Authorize] with [AllowAnonymous] to allow access to registration

Architecture

The current version of NetLearner on Github includes a shared .NET Standard Class Library, used by multiple web app projects. The web apps include:

  • MVC: familiar to most ASP .NET developers
  • Razor Pages: relatively new in ASP .NET
  • Blazor: the latest offering from ASP .NET
NetLearner Archicture: Web App + API

Future updates will also include:

  • Web API, exposed for use by other consumers
  • JavaScript front-end web app(s)

Note that an ASP .NET Core web app can contain various combinations of all of the above. However, the purpose of the NetLearner application code is to demonstrate how to achieve similar results using all of the above. So, each of the web app projects will be developed in parallel, using a shared library.

Shared Library

The shared library is a .NET Standard 2.1 library. This version was selected because .NET Core 3.x supports .NET Standard 2.1, as seen in the official documentation.

.NET Standard: https://docs.microsoft.com/en-us/dotnet/standard/net-standard

The shared library contains the following:

  • Database Context: for use by Entity Framework Core
  • Migrations: for EF Core to manage the (SQL Server) db
  • Models: db entities, used by web apps
  • Services: service classes to handle CRUD operations

Using terms from Clean Architecture references, you may think of the DB Context and Migrations as part of the Infrastructure code, while the Models and Services are part of the Core code. For simplicity, these are all kept in a single library. In your own application, you may split them up into separate assemblies named Core and Infrastructure.

Running the Application

In order to run the web app samples, clone the following repository:

NetLearnerhttps://github.com/shahedc/NetLearnerApp

Here, you will find at least 4 projects:

  1. NetLearner.SharedLib: shared library project
  2. NetLearner.Blazor: Blazor server-side web project
  3. NetLearner.Mvc: MVC web project
  4. NetLearner.Pages: Razor Pages web project

To create a local copy of the database:

  1. Open the solution file in Visual Studio 2019
  2. In the Package Manager Console panel, change the Default Project to “NetLearner.SharedLib” to ensure that EF Core commands are run against the correct project
  3. In the Package Manager console, run the Update-Database command
  4. Verify that there are no errors upon database creation

To run the samples from Visual Studio 2019:

  1. Run each web project one after another
  2. Navigate to the links in the navigation menu, e.g. Lists and Resources
  3. Add/Edit/Delete items in any of the web apps
  4. Create one or more lists
  5. Create one more resources, assign each to a list
  6. Verify that your data changes are reflected no matter which web app you use
NetLearner MVC: Resource Lists
NetLearner MVC: Learning Resources

NetLearner Razor Pages: Resource Lists
  NetLearner Razor Pages: Learning Resources
NetLearner Razor Pages: Learning Resources
   NetLearner Blazor: Resource Lists
NetLearner Blazor: Resource Lists
    NetLearner Blazor: Learning Resources
NetLearner Blazor: Learning Resources

What’s Next?

In 2020, you can expect a new A-Z weekly blog series to cover 26 different topics from January through June 2020. To get a sneak peek of what’s to come, take a peek at the 2019 A-Z series.

ASP .NET Core code sharing between Blazor, MVC and Razor Pages

By Shahed C on December 16, 2019

In This Article:

Introduction

It’s been a while since I’ve published a standalone blog post on WakeUpAndCode.com. If you’ve been following the posts on this website, you may be familiar with my 2018 (surprise!) Happy New Year series and 2019 A-Z series on various ASP .NET Core topics. This led to a free ebook, which itself was generated by a .NET Core Worker Service.

Going forward, you can expect a 2020 A-Z series that will use ASP .NET Core 3.1 (LTS). The upcoming series will contain new and improved versions of the topics explored in the 2019 series, including Build 2020 coverage.

For now, this one-off blog post will discuss code-sharing for ASP .NET Core developers. For demonstrative purposes, the sample code accompanying this article includes code that is derived from the code snippets provided on the following blog:

Kudos to the author (aka PI Blogger) for this great intro article!

Why Share Code Across Projects/Assemblies?

There are multiple reasons why you may want to share code between multiple projects/assemblies.

  1. Code reuse: This should be pretty self-explanatory. You shouldn’t have to rewrite the same code more than once. Placing reusable code in a shared library enables code reuse.
  2. Multiple front-ends: In the sample code, there are multiple web apps, all using the same data layer. Splitting into separate assemblies allows you to develop multiple web apps in their own projects/assemblies.
  3. Separate deployments: You can deploy each assembly independent of one another.

Even if you’re just working on a single web app (just Blazor, or a web app that combines Blazor+MVC+Razor Pages), you can still benefit from this type of “physical” code separation. Note that this approach is not required for “separation of concerns”. The nature of ASP .NET Core web applications make them possible to implement separation of concerns, even if everything is in a single project (such as the one generated by the official VS2019 project templates).

NOTE: This article will focus on the creation of a shared library project to hold a shared database context, EF Core migrations, models and services. In your application, you can go further by separating your domain objects and related items into their own project/assembly.

For an official guide on ASP .NET Core architecture, download this free ebook and its sample code. The eShopOnWeb sample includes the “business layer” with domain entities under ApplicationCore, the “data layer” with data context + migrations under Infrastucture, and the “presentation layer” with its MVC components under Web.

Also, here’s a recent quote from author Steve Smith:

  • Tweet: https://twitter.com/ardalis/status/1207301716347150336
  • Quote: “Separating things by project ensures decisions about dependency direction are enforced by the compiler, helping avoid careless mistakes. Separating into projects isn’t solely about individually deploying or reusing assemblies.”

Creating a shared library

The quickest way to create a shared library project is to use the built-in project templates. Create a project of type .NET Standard 2.1 using either Visual Studio 2019 or CLI commands for use with VS Code.

To add the new project in Visual Studio 2019:

  1. Add | New Project
  2. Select the template for Class Library (.NET Standard)
  3. Click Next
  4. Name your project and select a location
  5. Click Create
Add New Project dialog

Verify that the shared library is a Class Library project targeting .NET Standard 2.1. Check out the official docs to learn more about how to pick a version of .NET Standard for your class libraries.

To verify the target version in Visual Studio 2019:

  1. Right-click your shared library project in Solution Explorer
  2. Select Properties in the popup context menu
  3. In the Application section, select a “Target framework” value of “.NET Standard 2.1”.
  4. Edit your .csproj project file manually to verify that the correct target framework is being used.
<PropertyGroup>
<TargetFramework>netstandard2.1</TargetFramework>
</PropertyGroup>

If using the .NET CLI, type the following command:

>dotnet new classlib -f netstandard2.1

As of .NET Core 3.0, Entity Framework Core is now available via NuGet. As a result, you must add the following packages manually.

  • Microsoft.EntityFrameworkCore
  • Microsoft.AspNetCore.Identity.EntityFrameworkCore
  • Microsoft.EntityFrameworkCore.SqlServer

To add EF Core in Visual Studio 2019:

  1. In Solution Explorer, right-click your shared library project
  2. Select “Manage NuGet Packages…”
  3. Search for the aforementioned packages and install v3.1 for each
EF Core Nuget Packages

To create a new database context in the shared library project:

  1. Create a “Data” folder at the root level of the project folder
  2. In the Data folder, create a new public class named “LibDbContext” that inherits from “IdentityDbContext”
  3. Create a “Models” folder at the root level of the project folder
  4. In the Models folder, add one or more model classes, to be used by your web application project(s)
  5. In the context class, add one or more DbSet<T> properties

Your shared context class LibDbContext should now look like the following snippet:

using Microsoft.AspNetCore.Identity.EntityFrameworkCore;
using Microsoft.EntityFrameworkCore;
using SharedLib.Models;

namespace SharedLib.Data
{
public class LibDbContext : IdentityDbContext
{
public LibDbContext(DbContextOptions<LibDbContext> options)
: base(options)
{
}

protected LibDbContext()
{

}

public DbSet<CinematicItem> CinematicItems { get; set; }

}
}

In this case, the one DbSet property represents a collection of CinematicItems defined in its own CinematicItem model class file:

using System;

namespace SharedLib.Models
{
public class CinematicItem
{
public int Id { get; set; }

public string Name { get; set; }

public string Description { get; set; }

public int Phase { get; set; }

public DateTime ReleaseDate { get; set; }
}
}

Note that the new database context in the shared library is a replacement for any database context you may already have in your web app projects. In fact, you’ll have to edit your Startup.cs file in each web app project to ensure that it is using the correct database context.

Using the Shared Library

If you are starting a brand new web project, you can start with an auto-generated template. You could create an empty web project and add everything manually as needed. But it may be easier to start with a standard web template and remove/edit items as necessary.

To create a new web project in Visual Studio 2019:

  1. Add | New Project
  2. Select the template
    1. For Blazor, select Blazor App
    2. For MVC or Razor Pages, select ASP .NET Core Web Application
  3. Click Next
  4. Name your project and select a location
  5. Click Create
  6. Select .NET Core, ASP .NET Core 3.1, and a project template
    1. For Blazor, select Blazor Server App
    2. For Razor Pages, select Web Application
    3. For MVC, select Web Application (Model-View-Controller)
  7. For Authentication, change “No Authentication” to “Individual User Accounts”
  8. Under Advanced, leave the checkbox checked for “Configure for HTTPS”
New Project: Web Application
New Project: Blazor Server App

Following the above steps will add a new database context and an initial migration. Since we will be using our shared library instead, let’s do some cleanup in each web project you created.

In each web project, add the Shared Library as a dependency:

  1. In Solution Explorer, right-click Dependencies for a web project
  2. Click Add Reference under Dependencies
  3. Select the shared library project
  4. Click Ok
  5. Repeat for each web project

In each web project, update the Startup.cs class:

  1. Replace any mentions of ApplicationDbContext with LibDbContext
  2. Expand the UseSqlServer method call to refer to the connection string and db context in the shared assembly
services.AddDbContext<LibDbContext>(options =>
{
options
.UseSqlServer(Configuration.GetConnectionString("DefaultConnection"),
assembly =>
assembly.MigrationsAssembly
(typeof(LibDbContext).Assembly.FullName));
});

services.AddDefaultIdentity<IdentityUser>(
options =>
options.SignIn.RequireConfirmedAccount = true)
.AddEntityFrameworkStores<LibDbContext>();

Perform some additional cleanup in each web project:

  1. Delete the template-generated ApplicationDbContext class
  2. Delete any initial migrations in the Migrations folder
  3. In the Startup.cs class, remove any using statements that mention the .Data namespace in your web project
  4. Add a using statement referring to the .Data namespace in your shared library project, e.g. SharedLib.Data
  5. Make a similar change in your partial view “_ViewImports.chstml” if applicable
  6. If you have more than one web project, use the ConnectionString value from the first appsettings.json file and reuse it in the other web app projects.
  7. BUT WAIT: beyond any initial sample, always use app secrets during development to avoid connection strings in appsettings.json files. For Azure-deployed web projects, use Key Vault or environment variables in your App Service.

Running the Samples

In order to run the web app samples, clone the following repository:

Here, you will find 4 projects:

  1. SharedLib: shared library project
  2. WebAppBlazor: Blazor server-side web project
  3. WebAppMvc: MVC web project
  4. WebAppPages: Razor Pages web project

To create a local copy of the database:

  1. Open the solution file in Visual Studio 2019
  2. In the Package Manager Console panel, change the Default Project to “SharedLib” to ensure that EF Core commands are run against the correct project
  3. In the Package Manager console, run the Update-Database command
  4. Verify that there are no errors upon database creation

To run the samples from Visual Studio 2019:

  1. Run each web project one after another
  2. Navigate to the Cinematic Items link in the navigation menu
  3. Add/Edit/Delete items in any of the web apps
  4. Verify that your data changes are reflected no matter which web app you use
Sample: Blazor Web App
Sample: MVC Web App
Sample: Razor Pages Web App

NOTE: During Blazor development, editing a Razor component may not always trigger the proper Intellisense help in the containing Page. You may have to clean+rebuild solution or even reopen the solution in VS2019.

Conclusion

In this article, we covered the following:

  • Creation of a shared library project for use in one or more ASP .NET Core web apps
  • Some reasons for such an approach
  • Steps required to use the shared library
  • Sample projects to see the shared library in action

References

ASP.NET Core MVC + Web API @ NoVA Code Camp 2016.2

By Shahed C on October 8, 2016

I presented Cross-Platform Web Apps with ASP.NET Core 1.0 at NoVA Code Camp 2016.2. Here is the presentation material with the slides, links and my contact information. The live talk was a combination of my presentation on ASP .NET Core (overview) and a deeper looking into ASP .NET MVC & Web API.

asp-net-logo

SLIDES 1 of 2

Download PPTX or view slideshow below

SlideShare: http://www.slideshare.net/shahedC3000/aspnet-core-10-overview-prerc2

Recently known as ASP.NET 5, the all-new ASP.NET Core 1.0 is Microsoft’s cross-platform lightweight approach to building robust applications for the modern Web. Get a high-level overview of what you need to know about ASP.NET Core from Shahed Chowdhuri, Sr. Technical Evangelist @ Microsoft.

SLIDES 2 of 2

Download PPTX or view slideshow below for ASP .NET Overview

SlideShare: http://www.slideshare.net/shahedC3000/aspnet-core-mvc-web-api-with-overview

Developers, learn how you can build modern web applications using the all-new ASP.NET Core 1.0 on your platform of choice! From Web Apps to Web APIs, you can use Visual Studio 2015 on Windows or the all-new Visual Studio Code on Windows, Mac or Linux. Use your JavaScript skills to build a Single Page Application front-end to interact with a Web API back-end.


Cross-Platform Web Apps with ASP.NET Core 1.0

By Shahed C on May 13, 2016

I presented Cross-Platform Web Apps with ASP.NET Core 1.0 at RevolutionConf 2016. Here is the presentation material with the slides, links and my contact information. The live talk was a combination of my presentation on ASP .NET Core (overview) and a deeper looking into ASP .NET MVC & Web API.

asp-net-logo

SLIDES 1 of 2

Download PPTX or view slideshow below

SlideShare: http://www.slideshare.net/shahedC3000/aspnet-core-10-overview-prerc2

Recently known as ASP.NET 5, the all-new ASP.NET Core 1.0 is Microsoft’s cross-platform lightweight approach to building robust applications for the modern Web. Get a high-level overview of what you need to know about ASP.NET Core from Shahed Chowdhuri, Sr. Technical Evangelist @ Microsoft.

SLIDES 2 of 2

Download PPTX or view slideshow below for ASP .NET Overview

SlideShare: http://www.slideshare.net/shahedC3000/aspnet-core-mvc-web-api-with-overview

Developers, learn how you can build modern web applications using the all-new ASP.NET Core 1.0 on your platform of choice! From Web Apps to Web APIs, you can use Visual Studio 2015 on Windows or the all-new Visual Studio Code on Windows, Mac or Linux. Use your JavaScript skills to build a Single Page Application front-end to interact with a Web API back-end.