Updates:
- the sample files are available on the Downloads page.
- this speaking engagement has been added to a new Speaking page
Original Post:
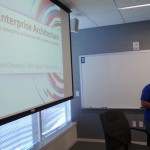
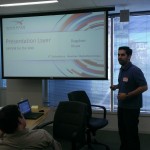
I recently spoke at NoVA Code Camp (at Microsoft’s Reston VA office) about Entity Framework Code First Migrations. This talk was about the Data Layer of an enterprise web application, part of a larger presentation about Lean Enterprise Architecture. It was followed by presentations on the Domain Layer and Presentation Layer, given by my colleagues Sahil Talwar and Doguhan Uluca.
- Attending the Lean Enterprise Architecture presentation
- 01 – Shahed Chowdhuri presenting the Data Layer
- 02 – Sahil Talwar presenting the Domain Layer
- 03 – Doguhan Uluca presenting the Presentation Layer
So what the heck is (are?) Code First Migrations? Read on to find out!
Options & Alternatives
Here are a few options you have when modeling your entities for an enterprise web application:
- Database First: This involves generating an EDMX file from your database. Every time your tables and fields change, you’ll have to update the model from Visual Studio.
- Model First: You may use Visual Studio to create your database model and relationships between entities. I wouldn’t normally recommend this for an Agile/Scrum project.
- Code First with automatic migrations: You can enable Migrations and configure it to “Enable Automatic Migrations”.
- Code First with manual migrations: In this blog post, I will focus on Migrations with manual updates.
What Problems Are We Trying To Solve?
When modeling your data, you may have conflicts within your development team, with other development teams, and also with enterprise architects at your organization. With Migrations, you will have the opportunity to get everyone on the same page.
When you make add a new field or a new entity, you want to be sure that everyone else has it too. When your application is deployed onto various server environments (e.g. Testing, Mock and Production), you need to know that that all the corresponding databases are on the same version.
A Simple Example
Download the sample project from the following location:
https://wakeupandcode.com/public_downloads/00_PatientRecords_Demo.zip
Open the PatientRecords.sln file in VS2012 and you will observe the following:
- The PatientRecords project is an ASP.NET MVC web project
- The Dal project contains your Models, Migrations and Mapping files
- The App_Data folder in your web project contains an .mdf file for simplicity and portability. In the real world, your database would exist in SQL Server.
- A packages subfolder has been included, but you should update via NuGet
First, let’s discuss the PatientRecordsDbContext class in the Contexts subfolder:
- The PatientRecordsDbContext is a subclass of Entity Framework’s DbContext
- It contains a DBSet<> for each entity, e.g. Human
- It overrides OnModelCreating() to establishing mapping configurations
Next, let’s take a look at the Human class, also in the Models subfolder:
- The Human class represents a person, with a first name, last name, etc
- An “Id” field represents the primary key, but this can be extracted into a BaseEntity class, a parent class for all future entities.
On to the Mapping subfolder:
- The HumanMap class reconciles any differences between the Human model in your C# code and the Humans table in your database.
- The mapping code can also be used to establish relationships between entities.
- Be aware that EF automatically plularizes your entities if you don’t specify a name explicitly. And sometimes, it’s not what you want (or EF may be wrong). For example, if I hadn’t specified a table name of “Humans”, EF would have used the name “Humen” with an “e” as the plural of “Human”.
Now, expand the PatientRecords web project:
- The web.config file contains a reference to “ConnectionStrings.config” where the ConnectionString should be. Read my blog post about isolating your connection strings to learn more about this technique.
- The HumanController class uses the DbContext directly, and the Human views use the Dal model directly.
- For a real project: you should use UI-specific models for your Razor views, and you should inject a service into the controller, instead of accessing the DbContext directly.
- Run the web project, and go to /Human to see the application in action.
Finally, Migrations!
In order to use Code First Migrations, download the following version of the project, without migrations added to it. Make sure you enable Nuget Package Restore to restore all packages (e.g. EntityFramework) and restart your project after the restoration.
https://wakeupandcode.com/public_downloads/01_PatientRecordsForExercise.zip
You will go through the following steps:
- Enable Migrations
- Create initial migration and auto-generate database.
- Make model changes in your code
- Add a new migration for model changes
- Update your database for your new migration
All migrations commands are run from the Package Manager Console. If you don’t have this panel open in VS2012, click on Tools -> Library Package Manager -> Package Manager Console.
1. Enable Migrations
In order to enable migrations, select the DAL project as the default project in the PMC, then run the following command.
Enable-Migrations -ContextTypeName Dal.Contexts.PatientRecordsDbContext
In the Migrations subfolder, a Configuration.cs file was automatically created, including a Seed method. You may update the Seed method to include lookup/reference data for your database, using the DbContext that is passed on to the method.
2. Create initial migration and auto-generate database.
To create the initial migration (and generate the database), run the Add-Migration command, followed by a name for this migration, e.g. “InitialCreate”.
> Add-Migration "InitialCreate"
This will create a new Migration file that contains the necessary commands to create the Human table.
Run the Update-Database command to auto-generate an mdf file under App_Data in the web project. (The database file won’t be attached to the web project by default.)
> Update-Database
3. Make model changes in your code
Add a middle name to the Human class, and rebuild your solution.
public string MiddleName { get; set; }
4. Add a new migration for model changes
Run the Add-Migration command, followed by a name for the migration, “AddedMiddleName”.
> Add-Migration "AddedMiddleName"
This will create a new migration with a filename that includes the above name. It should be visible in the Migrations subfolder, prefixed by a timestamp.
5. Update your database for your new migration
The database has not been updated at this point. To do that, run the Update-Database command.
> Update-Database
Running this command automatically updates the Humans table with a new MiddleName field, and also runs the Seed method to insert the sample records. If we run the Update-Database command again, it won’t have any more database updates to run, but it will still run the Seed method each time.
Making Migrations Work
- Before you add a migration, you should discuss your upcoming changes with your dev team.
- Inspect your migration code, and make additional changes as necessary (e.g. provide explicit names for constraints if required by your organization’s enterprise architects)
- After you’ve added a migration, you should update your database to test it out. After verifying that everything works, push your code so that other developers may pull and update their own database.
- For server deployments, run migrate.exe against your deployed application on the web server. This executable is available under the Tools subfolder for EntityFramework in your NuGet packages. This step can be automated during web server deployments, so that the corresponding database are also updated as necessary. (For table alterations, you must make sure that you’re not wiping out any data unintentionally)
Trouble with Package Manager commands?
Try the following after downloading each sample:
- Delete your Packages folder first
- Open .sln in VS2012
- Restore NuGet Packages when prompted
- Clean Solution
- Uninstall EF via NuGet
- Reinstall EF via NuGet
- Rebuild your solution


It’d be helpful to add quick instructions on how to setup a DbContext, before enabling migrations.
Good idea, I’ll explain it in a new post, and will link it to this one.
Pingback: Presenting EF Migrations at Caparea and RADNUG | Wake Up And Code!
Pingback: Shahed Chowdhuri's Blog: Presenting Entity Framework at GWU’s Graduate Computing Club | Wake Up And Code!
Pingback: Shahed Chowdhuri's Blog: Presenting EF Migrations at Hampton Roads .NET Users Group | Wake Up And Code!
Pingback: Shahed Chowdhuri's Blog: Presenting EF Migrations at BaltoMSDN | Wake Up And Code!
Pingback: Shahed Chowdhuri's Blog: Presenting EF Migrations at Richmond .NET Users Group | Wake Up And Code!