Category Archives: HTML

RELEASE: ASP .NET Core A-Z eBook

By Shahed C on July 29, 2019

As promised, below is the initial release of the ASP .NET Core A-Z ebook. This combines the 26 blog posts from the series of ASP .NET Core articles on this website.

ASPNETCoreLogo-300x267 A – Z of ASP .NET Core!

eBook cover

eBook cover

You can find the complete ebook on GitHub using one of the links below:

Don’t miss my guest appearance on the .NET Community Standup:

    • With Jon Galloway, Damian Edwards and Scott Hanselman.
    • 5:07 -> video starts
    • 18:58 to 36:20 -> my segment
    • 36:20 to end -> just chatting

Things to note (updated):

  • The cover image was generated using the Canva mobile app
  • The eBook is still a work in progress 🙂
  • I’m using my Worker Service sample to auto-generate Word documents from each blog post by converting each article’s HTML into Word format using MariGold.OpenXHTML
  • After some tweaking, images have been manually resized per chapter. Automatic resizing doesn’t seem to work between HTML to Word conversions, but feel free to submit a Pull Request if you have suggestions on how to fix it.
  • Animated GIF images don’t work in the ebook, so a link to each original source has been included where they appear in a few chapters.
  • The content currently covers a combination of ASP .NET Core 2.2 and 3.0 (Preview). In the weeks/months ahead, the content will be updated to include Core 3.0 across the entire series.

Validation in ASP .NET Core

By Shahed C on June 4, 2019

This is the twenty-second of a series of posts on ASP .NET Core in 2019. In this series, we’ll cover 26 topics over a span of 26 weeks from January through June 2019, titled A-Z of ASP .NET Core!

ASPNETCoreLogo-300x267 A – Z of ASP .NET Core!

In this Article:

V is for Validation

To build upon a previous post on Forms and Fields in ASP .NET Core, this post covers Validation in ASP .NET Core. When a user submits form field values, proper validation can help build a more user-friendly and secure web application. Instead of coding each view/page individually, you can simply use server-side attributes in your models/viewmodels.

NOTE: As of ASP .NET Core 2.2, validation may be skipped automatically if ASP .NET Core decides that validation is not needed. According to the “What’s New” release notes, this includes primitive collections (e.g. a byte[] array or a Dictonary<string, string> key-value pair collection)

Blog-Diagram-Validation

This article will refer to the following sample code on GitHub:

Web Validation Sample App: https://github.com/shahedc/ValidationSampleApp

Validation Attributes

To implement model validation with [Attributes], you will typically use Data Annotations from the System.ComponentModel.DataAnnotations namespace. The list of attribute does go beyond just validation functionality though. For example, the DataType attribute takes a datatype parameter, used for inferring the data type and used for displaying the field on a view/page (but does not provide validation for the field).

Common attributes include the following

  • Range: lets you specify min-max values, inclusive of min and max
  • RegularExpression: useful for pattern recognition, e.g. phone numbers, zip/postal codes
  • Required: indicates that a field is required
  • StringLength: sets the maximum length for the string entered
  • MinLength: sets the minimum length of an array or string data

From the sample code, here is an example from the CinematicItem model class:

public class CinematicItem
{
   public int Id { get; set; }

   [Range(1,100)]
   public int Score { get; set; }

   [Required]
   [StringLength(100)]
   public string Title { get; set; }

   [StringLength(255)]
   public string Synopsis { get; set; }
  
   [DataType(DataType.Date)]
   [DisplayName("Available Date")]
   public DateTime AvailableDate { get; set; }

   [Required]
   [DisplayName("Movie/Show/etc")]
   public CIType CIType { get; set; }
}

From the above code, you can see that:

  • The value for Score can be 1 or 100 or any integer in between
  • The value for Title is a required string, needs to be less than 100 characters
  • The value for Synopsis can be left blank, but has to be less than 100 characters.
  • The value for AvailableDate is displayed as “Available Date” (with a space)
  • Because of the DataType provided, AvailableDate is displayed as a selectable date in the browser
  • The value for CIType (short for Cinematic Item Type) is displayed as “Movie/Show/etc” and is displayed as a selectable value obtained from the CIType data type (which happens to be an enumerator. (shown below)
public enum CIType
{
   Movie,
   Series,
   Short
}

Here’s what it looks like in a browser when validation fails:

Validation-Fields-Errors

The validation rules make it easier for the user to correct their entries before submitting the form.

Server-Side Validation

Validation occurs before an MVC controller action (or equivalent handler method for Razor Pages) takes over. As a result, you should check to see if the validation has passed before continuing next steps.

e.g. in an MVC controller

[HttpPost]
[ValidateAntiForgeryToken]
public async Task<IActionResult> Create(...)
{
   if (ModelState.IsValid)
   {
      // ... 
      return RedirectToAction(nameof(Index));
   }
   return View(cinematicItem);
}

e.g. in a Razor Page’s handler code:

public async Task<IActionResult> OnPostAsync()
{
   if (!ModelState.IsValid)
   {
      return Page();
   }

   //... 
   return RedirectToPage("./Index");
}

Note that ModelState.IsValid is checked in both the Create() action method of an MVC Controller or the OnPostAsync() handler method of a Razor Page’s handler code. If IsValid is true, perform actions as desired. If false, reload the current view/page as is.

Client-Side Validation

It goes without saying that you should always have server-side validation. All the client-side validation in the world won’t prevent a malicious user from sending a GET/POST request to your form’s endpoint. Cross-site request forgery in the Form tag helper does provide a certain level of protection, but you still need server-side validation. That being said, client-side validation helps to catch the problem before your server receives the request, while providing a better user experience.

When you create a new ASP .NET Core project using one of the built-in templates, you should see a shared partial view called _ValidationScriptsPartial.cshtml. This partial view should include references to jQuery unobtrusive validation, as shown below:

<environment include="Development">
   <script src="~/lib/jquery-validation/dist/jquery.validate.js"></script>
   <script src="~/lib/jquery-validation-unobtrusive/jquery.validate.unobtrusive.js"></script>
</environment>

If you create a scaffolded controller with views/pages, you should see the following reference at the bottom of your page or view.

e.g. at the bottom of Create.cshtml view

@section Scripts {
   @{await Html.RenderPartialAsync("_ValidationScriptsPartial");}
}

e.g. at the bottom of the Create.cshtml page

@section Scripts {
   @{await Html.RenderPartialAsync("_ValidationScriptsPartial");}
}

Note that the syntax is identical whether it’s an MVC view or a Razor page. That being said, you may want to disable client-side validation. This is accomplished in different ways, whether it’s for an MVC view or a Razor page.

From the official docs, the following code should be used within the ConfigureServices() method of your Startup.cs class, to set ClientValidationEnabled to false in your HTMLHelperOptions configuration.

services.AddMvc().AddViewOptions(options =>
{
   if (_env.IsDevelopment())
   {
      options.HtmlHelperOptions.ClientValidationEnabled = false;
   }
});

Also mentioned in the official docs, the following code can be used for your Razor Pages, within the ConfigureServices() method of your Startup.cs class.

services.Configure<HtmlHelperOptions>(o => o.ClientValidationEnabled = false);

Client to Server with Remote Validation

If you need to call a server-side method while performing client-side validation, you can use the [Remote] attribute on a model property. You would then pass it the name of a server-side action method which returns an IActionResult with a true boolean result for a valid field. This [Remote] attribute is available in the Microsoft.AspNetCore.Mvc namespace, from the Microsoft.AspNetCore.Mvc.ViewFeatures NuGet package.

The model property would look something like this:

[Remote(action: "MyActionMethod", controller: "MyControllerName")]
public string MyProperty { get; set; }

In the controller class, (e.g. MyControllerName), you would define an action method with the name specified in the [Remote] attribute parameters, e.g. MyActionMethod. 

[AcceptVerbs("Get", "Post")]
public IActionResult MyActionMethod(...)
{
   if (TestForFailureHere())
   {
      return Json("Invalid Error Message");
   }
   return Json(true);
}

You may notice that if the validation fails, the controller action method returns a JSON response with an appropriate error message in a string. Instead of a text string, you can also use a false, null, or undefined value to indicate an invalid result. If validation has passed, you would use Json(true) to indicate that the validation has passed.

So, when would you actually use something like this? Any scenario where a selection/entry needs to be validated by the server can provide a better user experience by providing a result as the user is typing, instead of waiting for a form submission. For example: imagine that a user is buying online tickets for an event, and selecting a seat number displayed on a seating chart. The selected seat could then be displayed in an input field and then sent back to the server to determine whether the seat is still available or not.

Custom Attributes

In addition to all of the above, you can simply build your own custom attributes. If you take a look at the classes for the built-in attributes, e.g. RequiredAttribute, you will notice that they also extend the same parent class:

  • System.ComponentModel.DataAnnotations.ValidationAttribute

You can do the same thing with your custom attribute’s class definition:

public class MyCustomAttribute: ValidationAttribute 
{
   // ...
}

The parent class ValidationAttribute, has a virtual IsValid() method that you can override to return whether validation has been calculated successfully (or not).

public class MyCustomAttribute: ValidationAttribute 
{
   // ...
   protected override ValidationResult IsValid(
      object value, ValidationContext validationContext)
   {
      if (TestForFailureHere())
      {
         return new ValidationResult("Invalid Error Message");
      }
      
      return ValidationResult.Success;
   }
}

You may notice that if the validation fails, the IsValid() method returns a ValidationResult() with an appropriate error message in a string. If validation has passed, you would return ValidationResult.Success to indicate that the validation has passed.

References

Tag Helper Authoring in ASP .NET Core

By Shahed C on May 21, 2019

This is the twentieth of a series of posts on ASP .NET Core in 2019. In this series, we’ll cover 26 topics over a span of 26 weeks from January through June 2019, titled A-Z of ASP .NET Core!

ASPNETCoreLogo-300x267 A – Z of ASP .NET Core!

In this Article:

T is for Tag Helper Authoring

Tag Helpers are very useful for ASP .NET Core developers in creating HTML elements with server-side attributes. They work equally well in both Razor Pages and MVC views. Better yet, the syntax allows a front-end developer to easily customize the UI, with HTML/CSS knowledge.

If you need a refresher on built-in tag helpers in ASP .NET Core, you may revisit an earlier post in this series:

TagHelpers-Razor-MVC

Authoring your own tag helpers is as easy as implementing the ITagHelper interface. To make things easier, the TagHelper class (which already implements the aforementioned interface) can be extended to build your custom tag helpers.

To follow along, take a look at the sample project on Github:

Web Tag Helper Authoring Sample: https://github.com/shahedc/TagHelperAuthoring30

CAUTION: the sample code contains spoilers for Avengers: Endgame (2019).

Custom Tag Helpers

As with most concepts introduced in ASP .NET Core, it helps to use named folders and conventions to ease the development process. In the case of Tag Helpers, you should start with a “TagHelpers” folder at the root-level of your project for your convenience. You can save your custom tag helper classes in this folder.

This blog post and its corresponding code sample builds upon the official tutorial for authoring tag helpers. While the official tutorial covers instructions for MVC views, this blog post takes a look at a Razor Page example. The creation of Tag Helpers involves the same process in either case. Let’s start with the synchronous and asynchronous versions of a Tag Helper that formats email addresses.

The class EmailTagHelper.cs defines a tag helper that is a subclass of the TagHelper class, saved in the “TagHelpers” folder. It contains a Process() method that changes the output of the HTML tag it is generating.

public class EmailTagHelper : TagHelper
{
   ...
   // synchronous method, CANNOT call output.GetChildContentAsync();
   public override void Process(TagHelperContext context, TagHelperOutput output)
   {
      // ...
   } 
}

The class AsyncEmailTagHelper.cs defines a tag helper that is also a subclass of the TagHelper class, saved in the aforementioned “TagHelpers” folder. It contains a ProcessAsync() method, which has a different signature (returns Task object instead of void) and grabs the child content from the output using output.GetChildContentAsync();

public class AsyncEmailTagHelper : TagHelper
{
   ...
   // ASYNC method, REQUIRED to call output.GetChildContentAsync();
   public override async Task ProcessAsync(TagHelperContext context, TagHelperOutput output)
   {
      // ... 
   }
}

In order to use the tag helper in a Razor Page, simply add a using statement for the Tag Helper’s namespace, and then include a custom HTML tag that has the same name as the Tag Helper’s class name (without the TagHelper suffix). For the Email and AsyncEmail Tag Helpers, the corresponding tags in your Razor Page would be <email> and <async-email> respectively.

In the EmailTester.cshtml page:

<email mail-to="Black.Widow"></email>

In the AsyncEmailTester.cshtml page:

<async-email>Black.Widow</async-email>

Note that the PascalCase capitalization in the class name corresponds to a lowercase tag in kebab-case. In a browser, the end result includes a clickable email link from the Razor Pages. Both the non-async and async version of the methods produce similar end results.

Email Tester in a Razor Page

Email Tester in a Razor Page

Async Email Tester in a Razor Page

Async Email Tester in a Razor Page

Setting Attributes and Content

So how does the Process() method convert your custom tags into valid HTML tags? It does that in a series of steps.

  1. Set the HTML element as the tag name to replace it with, e.g. <a>
  2. Set each attribute within that HTML element, e.g. href
  3. Set HTML Content within the tags.

The process involved is slightly different between the synchronous and asynchronous versions of the Process method. In the synchronous EmailTagHelper.cs class, the Process() method does the following:

// 1. Set the HTML element
output.TagName = "a"; 

// 2. Set the href attribute
output.Attributes.SetAttribute("href", "mailto:" + address);

// 3. Set HTML Content
output.Content.SetContent(address);

In the asynchronous AsyncEmailTagHelper.cs class, the ProcessAsync() method does the following:

// 1. Set the HTML element
output.TagName = "a"; 

var content = await output.GetChildContentAsync();
var target = content.GetContent() + "@" + EmailDomain;

// 2. Set the href attribute within that HTML element, e.g. href
output.Attributes.SetAttribute("href", "mailto:" + target);

// 3. Set HTML Content
output.Content.SetContent(target);

The difference between the two is that the async method gets the output content asynchronously with some additional steps. Before setting the attribute in Step 2, it grabs the output content from GetChildContentAsync() and then uses content.GetContent() to extract the content before setting the attribute with output.Attributes.SetAttribute(). 

Updating Pre/Post Content

This section recaps the BoldTagHelper explained in the docs tutorial, by consolidating all the lessons learned. In the BoldTagHelper.cs class from the sample, you can see the following code:

[HtmlTargetElement("bold")]
[HtmlTargetElement(Attributes = "bold")]
public class BoldTagHelper : TagHelper
{
   public override void Process(TagHelperContext context, TagHelperOutput output)
   {
      output.Attributes.RemoveAll("bold");
      output.PreContent.SetHtmlContent("<strong>");
      output.PostContent.SetHtmlContent("</strong>");
   }
}

Let’s go over what the code does, line by line:

  • The [HtmlTargetElement] attribute forces a Tag Helper to target a specific element, e.g. [HtmlTargetElement(“bold”)], which will target a <bold> tag in a Razor Page or MVC View.
  • When one or more attributes are specified, e.g. [HtmlTargetElement(Attributes = “bold”)], the Tag Helper targets a bold attribute within an element, e.g. <p bold>
  • Combining the above one after the other gives you an OR condition, in which either scenario can be matched.
  • Combining them in a single [HtmlTargetElement] creates an AND condition, which would match a bold tag with a bold attribute, which is not very useful, e.g. [HtmlTargetElement(“bold”, Attributes = “bold”)]

Here is a snippet the corresponding Razor Page for testing the above scenario, BoldTester.cshtml:

<p bold>This paragraph uses a P tag with a bold attribute. 
Using a tag helper, the entire paragraph should be displayed with bold text.</p>

<bold>This statement uses a custom bold tag to be displayed in bold.</bold>

The tag helper affects both fragments, as seen in the screenshot below:

TagHelpers-BoldTester

The statements in the Process() method accomplish the following:

  • The RemoveAll() method from output.Attributes removes the “bold” attribute within the tag, as it is essentially acting as a placeholder.
  • The SetHtmlContent() from output.PreContent adds an opening <strong> tag  inside the enclosing element, i.e. just after <p> or <bold>
  • The SetHtmlContent() from output.Postontent adds a closing </strong> tag  inside the enclosing element, i.e. just before </p> or </bold>

Passing Complex Objects

What if you want to pass a more complex object, with properties and objects within it? This can be done by defining a C# model class, e.g. SuperheroModel.cs, that can be initialized inside in the Page Model class (SuperheroInfoTesterModel.cs) and then used in a Razor Page (SuperheroInfoTester.cshtml). The tag helper (SuperheroTagHelper.cs) then brings it all together by replacing <superhero> tags with whatever SuperHeroModel info is passed in.

Let’s take a look at all its parts, and how it all comes together.

Object ModelSuperheroModel.cs

public class SuperheroModel
{
   public string LastName { get; set; }
   public string FirstName { get; set; }
   public string SuperName { get; set; }
   public bool HasSurvived { get; set; }

   public bool ShowInfoWithSpoilers { get; set; }
}

Razor PageSuperheroInfoTester.cshtml

@page
@model SuperheroInfoTesterModel

... 

<h3>Black Widow Info:</h3>
<div condition="@Model.blackWidowInfo.ShowInfoWithSpoilers">
 <superhero hero-info="Model.blackWidowInfo" />
</div>
...

Page Model for Razor Page: SuperheroInfoTester.cshtml.cs

public class SuperheroInfoTesterModel : PageModel
{
   public SuperheroModel blackWidowInfo { get; set; }
   // ...

   public void OnGet()
   {
      blackWidowInfo = new SuperheroModel
      {
         // ...
      }
      // ...
   }
}

Superhero Tag HelperSuperheroTagHelper.cs

public class SuperheroTagHelper : TagHelper
{
   public SuperheroModel HeroInfo { get; set; }

   public override void Process(TagHelperContext context, TagHelperOutput output)
   {
     // ...
   }
}

Going through the above code:

  1. The tag helper is named SuperheroTagHelper, implying that it can be used for <superhero> tags in a Razor Page, e.g. SuperHeroInfoTester.cshtml
  2. The tag helper also contains a SuperheroModel object called HeroInfo, which allows a hero-info attribute, i.e. <superhero hero-info=”Model.property”>
  3. The SuperheroModel class contains various public properties that provide information about a specific superhero.
  4. The SuperHeroInfoTesterModel page model class includes an OnGet() method that initializes multiple SuperheroModel objects, to be displayed in the Razor Page.

Inside the tag helper, the Process() method takes care of replacing the <superhero> tag with a <section> tag:

public override void Process(TagHelperContext context, TagHelperOutput output)
{
   string htmlContent = $@"<ul><li><strong>First Name:</strong> {HeroInfo.FirstName}</li>
<li><strong>Last Name:</strong> {HeroInfo.LastName}</li>
<li><strong>Superhero Name:</strong> {HeroInfo.SuperName}</li>
<li><strong>Survived Endgame? </strong> {HeroInfo.HasSurvived}</li></ul>";
 
   output.TagName = "section";
   output.Content.SetHtmlContent(htmlContent);
   output.TagMode = TagMode.StartTagAndEndTag; 
}

After initializing some HTML content to display a <ul> list, the above code in the Process() method accomplishes the following:

  1. Set the HTML element as the tag name to replace it with, e.g. <section>
  2. Set HTML Content within the tags.
  3. Set Tag Mode to include both start and end tags, e.g. <section> … </section>

End Result in Browser:

TagHelpers-Model

In a web browser, you can see that that the <superhero> tag has been converted into a <section> tag with <ul> content.

Handling Conditions

When you want to handle a UI element in different ways based on certain conditions, you may use a ConditionTagHelper. In this case, a condition is used to determine whether spoilers for the popular movie Avengers: Endgame should be displayed or not. If the spoiler flag is set to false, the character’s info is not displayed at all.

@page
@model SuperheroInfoTesterModel
...
<div condition="@Model.blackWidowInfo.ShowInfoWithSpoilers">
 <superhero hero-info="Model.blackWidowInfo" />
</div>
...

In the above code from the SuperheroInfoTester.cshtml page:

  • the <div> includes a condition that evaluates a boolean value, e.g. Model.blackWidowInfo.ShowInfoWithSpoilers
  • the Model object comes from the @model defined at the top of the page
  • the boolean value of ShowInfoWithSpoilers determines whether the <div> is displayed or not.

References


JavaScript, CSS, HTML & Other Static Files in ASP .NET Core

By Shahed C on March 11, 2019

This is the tenth of a series of posts on ASP .NET Core in 2019. In this series, we’ll cover 26 topics over a span of 26 weeks from January through June 2019, titled A-Z of ASP .NET Core!

ASPNETCoreLogo-300x267 A – Z of ASP .NET Core!

In this Article:

J is for JavaScript, CSS, HTML & Other Static Files

NOTE: this article will teach you how to include and customize the use of static files in ASP .NET Core web applications. It is not a tutorial on front-end web development.

If your ASP .NET Core web app has a front end – whether it’s a collection of MVC Views or a Single-Page Application (SPA) – you will need to include static files in your application. This includes (but is not limited to): JavaScript, CSS, HTML and various image files.

When you create a new web app using one of the built-in templates (MVC or Razor Pages), you should see a “wwwroot” folder in the Solution Explorer. This points to a physical folder in your file system that contains the same files seen from Visual Studio. However, this location can be configured, you can have multiple locations with static files, and you can enable/disable static files in your application if desired. In fact, you have to “opt in” to static files in your middleware pipeline.

Blog-Diagram-AspNetCore-mw

You can browse the (template-generated) sample app (with static files) on GitHub at the following location:

Web sample app with static files: https://github.com/shahedc/AspNetCoreStaticSample

Configuring Static Files via Middleware

Let’s start by observing the Startup.cs configuration file. We’ve seen this file several times throughout this blog series. In the Configure() method, you’ll find the familiar method call to enable the use of static files.

public void Configure(IApplicationBuilder app, IHostingEnvironment env)
{
   ...
   app.UseStaticFiles();
   ...
   app.UseMvc(...);
}

This call to app.UseStaticFiles() ensures that static files can be served from the designated location, e.g. wwwroot. In fact, this line of code looks identical whether you look at the Startup.cs file in an MVC or Razor Pages project.

It’s useful to note the placement of this line of code. It appears before app.UseMvc(), which is very important. This ensures that static file requests can be processed and sent back to the web browser without having to touch the MVC middleware. This becomes even more important when authentication is used.

Take a look at either the MVC or Razor Pages projects that have authentication added to them. In the code below, you can see the familiar call to app.UseStaticFiles() once again. However, there is also a call to app.UseAuthentication(). It’s important for the authentication call to appear after the call to use static files. This ensure that the authentication process isn’t triggered when it isn’t needed.

public void Configure(IApplicationBuilder app, IHostingEnvironment env)
{
   ...
   app.UseStaticFiles();
   ...
   app.UseAuthentication();
   ...
   app.UseMvc(...);
}

By using the middleware pipeline in this way, you can “short-circuit” the pipeline when a request has been fulfilled by a specific middleware layer. If a static file has been successfully served using the Static Files middleware, it prevents the next layers of middleware (i.e. authentication, MVC) from processing the request.

NOTE: if you need to secure any static files, e.g. private images, you can consider a cloud solution such as Azure Blob Storage to store the files. The files can then be served from within the application, instead of actual static files. You could also serve secure files (from outside the wwwroot location) as a FileResult() object returned from an action method that has an [Authorize] attribute.

Customizing Locations for Static Files

It may be convenient to have the default web templates create a location for your static files and also enable the use of those static files. As you’ve already seen, enabling static files isn’t magic. Removing the call to app.useStaticFiles() will disable static files from being served. In fact, the location for static files isn’t magic either.

In a previous post, we had discussed how the Program.cs file includes a call to CreateDefaultBuilder() to set up your application:

public class Program
{
   ...
   public static IWebHostBuilder CreateWebHostBuilder(string[] args) =>
      WebHost.CreateDefaultBuilder(args)
         .UseStartup<Startup>();
}

Behind the scenes, this method call sets the “content root” to the current directory, which contains the “wwwroot” folder, your project’s “web root”. These can both be customized.

WebHost.CreateDefaultBuilder(args).UseContentRoot("c:\\<content-root>")
WebHost.CreateDefaultBuilder(args).UseWebRoot("public")

You may also use the call to app.UseStaticFiles() to customize an alternate location to serve static files. This allows you to serve additional static files from a location outside of the designated web root.

...
using Microsoft.Extensions.FileProviders;
using System.IO;
...
public void Configure(IApplicationBuilder app)
{
   ...
   app.UseStaticFiles(new StaticFileOptions
   {
      FileProvider = new PhysicalFileProvider(
         Path.Combine(env.ContentRootPath, "AltStaticRoot")),
         RequestPath = "/AltStaticFiles"
   });
}

Wait a minute… why does it look like there are two alternate locations for static files? There is a simple explanation:

  • In the call to Path.Combine(), the “AltStaticRoot” is an actual folder in your current directory. This Path class and its Combine() method are available in the System.IO namespace.
  • The “AltStaticFiles” value for RequestPath is used as a root-level “virtual folder” from which images can be served. The PhysicalFileProvider class is available in the Microsoft.Extensions.FileProviders namespace.

The following markup may be used in a .cshtml file to refer to an image, e.g. MyImage01.png:

<img src="~/AltStaticFiles/MyImages/MyImage01.png" />

The screenshot below shows an example of an image loaded from an alternate location.

code sample for alt images

The screenshot below shows a web browser displaying such an image.

VS2017-AltStaticFile-Browser

You can find the above code in the RazorWebAltStatic sample web app on GitHub:

Preserving CDN Integrity

When you use a CDN (Content Delivery Network) to serve common CSS and JS files, you need to ensure that the integrity of the source code is reliable. You can rest assured that ASP .NET Core has already solved this problem for you in its built-in templates. Let’s take a look at the shared Layout page, e.g. _Layout.cshtml in a Razor Pages web application.

<environment include="Development">
 <link rel="stylesheet" href="~/lib/bootstrap/dist/css/bootstrap.css" />
</environment>

<environment exclude="Development">
 <link 
   rel="stylesheet" 
   href="https://cdnjs.cloudflare.com/ajax/libs/twitter-bootstrap/4.1.3/css/bootstrap.min.css"
   asp-fallback-href="~/lib/bootstrap/dist/css/bootstrap.min.css"
   asp-fallback-test-class="sr-only" 
   asp-fallback-test-property="position" 
   asp-fallback-test-value="absolute"
   crossorigin="anonymous"
   integrity="sha256-eSi1q2PG6J7g7ib17yAaWMcrr5GrtohYChqibrV7PBE="/>
</environment>

Right away, you’ll notice that there are two conditional <environment> blocks in the above markup. The first block is used only during development, in which the bootstrap CSS file is obtained from your local copy. When not in development (e.g. staging, production, etc), the bootstrap CSS file is obtained from a CDN, e.g. CloudFlare.

You could use an automated hash-generation tool to generate the SRI (Subresource Integrity) hash values, but you would have to manually copy the value into your code. You can try out the relatively-new LibMan (aka Library Manager) for easily adding and updating your client-side libraries.

LibMan (aka Library Manager)

The easiest way to use LibMan is to use the built-in features available in Visual Studio. Using LibMan using the IDE is as easy as launching it from Solution Explorer. Specify the provider from the library you want, and any specific files you want from that library.

If you’ve already read my SignalR article from my 2018 blog series, you may recall the steps to add a client library via LibMan (aka Library Manager):

  • Right-click project in Solution Explorer
  • Select Add | Client-Side Library

In the popup that appears, select/enter the following:

  • Provider: choose from cdnjs, filesystem, unpkg
  • Library search term, e.g. @aspnet/signalr@1… pick latest stable if desired
  • Files: At a minimum, choose specific files, e.g. signalr.js and/or its minified equivalent

VS2017-SignalR-ClientLib

For more on LibMan (using VS or CLI), check out the official docs:

In any case, using LibMan will auto-populate a “libman.json” manifest file, which you can also inspect and edit manually. The aforementioned SignalR article also includes a real-time polling web app sample. You can view its libman.json file to observe its syntax for using a SignalR client library.

{
  "version": "1.0",
  "defaultProvider": "unpkg",
  "libraries": [
    {
      "library": "@aspnet/signalr@1.1.0",
      "destination": "wwwroot/lib/signalr/",
      "files": [
        "dist/browser/signalr.js",
        "dist/browser/signalr.min.js"
      ]
    }
  ]
}

Every time you save the libman.json file, it will trigger LibMan’s restore process. This pulls down the necessary libraries from their specified source, and adds them to your local file system. If you want to trigger this restore process manually, you can always choose the “Restore Client-Side Libraries” option by right-clicking the libman.json file in Solution Explorer.

What About NPM or WebPack?

If you’ve gotten this far, you may be wondering: “hey, what about NPM or WebPack?”

It’s good to be aware that LibMan is a not a replacement for your existing package management systems. In fact, the Single-Page Application templates in Visual Studio (for Angular and React) currently use npm and WebPack. LibMan simply provides a lightweight mechanism to include client-side libraries from external locations.

For more information on WebPack in ASP .NET Core, I would recommend these 3rd-party articles:

References

Additional reference for pre-compressing static files, found on Twitter via:

@DotNetAppDevhttps://twitter.com/DotNetAppDev/status/1106299093922533376


Forms and Fields in ASP .NET Core

By Shahed C on February 13, 2019

This is the sixth of a series of posts on ASP .NET Core for 2019. In this series, we’ll cover 26 topics over a span of 26 weeks from January through June 2019, titled A-Z of ASP .NET Core!

ASPNETCoreLogo-300x267 A – Z of ASP .NET Core!

In this Article:

This article will refer to the following sample code on GitHub:

Web Forms And Bindings: https://github.com/shahedc/FormsAndBindings

F is for Forms (and Fields)

Before Tag Helpers were available, you would have to use HTML Helper methods to create forms and their elements in a ASP .NET Core views. This meant that your form could look something like this:

@using (Html.BeginForm())
{
   <input />
}

With the introduction of Tag Helpers, you can now make your web pages much more cleaner. In fact, Tag Helpers work with both MVC Views and Razor Pages. The syntax is much simpler:

<form method="post">

This looks like HTML because it is HTML. You can add additional server-side attributes within the <form> tag for additional features.

<form asp-controller="ControllerName" asp-action="ActionMethod" method="post">

In this above example, you can see how the attributes asp-controller and asp-action can be used to specify a specific controller name and action method. When these optional attributes are omitted, the current controller and default action method will be used.

Optionally, you can also use a named route, e.g.

<form asp-route="NamedRoute" method="post">

The asp-route attribute will look for a specific route with the name specified. When the form is submitted via HTTP POST, the action method will then attempt to read the form values via a passed values or bound properties.

In a Controller’s class file within an MVC app, you can set an optional Name for your action method’s Route attribute, as shown below:

[Route("/ControllerName/ActionMethod", Name = "NamedRoute")]
public IActionResult ActionMethod()
{
}

While you won’t find new Tag Helper equivalents for each and every HTML Helper you may have used in the past, you should consider using a Tag Helper wherever possible. You can even create your own custom Tag Helpers as well. For more information on custom Tag Helpers, check out the official documentation:

Tag Helpers for HTML form elements

Below is a list of Tag Helpers with their corresponding HTML form elements:

Input Tag Helper

Let’s say you have a model with a couple of fields:

public class MyModel
{
   public string MyProperty1 { get; set; }
   public string MyProperty2 { get; set; }
}

You can use the following syntax to use an Input Tag Helper with an expression name assigned to the asp-for attribute. This allows you to refer to the properties without requiring the “Model.” prefix in your Views and Pages.

@model MyModel 
...
<!-- Syntax -->
<input asp-for="<Expression Name>" />
...
<!-- Examples -->
<input asp-for="MyProperty1" />
<input asp-for="MyProperty2" />

Corresponding to the Input Tag Helper, there are existing HTML Helpers, with some differences:

  • Html.TextBox: doesn’t automatically set the type attribute
  • Html.TextBoxFor: also doesn’t automatically set the type attribute; strongly typed
  • Html.Editor: suitable for collections, complex objects and templates (while Input Tag Helper is not).
  • Html.EditorFor: also suitable for collections, complex objects and templates; strongly typed

Since Input Tag Helpers use an inline variable or expression in your .cshtml files, you can assign the value using the @ syntax as shown below:

@{
   var myValue = "Some Value";
 }
 <input asp-for="@myValue" />

This will generate the following textbox input field:

<input type="text" id="myValue" name="myValue" value="Some Value" />

To create more specific fields for email addresses, passwords, etc, you may use data-type attributes on your models to auto-generate the necessary fields. These may include one of the following enum values:

  • CreditCard
  • Currency
  • Custom
  • Date
  • DateTime
  • Duration
  • EmailAddress
  • Html
  • ImageUrl
  • MultilineText
  • Password
  • PhoneNumber
  • PostalCode
  • Text
  • Time
  • Upload
  • Url
// For example: 
[DataType(DataType.Date)]
public DateTime DateOfBirth { get; set; }

Note that each attribute can be applied on a field for the view/page generator to infer the data type, but is not used for data validation. For validation, you should use the appropriate validation techniques in your code. We will cover validation in a future blog post, but you can refer to the official docs for now:

Checkboxes

Any boolean field in your model will automatically be turned into a checkbox in the HTML form. There is no extra work necessary to specify that the input type is a “checkbox”. In fact, the generated HTML includes the “checkbox” type automatically, sets the “checked” property if checked and wraps it in a label with the appropriate caption. For example, imagine a boolean field named “IsActive”:

// boolean field in a model class
public bool IsActive { get; set; }
<!-- input field in page/view wrapped in label -->
<label class="form-check-label">
   <input class="form-check-input" asp-for="IsActive" /> 
   @Html.DisplayNameFor(model => model.IsActive)
</label>
<!-- HTML generated for boolean field -->
<label class="form-check-label">
<input 
   class="form-check-input" 
   type="checkbox" 
   checked="checked" 
   data-val="true" 
   data-val-required="The IsActive field is required." 
   id="IsActive" 
   name="IsActive" 
   value="true"> IsActive
</label>

Hidden Fields

In case you’re wondering how you can generate a hidden <input> field, you can simply use the [HiddenInput] attribute on your hidden field’s property, as shown below. If you wish, you can explicitly set “type=hidden” in your Page/View, but I prefer to set the attribute in the model itself.

// hidden property in model class
[HiddenInput] 
public string SomeHiddenField { get; set; } = "Some Value";
<!-- hidden field in page/view -->
<input asp-for="SomeHiddenField" /> 
<!-- HTML generated for hidden field --> 
<input type="hidden" id="SomeHiddenField" name="SomeHiddenField" value="Some Value">

Radio Buttons

For radio buttons, you can create one <input> tag for each radio button option, with a reference to a common field, and a unique value for each radio button. Each input element can be wrapped in a label to include a proper (clickable) text caption . You can generate these in a loop or from a collection from dynamically generated radio buttons.

// string property in model class
public string ExperienceLevel { get; set; }
<!-- input fields for radio buttons in page/view -->
<label><input asp-for="ExperienceLevel" value="N" type="radio" />Novice</label> 
<label><input asp-for="ExperienceLevel" value="B" type="radio"/>Beginner</label> 
<label><input asp-for="ExperienceLevel" value="I" type="radio" />Intermediate</label> 
<label><input asp-for="ExperienceLevel" value="A" type="radio"/>Advanced</label>
<!-- HTML generated for radio buttons --> 
<label><input value="N" type="radio" id="ExperienceLevel" name="ExperienceLevel">Novice</label>
<label><input value="B" type="radio" id="ExperienceLevel" name="ExperienceLevel">Beginner</label>
<label><input value="I" type="radio" id="ExperienceLevel" name="ExperienceLevel">Intermediate</label>
<label><input value="A" type="radio" id="ExperienceLevel" name="ExperienceLevel">Advanced</label>

Textarea Tag Helper

The multiline <textarea> field can be easily represented by a Textarea Tag Helper. This is useful for longer strings of text that need to be seen and edited across multiple lines.

public class MyModel
{
   [MinLength(5)]
   [MaxLength(1024)]
   public string MyLongTextProperty { get; set; }
}

As you would expect, you can use the following syntax to use a Textarea Tag Helper with an expression name assigned to the asp-for attribute.

@model MyModel 
...
<textarea asp-for="MyLongTextProperty"></textarea>

This will generate the following textarea input field:

<textarea 
   data-val="true" 
   data-val-maxlength="The field ... maximum length of '1024'." 
   data-val-maxlength-max="1024" 
   data-val-minlength="The field ... minimum length of '5'." 
   data-val-minlength-min="5" 
   id="MyLongTextProperty" 
   maxlength="1024" 
   name="MyLongTextProperty"
></textarea>

Note that the property name and its attributes are used to create that textarea with the necessary id, name, maxlength and data validation settings.

Corresponding to the Textarea Tag Helper, the existing HTML Helper is shown below:

  • Html.TextAreaFor

Label Tag Helper

The <label> field can be represented by a Label Tag Helper. A label usually goes hand-in-hand with a specific <input> field, and is essential in creating text captions for more accessible web applications. The Display attribute from your model’s fields are used for the label’s displayed text values. (You could use the DisplayName attribute instead and omit the Name parameter, but it limits your ability to use localized resources.)

public class MyModel
{
   [Display(Name = "Long Text")]
   public string MyLongTextProperty { get; set; }
}

You can use the following syntax to use a Label Tag Helper along with an Input Tag Helper.

@model MyModel 
...
<label asp-for="MyLongTextProperty"></label>
<input asp-for="MyLongTextProperty" />

This will generate the following HTML elements:

<label for="MyLongTextProperty">Long Text</label>
<input type="text" id="MyLongTextProperty" name="MyLongTextProperty" value="">

Note that the property name and its attributes are used to create both the label with its descriptive caption and also the input textbox with the necessary id and name.

Corresponding to the Label Tag Helper, the existing HTML Helper is shown below:

  • Html.LabelFor

Select Tag Helper

The <select> field (with its nested <option> fields) can be represented by a Select Tag Helper. This visually represents a dropdown or listbox, from which the user may select one or more options. In your model, you can represent this with a List<SelectListItem> of items, made possible by the namespace Microsoft.AspNetCore.Mvc.Rendering.

...
using Microsoft.AspNetCore.Mvc.Rendering;

public class MyModel
{
   public string MyItem { get; set; }
   
   public List<SelectListItem> MyItems { get; } = new List<SelectListItem>
   {
      new SelectListItem { Value = "Item1", Text = "Item One" },
      new SelectListItem { Value = "Item2", Text = "Item Two" },
      new SelectListItem { Value = "Item3", Text = "Item Three" },
   };
}

You can use the following syntax to use a Select Tag Helper.

@model MyModel 
...
<select asp-for="MyItem" asp-items="Model.MyItems"></select>

Note that the asp-items attribute does require a “Model.” prefix, unlike the asp-for attribute that we have been using so far. This will generate the following HTML:

<select id="MyItem" name="MyItem">
   <option value="Item1">Item One</option>
   <option value="Item2">Item Two</option>
   <option value="Item3">Item Three</option>
</select>

Note that the property name and its attributes are used to create both the dropdown list and also the nested options available for selection. For more customization, optgroups and multiple selections, check out the “Select Tag Helper” section in the Tag Helpers documentation at:

Corresponding to the Select Tag Helper, the existing HTML Helpers are shown below:

  • Html.DropDownListFor
  • Html.ListBoxFor

MVC Sample

In the sample repo, you’ll find an MVC web project with various models, views and controllers.

  • Models: In the “Models” folder, you’ll find a Human.cs class (shown below) with some fields we will use to display HTML form elements.
  • Views: Within the “Views” subfolder, the “Human” subfolder contains auto-generated views for the HumanController’s methods, while the “Attr” subfolder contains simple Index and Detail views to be used by the AttrController class.
  • Controllers: The HumanController class was auto-generated for the Human model, while the AttrController class was manually written to illustrate the use of various attributes (e.g. FromQuery, FromRoute, FromForm) within the action methods.
public class Human
{
   public int Id { get; set; }
   public string FirstName { get; set; }
   public string LastName { get; set; }
   public string Address { get; set; }
   public DateTime DateOfBirth { get; set; }
   public int FavoriteNumber { get; set; }
   public bool IsActive { get; set; }
}

Take a look at the Create and Edit views for the Human class, and you’ll recognize familiar sets of <label> and <input> fields that we discussed earlier.

...
<div class="form-group">
   <label asp-for="FirstName" class="control-label"></label>
   <input asp-for="FirstName" class="form-control" />
   <span asp-validation-for="FirstName" class="text-danger"></span>
</div>
...

To bind these fields, the Create and Edit methods that respond to HTTP POST both use a [Bind] attribute for the Human parameter with specific fields to bind from the model:

[HttpPost]
public async Task<IActionResult> Create(
   [Bind("Id,FirstName,LastName,Address,DateOfBirth,FavoriteNumber,IsActive")] Human human)

... 
[HttpPost]
public async Task<IActionResult> Edit(
   int id, 
   [Bind("Id,FirstName,LastName,Address,DateOfBirth,FavoriteNumber,IsActive")] Human human)

In the AttrController class, you’ll find a different approach to gathering information submitted in an HTML form.

  • FromQuery: The Index() method uses a [FromQuery] attribute which can obtain information from the URL’s QueryString parameters
  • FromRoute: The first Details() method uses a [FromRoute] attribute which can obtain information from route values.
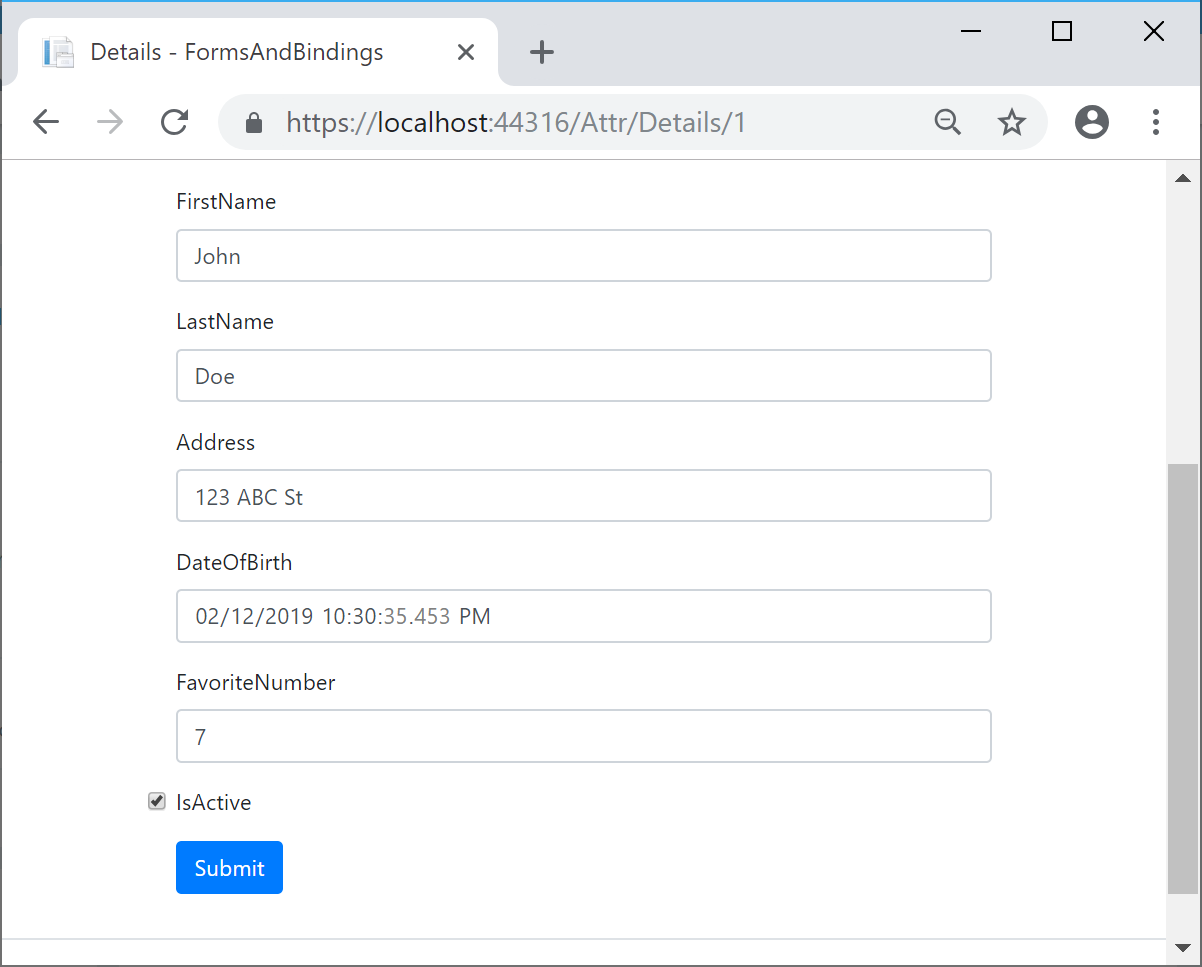
  • FromForm: The second Details() method uses a [FromForm] attribute which links the submitted form fields to the fields of the corresponding model passed to the method.
[HttpGet]
public IActionResult Index([FromQuery] string humanInfo) { }
...
[HttpGet]
public IActionResult Details([FromRoute] int id) { }
...
[HttpPost]
public IActionResult Details([FromForm] Human human) { }
...

The first two methods above can be reached via HTTP GET requests by accessing a URL, while the third one can be reached when submitting the Details form with a submit button. Run the sample application to click around and view its behavior.

Forms-Bindings


<!-- From shared _Layout.cshtml, link to Index page -->
<a 
   class="nav-link text-dark" 
   asp-area="" 
   asp-controller="Attr" 
   asp-action="Index" 
   asp-route-humanInfo="John"
>Attributes</a>

<!-- From Index.cshtml, link to Details page -->
<a 
   class="nav-link text-dark" 
   asp-area="" 
   asp-controller="Attr" 
   asp-action="Details" 
   asp-route-id="1"
>View Details</a>
<!-- From Details.cshtml, self-submitting form -->
<form asp-action="Details">
...
<input type="submit" value="Submit" class="btn btn-primary" />
...
</form>

Note that <a> tags have an asp-route-xx attribute that can have any text value appended to the end of it. These route parameters, e.g. id and humanInfo, correspond directly to action method parameters seen in Index() and Details() methods of the AttrController class.

Razor Pages with BindProperty

Compared to MVC views, the newer Razor Pages make it a lot easier to bind your model properties to your HTML forms. The [BindProperty] attribute can be applied to MVC Controllers as well, but is much more effective within Razor Pages.

In the sample repo, you’ll find a Razor web project with multiple subfolders, including Models and Pages.

  • Models: In the “Models” folder of the Razor web project, you’ll find a Human.cs class (shown below) with some fields we will use to display HTML form elements.
  • Pages: Within the “Pages” subfolder, the “Human” subfolder contains auto-generated Razor Pages along with corresponding .cs classes that contain the necessary Get/Post methods.

Here, the HumanModel class is named slightly differently from the aforementioned (MVC) example’s Human class, since the subfolder within Pages is also called Human. (We would have to rename one or the other to avoid a naming conflict.)

 public class HumanModel
 {
    public int Id { get; set; }
    public string FirstName { get; set; }
    public string LastName { get; set; }
    public string Address { get; set; }
    public DateTime DateOfBirth { get; set; }
    public int FavoriteNumber { get; set; }
    public bool IsActive { get; set; }
 }

This time, take a look at the Create and Edit pages for the Human class, and you’ll once again recognize familiar sets of <label> and <input> fields that we discussed earlier.

 <div class="form-group">
    <label asp-for="HumanModel.FirstName" class="control-label"></label>
    <input asp-for="HumanModel.FirstName" class="form-control" />
    <span asp-validation-for="HumanModel.FirstName" class="text-danger"></span>
 </div>

Since there are no controller classes in the Razor web project, let’s take a look at the corresponding C# classes for the Create and Edit pages, i.e. Create.cshtml.cs and Edit.cshtml.cs. In both of these classes, we’ll find the [BindProperty] attribute in use, right after the constructor and before the Get/Post methods.

 [BindProperty]
 public HumanModel HumanModel { get; set; }

This [BindProperty] attribute allows you to declaratively bind the HumanModel class and its properties for use by the HTML form in the corresponding Razor Page. This is an opt-in feature that allows to choose which properties to bind. If you wish, you could alternatively bind all public properties in the class by using the [BindProperties] attribute above the class, instead of above each individual member.

NOTE: By default, a Razor Page’s default methods for HTTP GET and HTTP POST are OnGet() and OnPost() respectively. If you wish to use custom page handlers in your HTML forms, you must create custom methods with the prefix OnPost followed by the name of the handler (and optionally followed by the word Async for async methods)

<!-- buttons with custom page handlers --> 
<input type="submit" asp-page-handler="Custom1" value="Submit 1" />
<input type="submit" asp-page-handler="Custom2" value="Submit 2" />
// action methods in .cs file associated with a Razor Page 
public async Task<IActionResult> OnPostCustom1Async() { } 
public async Task<IActionResult> OnPostCustom2sync() { }

The standard set of Get/Post methods are shown below, from Create.cshtml.cs:

public IActionResult OnGet()
{
   return Page();
}
public async Task<IActionResult> OnPostAsync()
{
   if (!ModelState.IsValid)
   {
      return Page();
   } 
   _context.HumanModel.Add(HumanModel);
   await _context.SaveChangesAsync(); 
   return RedirectToPage("./Index");
}

Note that the HumanModel is passed to the DB Context to add it to the database. If you were to remove the aforementioned [BindProperty] attribute, HumanModel would be null and the save operation would fail. The above approach only opts in to accepting HTTP POST requests. To enable use of BindProperty for HTTP GET requests as well, simply set the optional parameter SupportsGet to true, as shown below.

[BindProperty(SupportsGet = true)]

References