This is the first of a new series of posts on ASP .NET Core for 2019. In this series, we’ll cover 26 topics over a span of 26 weeks from January through June 2019, titled A-Z of ASP .NET Core!
 A – Z of ASP .NET Core!
In this Article:
- A is for Authentication & Authorization
- Authentication in ASP .NET Core
- Authentication in NetLearner
- Authorization in ASP.NET Core (MVC)
- Authorization in ASP.NET Core (Razor Pages)
- Testing Authorization in NetLearner
- Other Authorization Options
- References
A is for Authentication & Authorization
Authentication and Authorization are two different things, but they also go hand in hand. Think of Authentication as letting someone into your home and Authorization as allowing your guests to do specific things once they’re inside (e.g. wear their shoes indoors, eat your food, etc). In other words, Authentication lets your web app’s users identify themselves to get access to your app and Authorization allows them to get access to specific features and functionality.
In this article, we will take a look at the NetLearner app, on how specific pages can be restricted to users who are logged in to the application. Throughout the series, I will try to focus on new code added to NetLearner or build a smaller sample app if necessary.
Authentication in ASP .NET Core
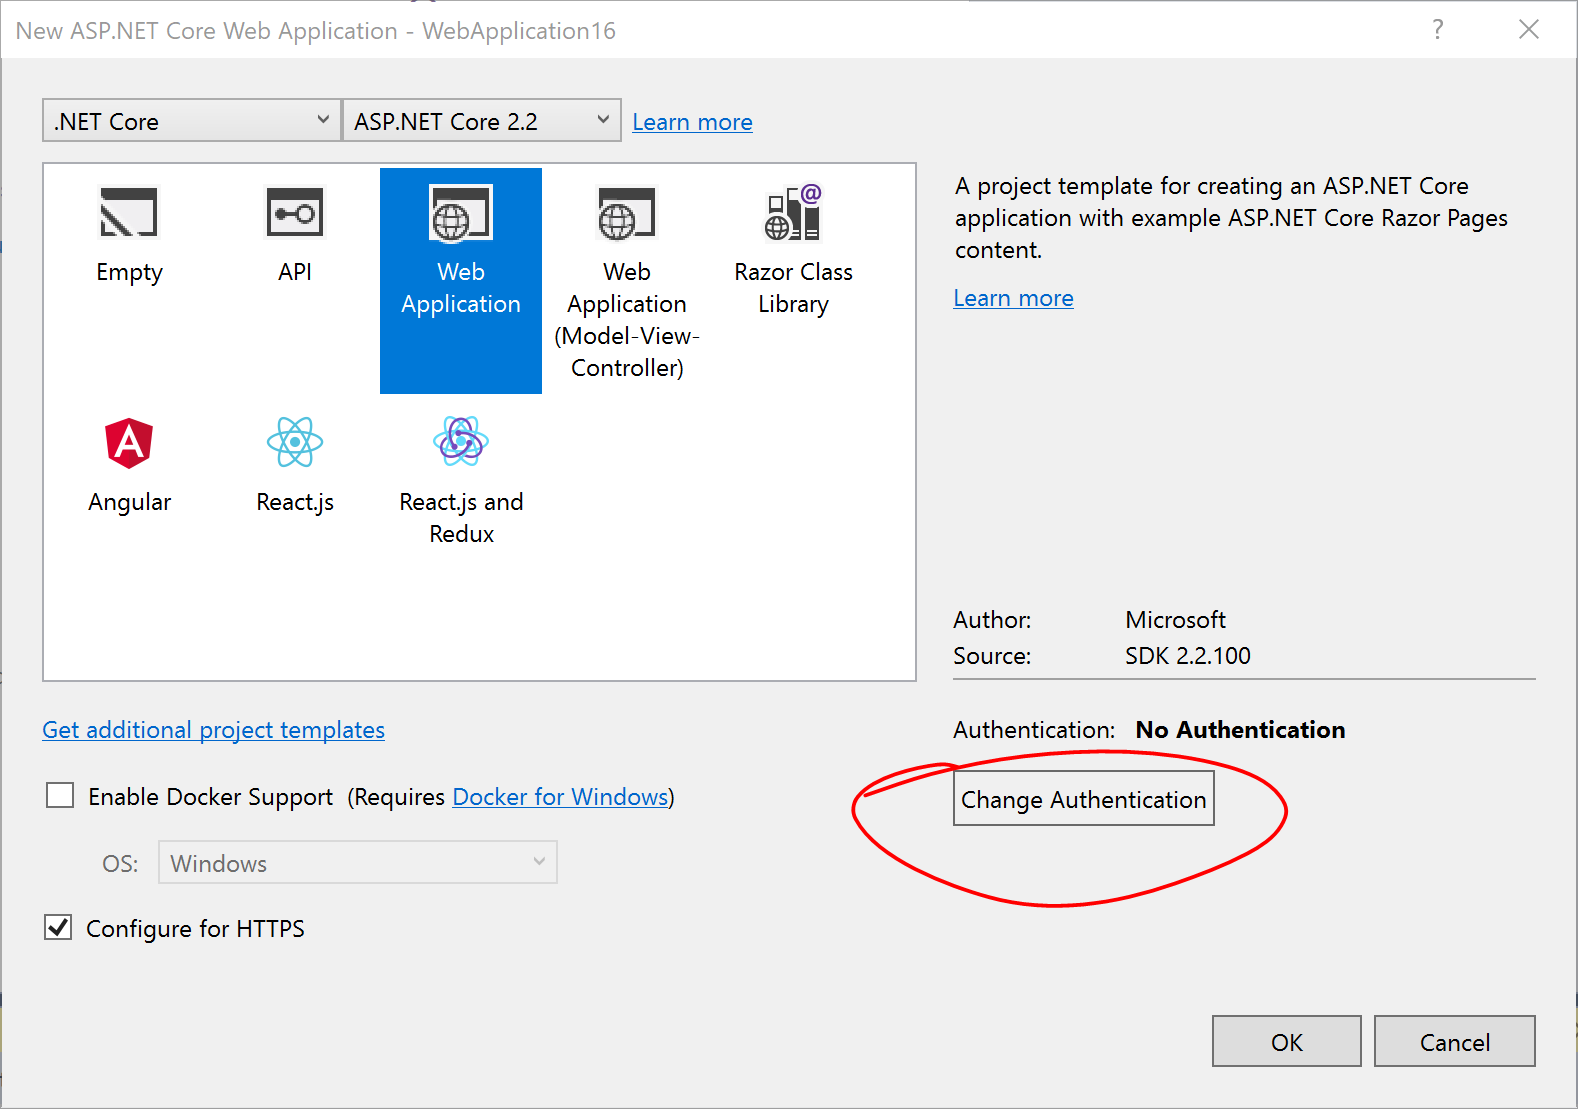
The quickest way to add authentication to your ASP .NET Core app is to use of the pre-built templates with one of the Authentication options. The examples below demonstrate both the CLI commands and Visual Studio UI.
CLI Commands:
> dotnet new webapp --auth Individual
Visual Studio 2017 new project with Authentication:
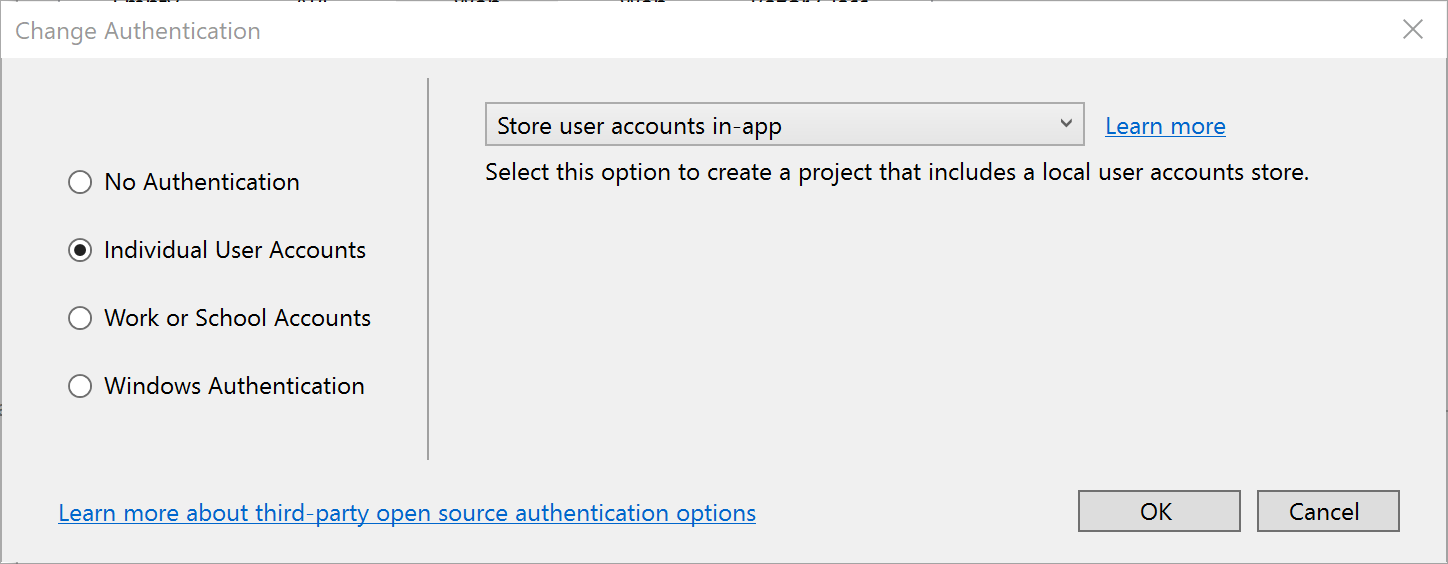
The above example uses “Individual” authentication, which offers a couple of options:
- Store user accounts in-app: includes a local user accounts store
- Connect to an existing user store in the cloud: connect to an existing Azure AD B2C application
Even if I choose to start with a local database, I can update the connection string to point to a SQL Server instance on my network or in the cloud, depending on which configuration is being loaded. If you’re wondering where your Identity code lives, check out my previous post on Razor UI Libraries, and jump to the last section where Identity is mentioned.
From the documentation, the types of authentication are listed below.
- None: No authentication
- Individual: Individual authentication
- IndividualB2C: Individual authentication with Azure AD B2C
- SingleOrg: Organizational authentication for a single tenant
- MultiOrg: Organizational authentication for multiple tenants
- Windows: Windows authentication
To get help information about Authentication types, simply type ––help after the ––auth flag, e.g.
> dotnet new webapp --auth --help
Authentication in NetLearner
Within my NetLearner app, the following snippets of code are added to the Startup.cs configuration:
public void ConfigureServices(IServiceCollection services)
{
...
   services.AddDbContext<ApplicationDbContext>(options =>
      options.UseSqlServer(
      Configuration.GetConnectionString("DefaultConnection")));

   services.AddDefaultIdentity<IdentityUser>()
      .AddDefaultUI(UIFramework.Bootstrap4)
      .AddEntityFrameworkStores<ApplicationDbContext>();
...
}
public void Configure(IApplicationBuilder app, IHostingEnvironment env)
{
...
 app.UseStaticFiles();
...
 app.UseAuthentication();
...
 app.UseMvc();
}
In the above, note that:
- The ConfigureServices() method has calls to services.AddDbContext and server.AddDefaultIdentity. The call to add a DB Context will vary depending on which data store you choose for authentication. The call to AddDefaultIdentity ensures that your app calls AddIdentity, AddDefaultUI and AddDefaultTokenProviders to add common identity features and user Register/Login functionality.
- The Configure() method has a call to app.UseAuthentication to ensure that authentication is used by your web app. Note that this appears after app.UseStaticFiles but before app.UseMvc to ensure that static files (html, css, js, etc) can be served without any authentication but MVC application-controlled routes and views/pages will follow authentication rules.
Authorization in ASP.NET Core (MVC)
Even after adding authentication to a web app using the project template options, we can still access many parts of the application without having to log in. In order to restrict specific parts of the application, we will implement Authorization in our app.
If you’ve already worked with ASP .NET Core MVC apps before, you may be familiar with the [Authorize] attribute. This attribute can be added to a controller at the class level or even to specific action methods within a class.
[Authorize]
public class SomeController1: Controller
{
   // this controller class requires authentication
   // for all action methods
   public ActionResult SomeMethod()
   {
      //
   }
}

public class SomeController2: Controller
{
   public ActionResult SomeOpenMethod()
   {
   }

   [Authorize]
   public ActionResult SomeSecureMethod()
   {
      // this action method requires authentication
   }
}
Well, what about Razor Pages in ASP .NET Core? If there are no controller classes, where would you add the [Authorize] attribute?
Authorization in ASP.NET Core (Razor Pages)
For Razor Pages, the quickest way to add Authorization for your pages (or entire folders of pages) is to update your ConfigureServices() method in your Startup.cs class, by calling AddRazorPagesOptions() after AddMvc(). The NetLearner configuration includes the following code:
services.AddMvc()
.AddRazorPagesOptions(options =>
{
   options.Conventions.AuthorizePage("/LearningResources/Create");
   options.Conventions.AuthorizePage("/LearningResources/Edit");
   options.Conventions.AuthorizePage("/LearningResources/Delete");
   options.Conventions.AllowAnonymousToPage("/Index");
})
.SetCompatibilityVersion(CompatibilityVersion.Version_2_2);
The above code ensures that the CRUD pages for Creating, Editing and Deleting any of the LearningResources are only accessible to someone who is currently logged in. Each call to AuthorizePage() includes a specific page name identified by a known route. In this case, the LearningResources folder exists within the Pages folder of the application.
Finally, the call to AllowAnonymousPage() ensures that the app’s index page (at the root of the Pages folder) is accessible to any user without requiring any login.
If you still wish to use the [Authorize] attribute for Razor Pages, you may apply this attribute in your PageModel classes for each Razor Page, as needed. If I were to add it to one of my Razor Pages in the LearningResources folder, it could look like this:
[Authorize]
public class CreateModel : PageModel
{
    ...
}
Testing Authorization in NetLearner
When I run my application, I can register and log in as a user to create new Learning Resources. On first launch, I have to apply migrations to create the database from scratch. Please refer to my previous post on EF Core Migrations to learn how you can do the same in your environment.
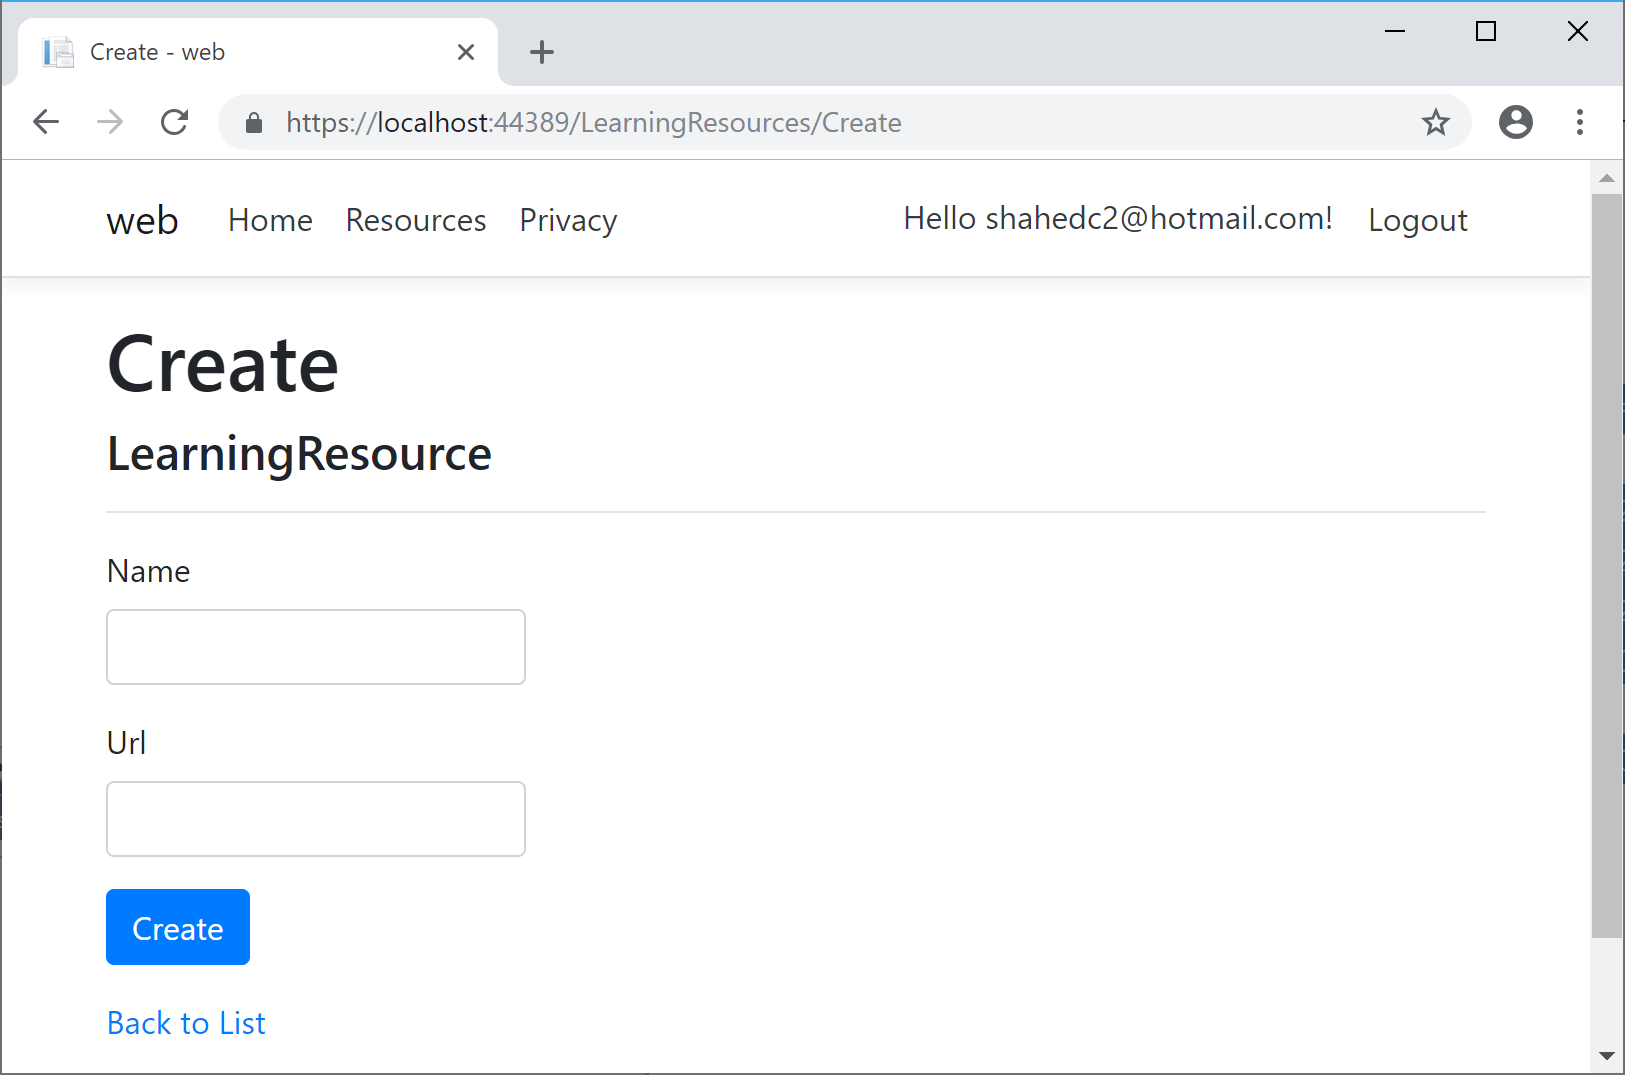
Here’s a screenshot of the Create page for a user who is logged in:
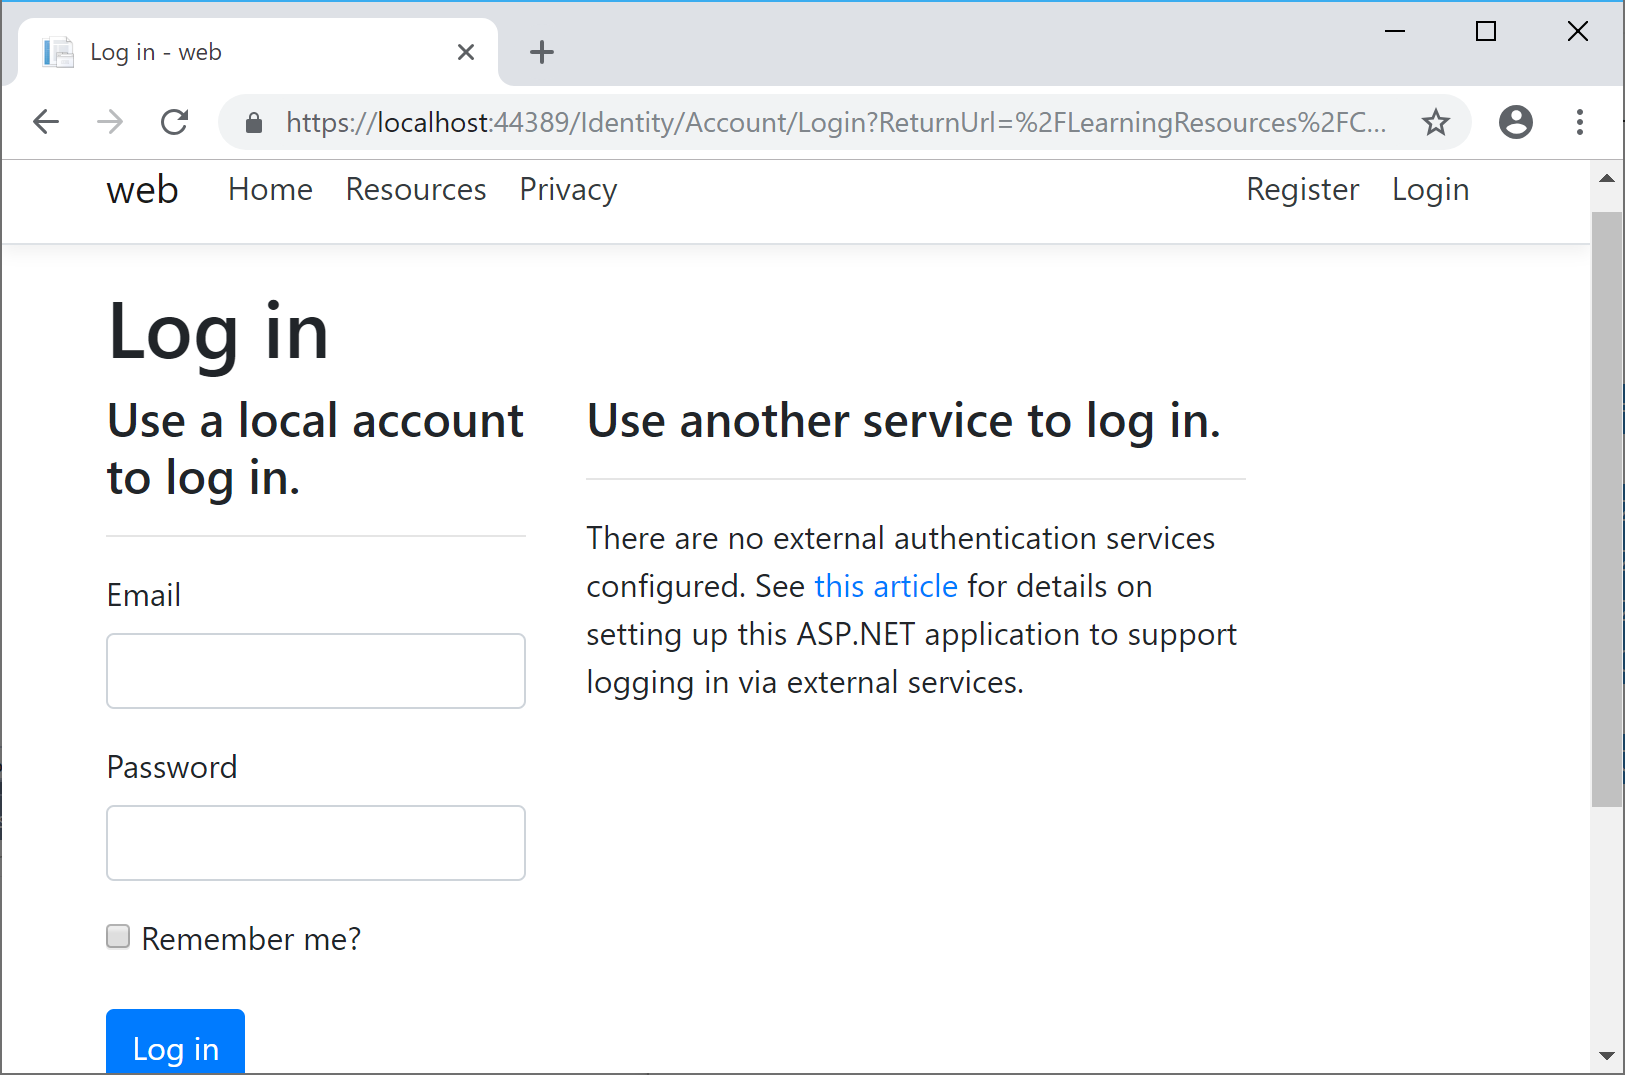
Here’s a screenshot of the page that an “anonymous” user sees when no one is logged in, indicating that the user has been redirected to the Login page:
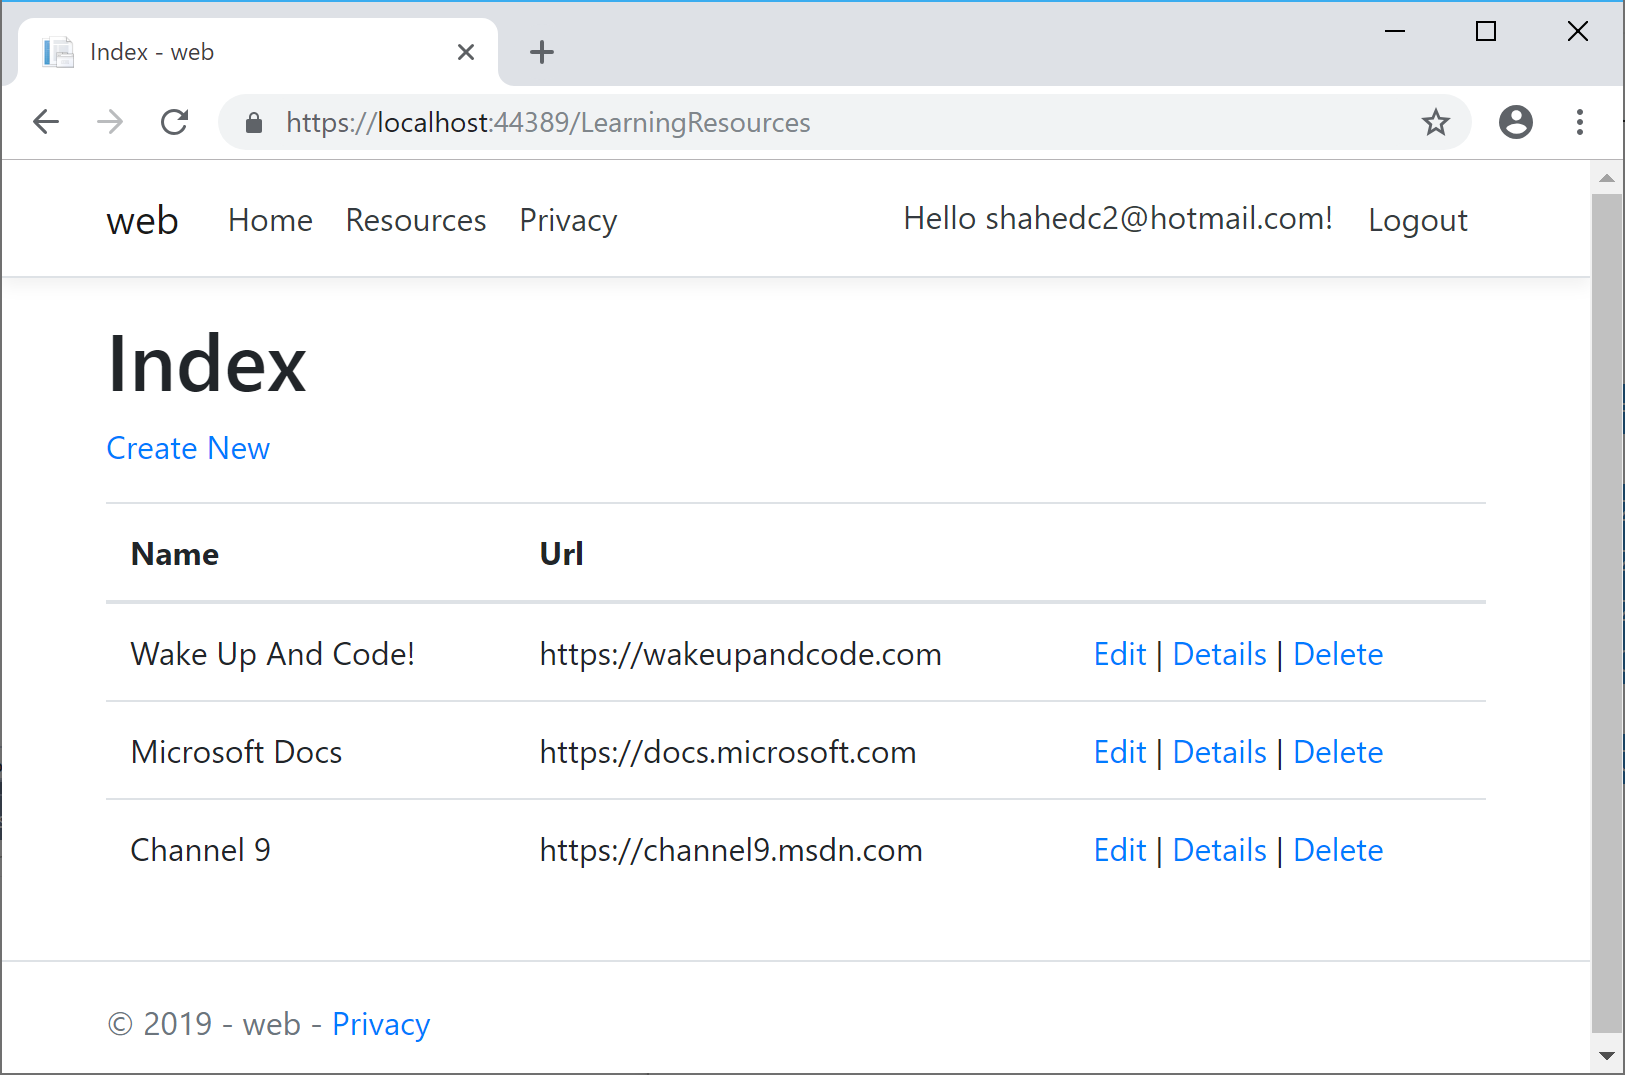
Here’s a screenshot of a list of Learning Resources, visible to anyone whether they’re logged in or not:
Other Authorization Options
Razor Pages have multiple ways of restricting access to pages and folders, including the following methods (as described in the official docs):
- AuthorizePage: Require authorization to access a page
- AuthorizeFolder: Require authorization to access a folder of pages
- AuthorizeAreaPage: Require authorization to access an area page
- AuthorizeAreaFolder: Require authorization to access a folder of areas
- AllowAnonymousToPage: Allow anonymous access to a page
- AllowAnonymousToFolder: Allow anonymous access to a folder of pages
You can get more information on all of the above methods at the following URL:
- Razor Pages authorization conventions in ASP.NET Core: https://docs.microsoft.com/en-us/aspnet/core/security/authorization/razor-pages-authorization
- Detailed Tutorial: https://docs.microsoft.com/en-us/aspnet/core/security/authorization/secure-data
References
To learn more about Authentication, Authorization and other related topics (e.g. Roles and Claims), check out the official docs:
- Razor Pages authorization conventions in ASP.NET Core: https://docs.microsoft.com/en-us/aspnet/core/security/authorization/razor-pages-authorization
- Is the Authorize attribute needed in Razor Pages? What about Roles, Claims and Policies?: https://github.com/aspnet/Docs/issues/6301
- [Authorize] Filter methods for Razor Pages in ASP.NET Core: https://docs.microsoft.com/en-us/aspnet/core/razor-pages/filter/#authorize-filter-attribute
- Simple authorization in ASP.NET Core: https://docs.microsoft.com/en-us/aspnet/core/security/authorization/simple
- Role-based authorization in ASP.NET Core: https://docs.microsoft.com/en-us/aspnet/core/security/authorization/roles
- Claims-based authorization in ASP.NET Core: https://docs.microsoft.com/en-us/aspnet/core/security/authorization/claims
- Policy-based authorization in ASP.NET Core: https://docs.microsoft.com/en-us/aspnet/core/security/authorization/policies
Pingback: Dew Drop - January 8, 2019 (#2874) - Morning Dew
Pingback: issue with trying to use Microsoft.Extensions.DependencyInjection with Visual Studio 2013 - How to Code .NET
Pingback: Middleware in ASP .NET Core | Wake Up And Code!
Pingback: Organizational Accounts for ASP .NET Core | Wake Up And Code!
Shahed, This tutorial is GREAT! THANKS SO MUCH for putting it and the source code available.
The article is easy to read. However, I found two minor typos that you may wish to fix. Once again, they are in my opinion minor, so if you ignore my input I doubt anyone will fail to understand the message you are relating.
(1) On this page the sentence begins:
“The call to AddDefaultEntity ensures that …”
“AddDefaultEntity” has the correct link associated with it; however, the actual method name is AddDefaultIdentity. (minor misspelling).
Thus, the sentence should read:
“The call to AddDefaultIdentity ensures that…”
(2) On this page the sentence begins:
“The Configure() method has a call to app.useAuthentication…”
The method’s capitalization is off just a bit, the “u” in useAuthentication should be capitalized.
The sentence should read:
“The Configure() method has a call to app.UseAuthentication…”
Thanks, I’ve updated both typos.
I have gone through many of the identity tutorials. However, I still cannot figure out how roles are assigned to users. For example, I want to create a user and assign ‘Member’ role. And create another user and assign ‘Admin’ role to the user. How does the stock authorization pages handle this?
In addition to the official docs, have you also seen these 3rd-party writeups how to add Roles? Hope this helps:
ASP.NET Core 2.0:
https://www.c-sharpcorner.com/article/getting-started-with-asp-net-core-2-0-identity-and-role-management/
ASP.NET Core 2.2:
https://jasonwatmore.com/post/2019/01/08/aspnet-core-22-role-based-authorization-tutorial-with-example-api