This is the ninth of a new series of posts on ASP .NET Core. In this post, we’ll learn about Razor Class Libraries to build reusable UI for your web app. This post is also included in Matthew Groves‘ 2018 C# Advent Calendar, in the Dec 2 slot.
- 2nd Annual C# Advent: https://crosscuttingconcerns.com/The-Second-Annual-C-Advent

Introduction to Razor Class Libraries
From an earlier post on Pages in ASP .NET Core, we’ve seen various of ways of creating web pages with or without controllers, views and models to support each of your pages. If you’re an experienced developer, you already know how to reuse server-side code in class libraries.
Starting with ASP .NET Core 2.1, you can now “package your Razor views and pages (.cshtml files) along with your controllers, page models, and data models in reusable class libraries that can be packaged and shared. Apps can then include pre-built UI components by referencing these packages and customize the UI by overriding specific views and pages.”
- March 18 announcement: https://blogs.msdn.microsoft.com/webdev/2018/03/01/asp-net-core-2-1-razor-ui-in-class-libraries/
Better yet, ASP .NET Core Identity is now available as a Razor Class Library, and can be scaffolded into your web application with just the pieces you need.
Before You Begin
Before you begin, take a look at the sample code project on GitHub:
![]() GameConsoles on GitHub: https://github.com/shahedc/GameConsoles
GameConsoles on GitHub: https://github.com/shahedc/GameConsoles
Open the GameConsoles.sln file to load the 2 projects included with the solution:
- Web App project (Set as StartUp Project)
- Razor UI Class Library project (contains shared UI for reuse)
Steps to Create in Visual Studio 2017
Create Class Library project, add reusable UI:
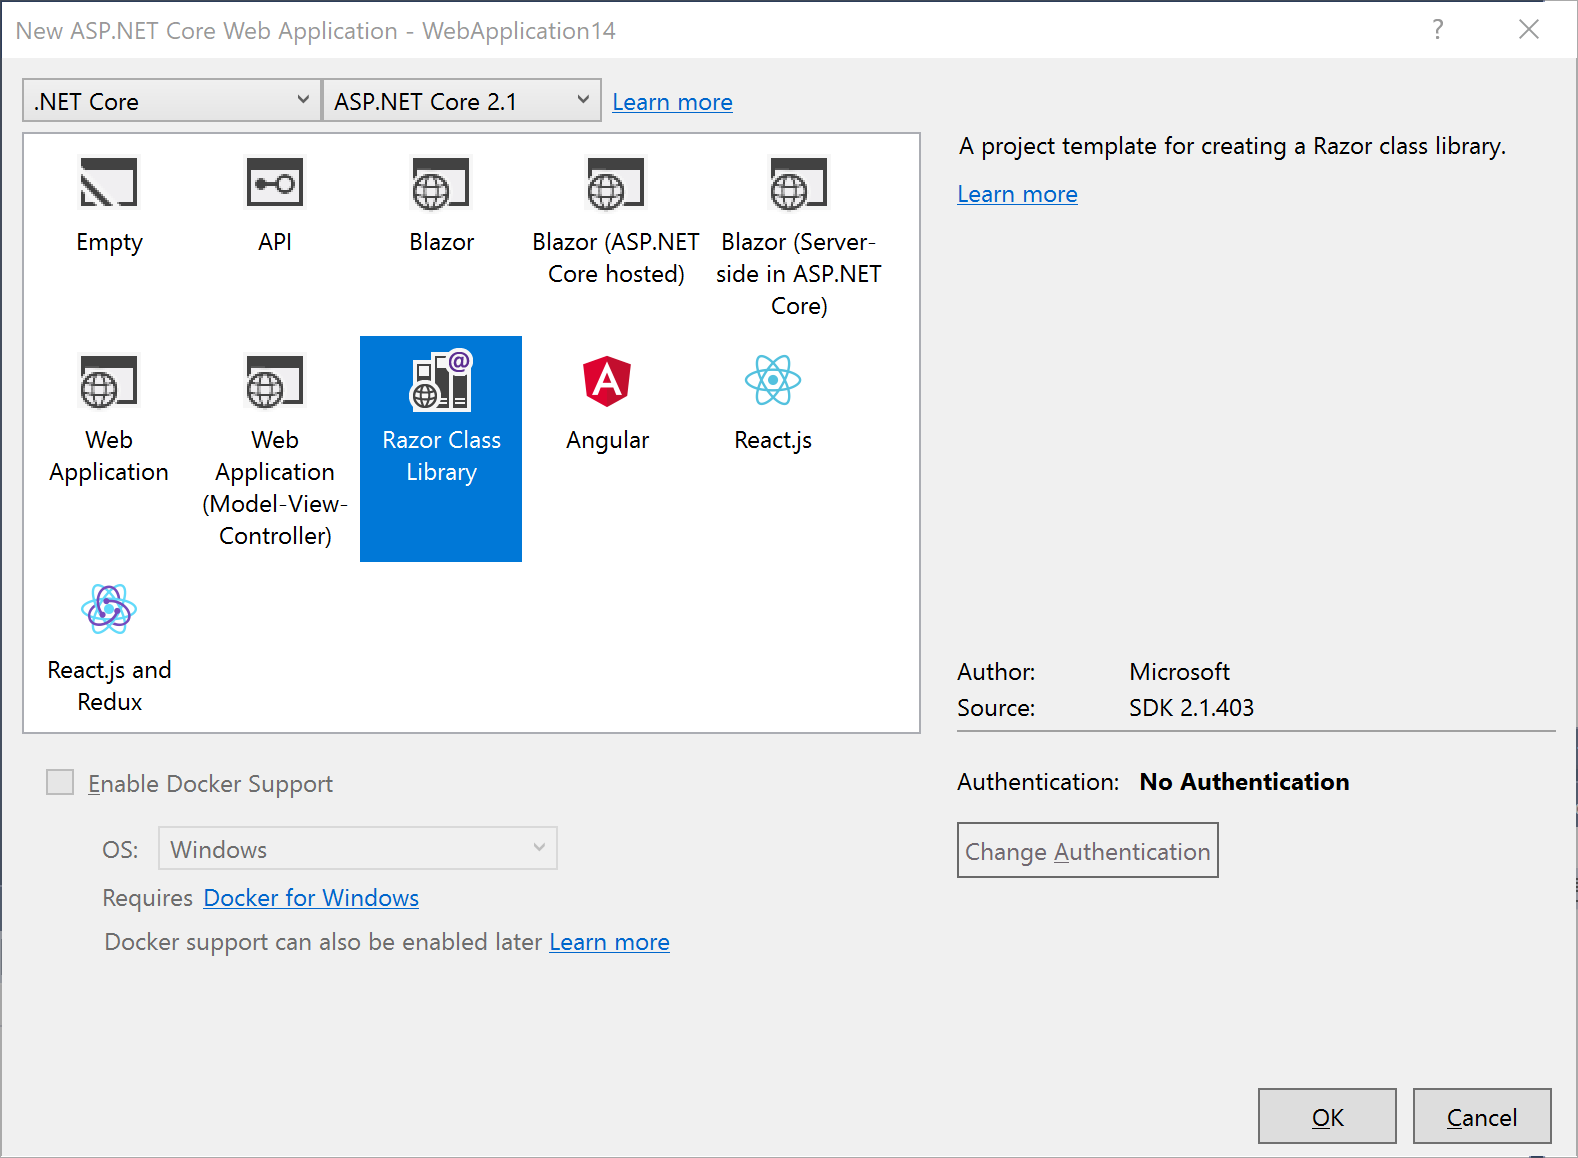
- Click File | New | Project
- Select ASP .NET Core Web Application, click OK
- Select Razor Class Library under ASP .NET Core 2.1
Add partial views under /Pages/Shared/
- /Pages/Shared/_Header.cshtml
- /Pages/Shared/_Footer.cshtml
- Create folder structure /Pages/Shared/
- Add new Razor View _Header.cshtml to Shared subfolder
- Add new Razor View _Footer.cshtml to Shared subfolder
Reference for adding new folders and views: https://docs.microsoft.com/en-us/aspnet/core/tutorials/first-mvc-app/adding-view?view=aspnetcore-2.1
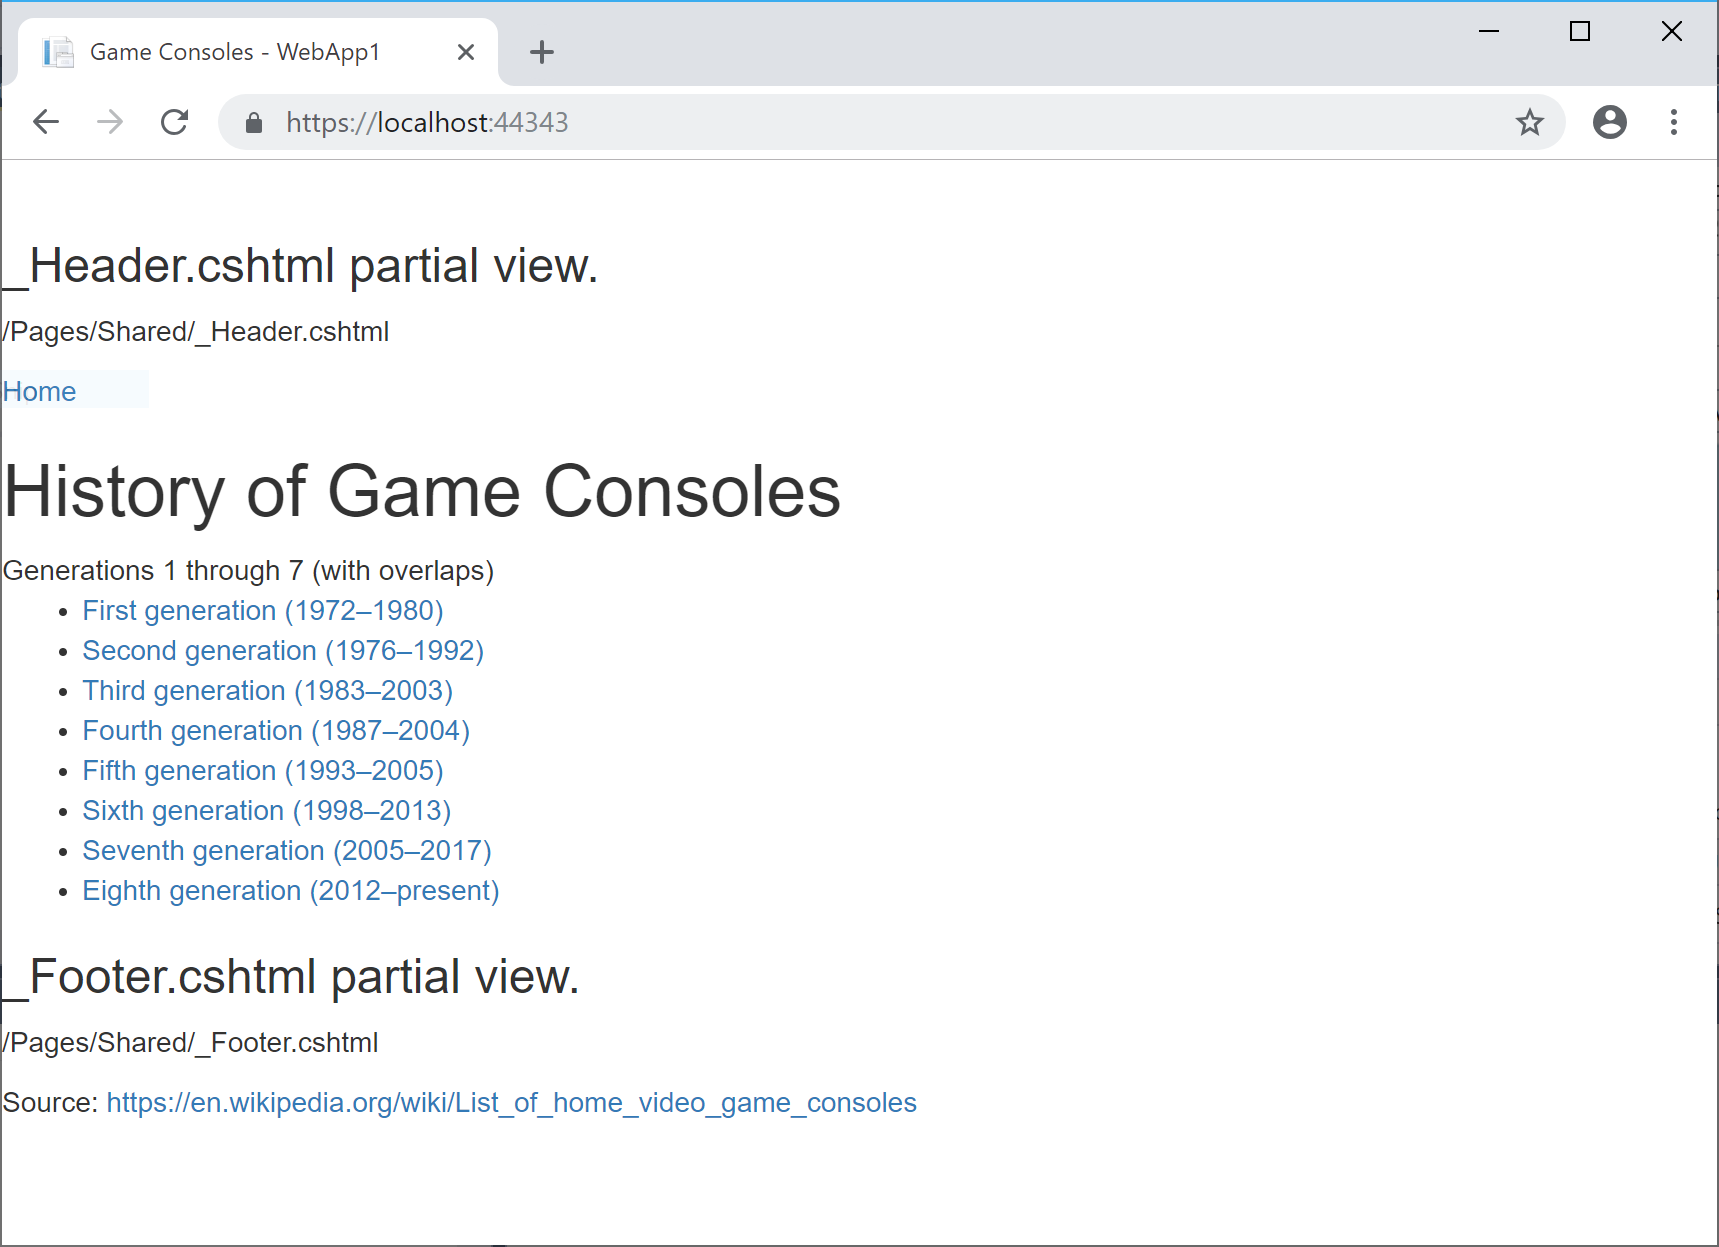
Contents of _Header.cshtml:
<h3>_Header.cshtml partial view.</h3>

<p>/Pages/Shared/_Header.cshtml</p>

<a href="/">Home</a>
Contents of _Footer.cshtml:
<h3>_Footer.cshtml partial view.</h3>

<p>/Pages/Shared/_Footer.cshtml</p>

Source: <a href="https://en.wikipedia.org/wiki/List_of_home_video_game_consoles">https://en.wikipedia.org/wiki/List_of_home_video_game_consoles</a>
Create the Web App project, use Class Library:
- Click File | New | Project
- Select ASP .NET Core Web Application, click OK
- Select Web Application under ASP .NET Core 2.1
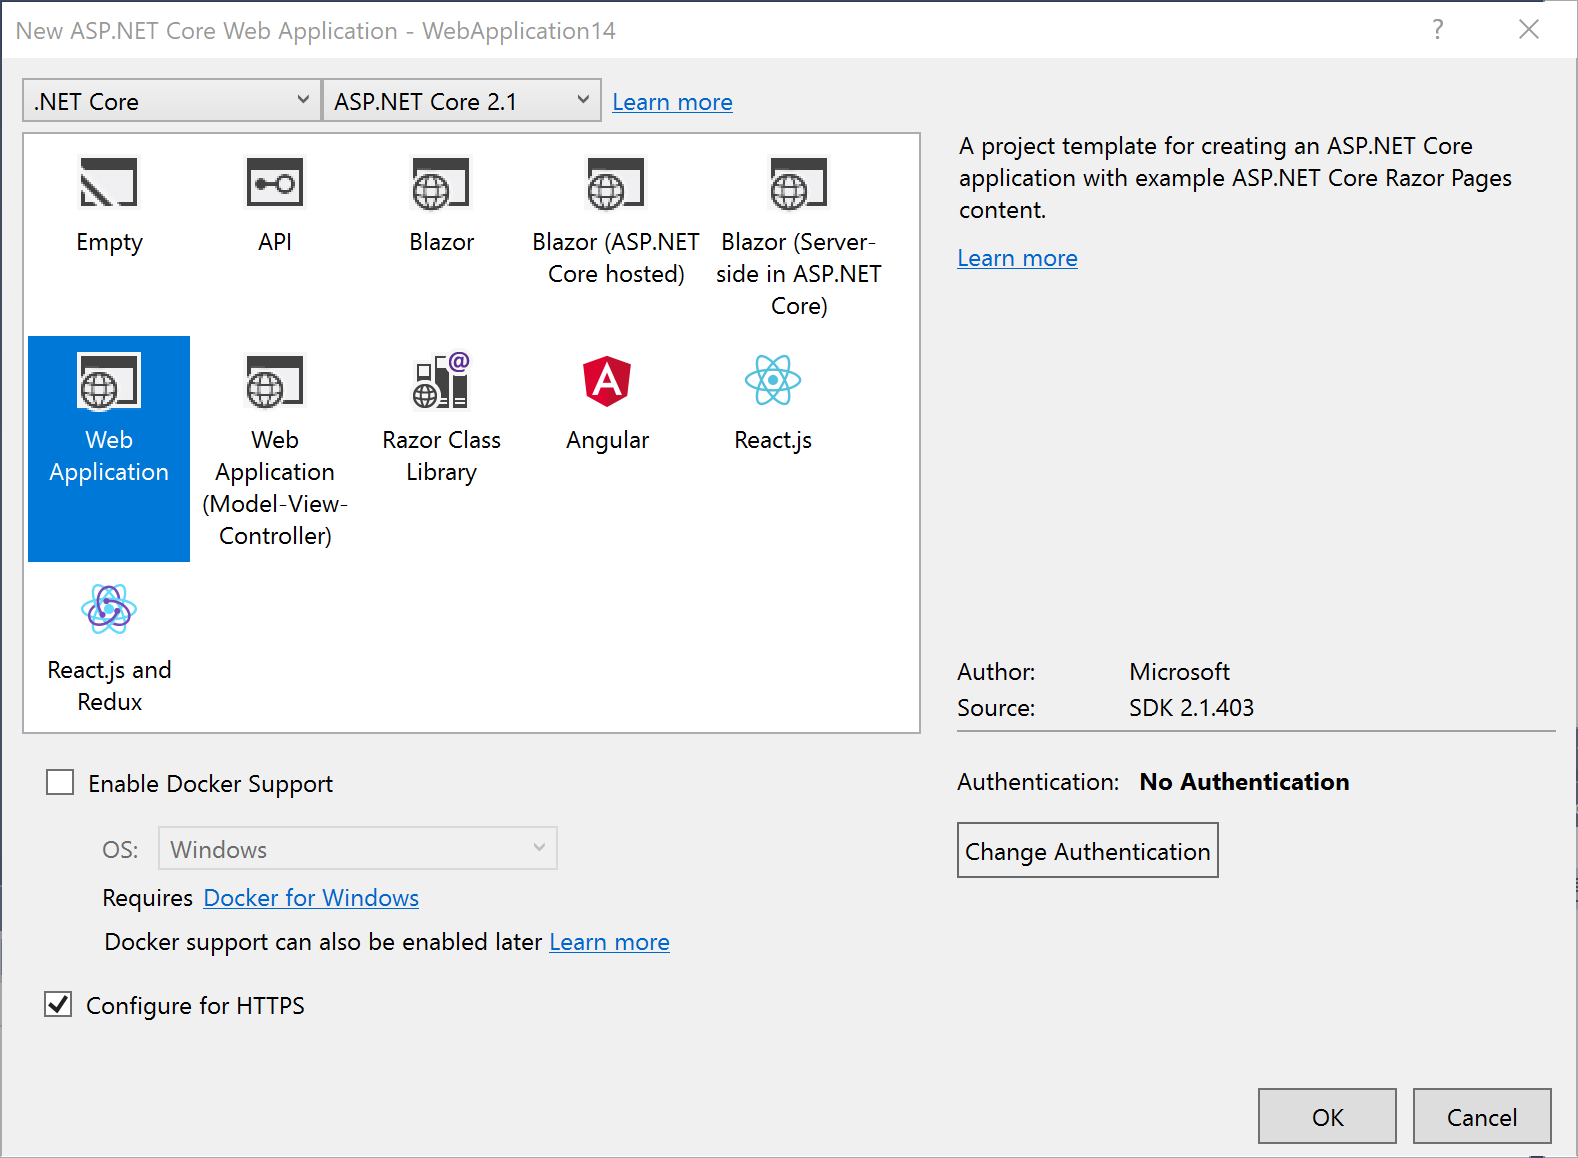
Note that this “Web Application” option will create an ASP .NET Core App with Razor Pages by default, as opposed to a traditional MVC web app with Models, Views and Controllers.
Reuse UI from Library in Web App
- Open _Layout.cshtml from /Pages/Shared/ in the Web App project
- Add a dependency to use the Razor Class Library
- Add <partial> tags to reuse the _Header and _Footer views
- Add new Pages that contain unique content
- Update the /Pages/Index.cshtml page to include links to various pages
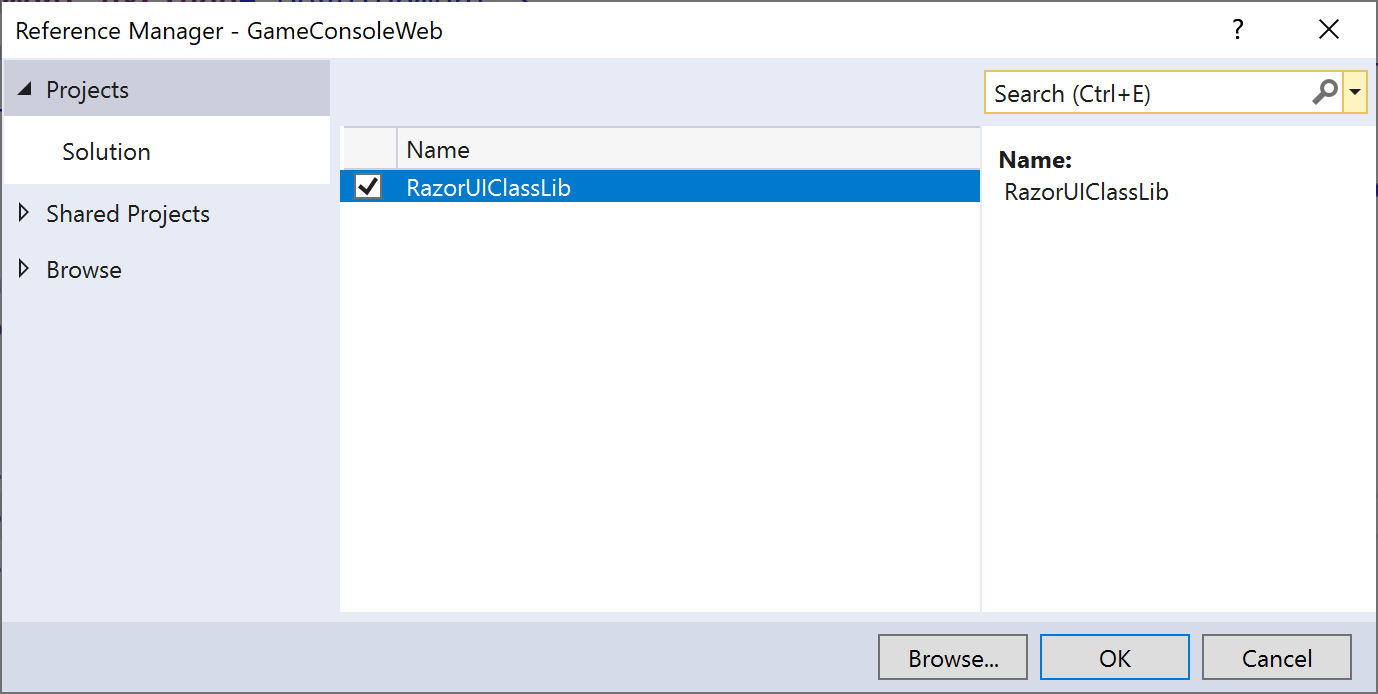
To add the dependency:
- Right-click the Web App project
- Select Add | Reference…
- Select the Class Library project under Projects | Solution and click OK
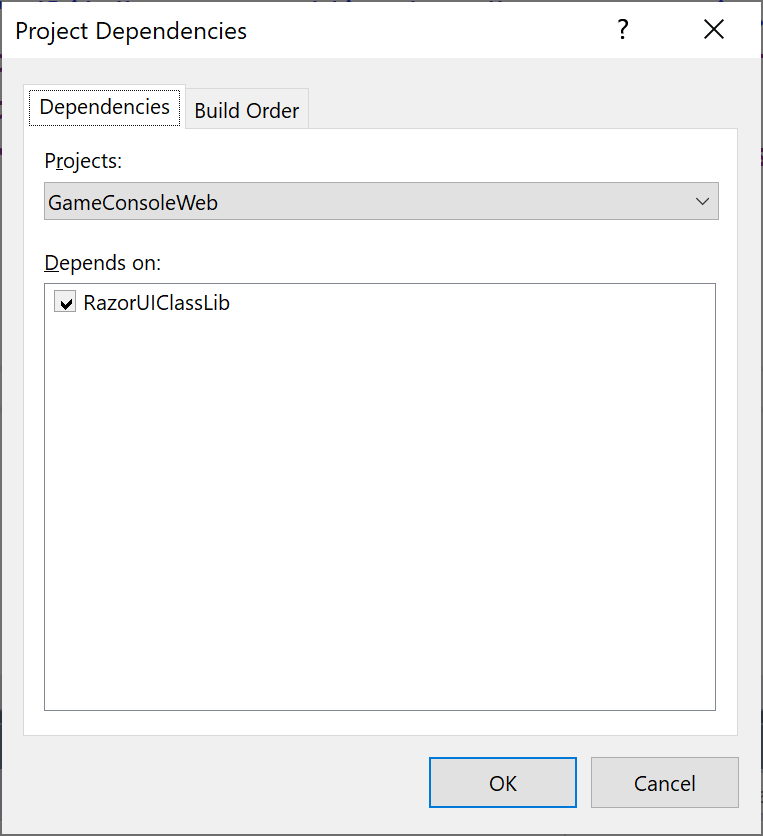
To ensure the correct build dependencies:
- Right-click the Web App project
- Select Build Dependencies | Project Dependencies
- Ensure that the desired Razor Class Library is selected
One way to reuse the partial views is to update the <body> in _Layout.cshtml file to look something like this.
<body>
 <partial name="_Header">
 @RenderBody()
 <partial name="_Footer">
</body>
In this sample, the @RenderBody() call within the _Header and _Footer views allows the page to reuse the same header and footer content in every page. Feel free to use your own partial views and shared content in any way you see fit.
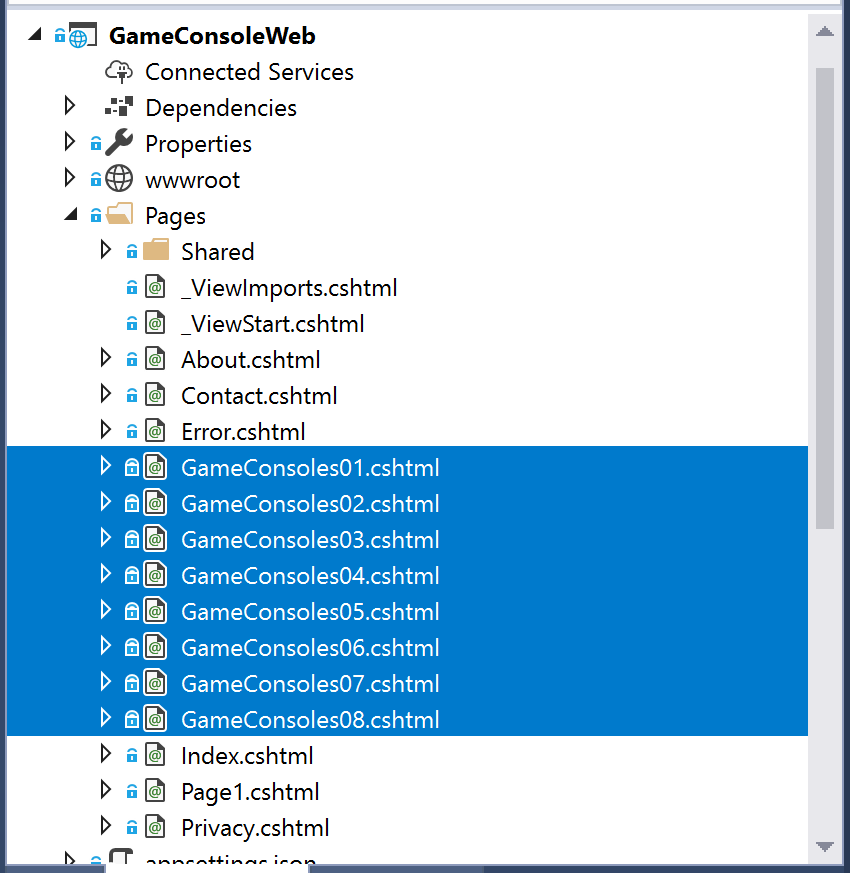
In the sample Index.cshtml page, there is a list of links, e.g.
<ul>
    <li>
        <a asp-page="./GameConsoles01">First generation (1972–1980)</a>
    </li>
...
</ul>
Also in the /Pages folder, there is a series of sample pages to display information about various video game console generations, e.g. GameConsoles01 through 08.
Running the Application
In Visual Studio 2017:
- Right click the Web App project to Set as Startup Project
- Click F5 on your keyboard or Debug | Start Debugging to run the web app
- Verify the Index page has loaded with its main content sandwiched between the shared header and footer.
- Click on one of the links to view additional pages that share the same header and footer.
IMPORTANT: Please note that your application uses the view, partial view or Razor Page from the Web App, if that view/page exists in the same folder structure in both the web app *and* and the Razor Class Library. In other words, the Web App takes precedence when looking for a named view or page.
Bonus: Identity as UI Library
As of ASP .NET Core 2.1, you can now include ASP .NET Core Identity features into your web app without having to include all the source code that goes along with it. These features are included in a Razor UI Class Library by default.
When you’ve added Authentication to a Web Project, you can then override anything you’d like.
- Create a new Web App project with Authentication
- Right-click your project in Solution Explorer
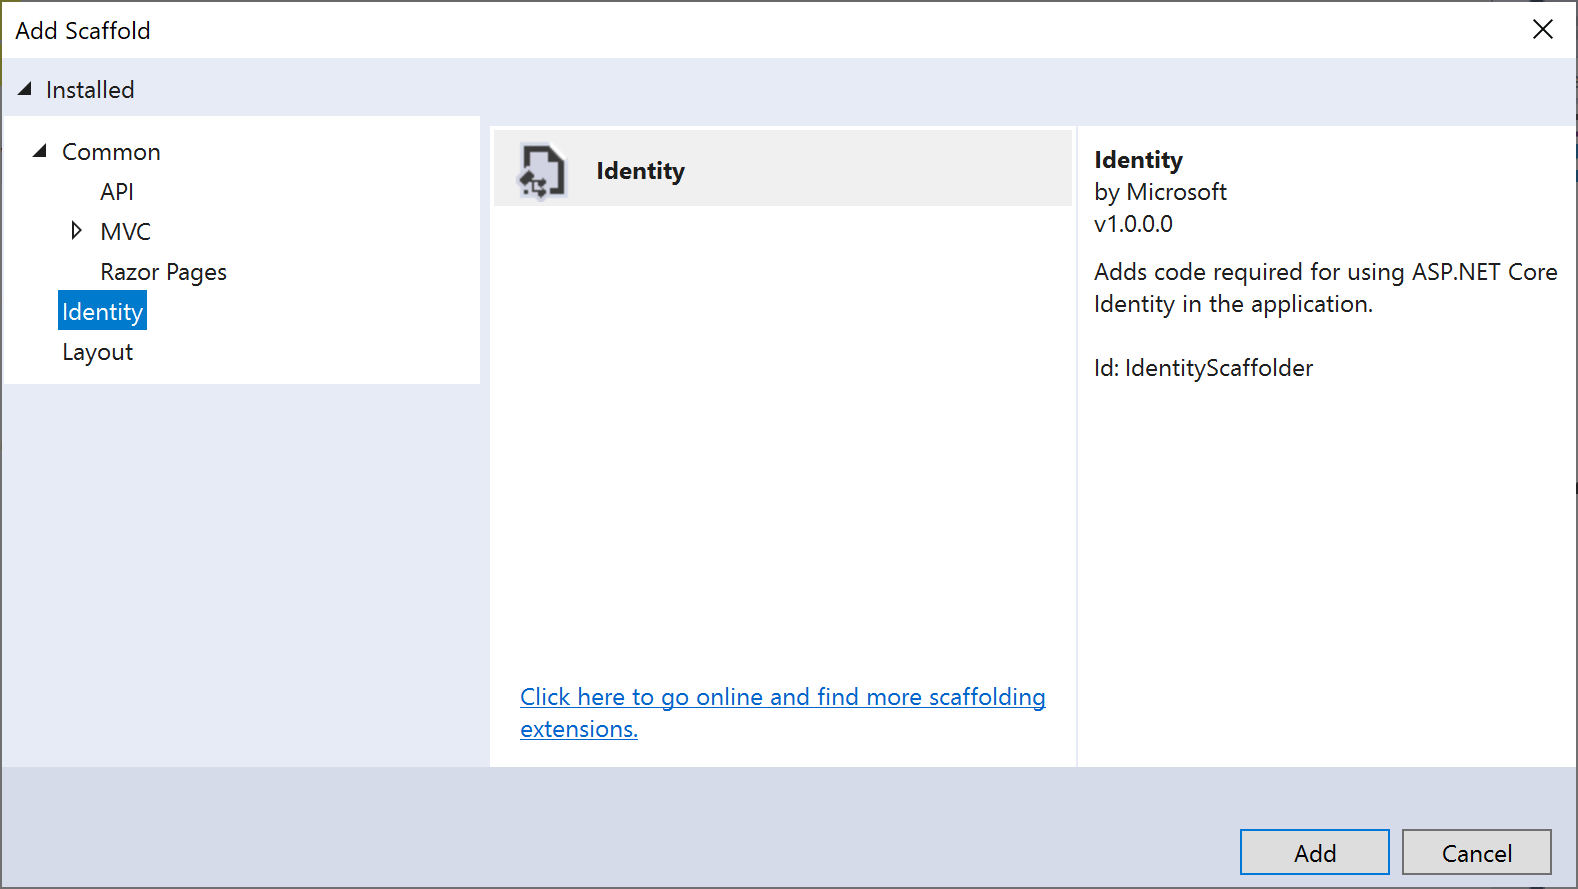
- Click Add | New Scaffolded Item…
- In the popup dialog that appears, select Identity then Add
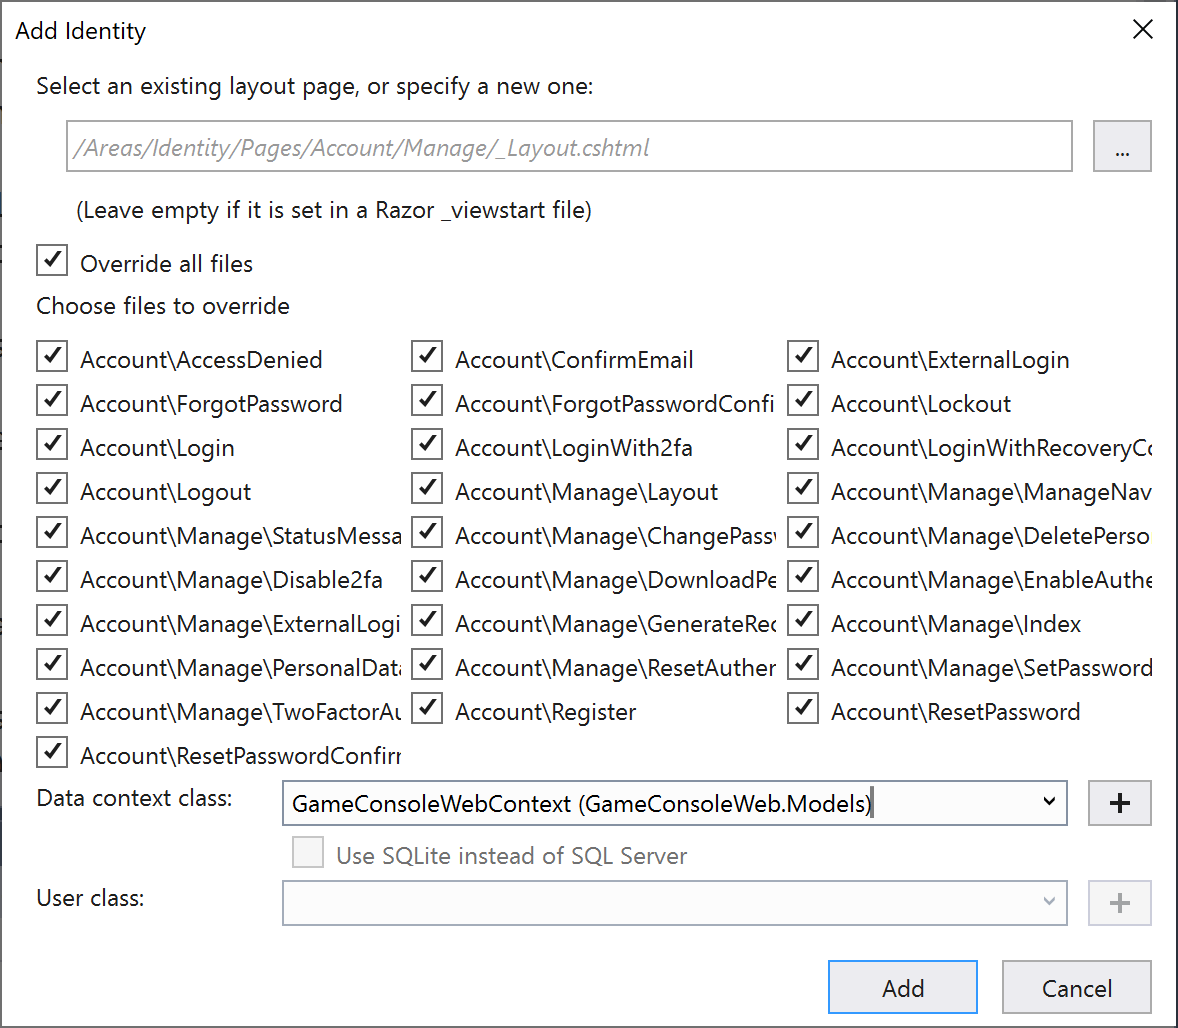
In the next popup dialog:
- Select specific files to override
- Optionally, choose “Override all files”
- Select a Data Context class or add a new one
- Click the Add button and wait for completion
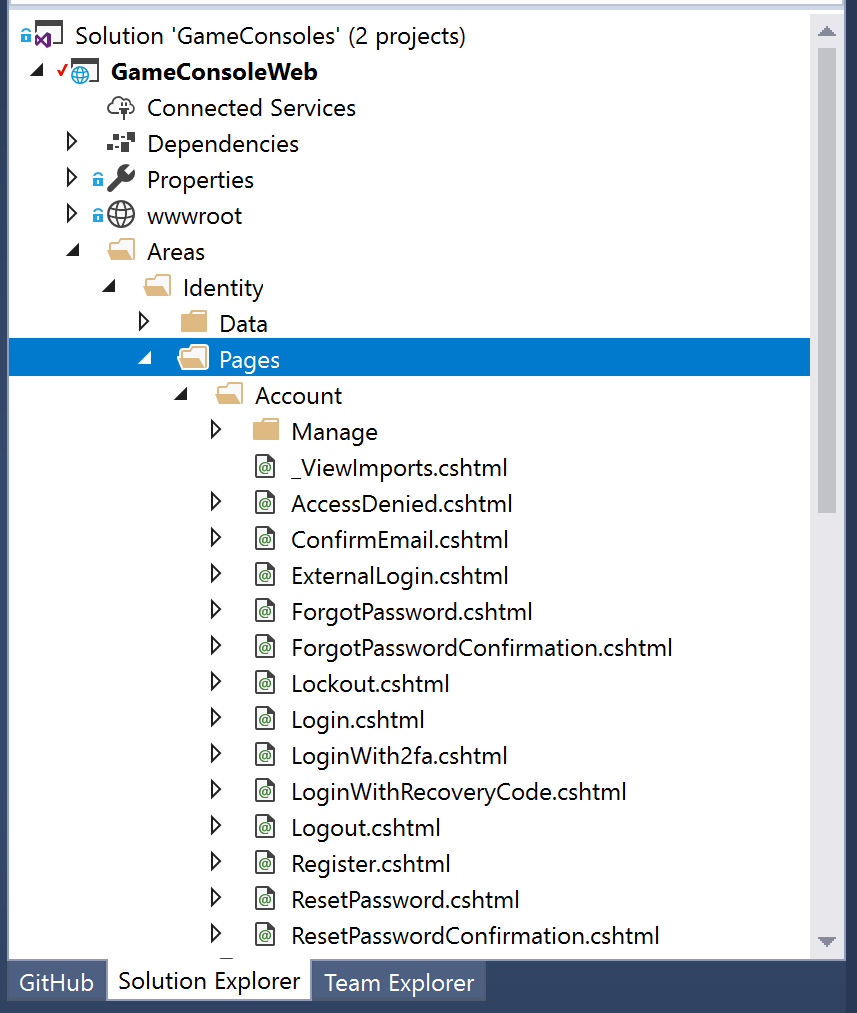
- Browse /Areas/Identity/Pages to see what was added
- Inspect the code and modify as desired
References:
Below are a list of relevant references, updated throughout 2018, as of this writing:
- March 1: ASP.NET Core 2.1.0-preview1: Razor UI in class libraries
- May 10: ASP.NET Core 2.1: Razor UI as Class Library
- July 7: Walkthrough: Creating an HTML Email Template with Razor and Razor Class Libraries and Rendering it from a .NET Standard Class Library
- July 18: ASP.NET Core Identity Pages with ASP.NET Core 2.1
- August 7: Introduction to Identity on ASP.NET Core
- August 8: Razor Class Library – Create Reusable UI In ASP.NET Core
- September 6: Reusable Razor UI in class libraries with ASP.NET Core
- October 31: (Code for above) Docs/aspnetcore/razor-pages/ui-class/samples at master · aspnet/Docs
- October 23: Scaffold Identity in ASP.NET Core projects
- October 31: ASP .NET Core Identity Demo
Pingback: Your First Razor UI Library with ASP .NET Core - How to Code .NET
Pingback: Dew Drop - December 3, 2018 (#2851) - Morning Dew
Not everyone is running Windows/Visual Studio. Can you provide some guidance on how to accomplish these things in VS Code, like MS does with their site?
See here for examples:
https://docs.microsoft.com/en-us/aspnet/core/tutorials/first-web-api?view=aspnetcore-2.1 (VS)
https://docs.microsoft.com/en-us/aspnet/core/tutorials/web-api-vsc?view=aspnetcore-2.1 (VSCode)
Good idea. Will try to update the post this week, before publishing next week’s post.
Pingback: 1 – The Second Annual C# Advent | Traffic.Ventures Social
Pingback: Authentication & Authorization in ASP .NET Core Razor Pages | Wake Up And Code!
Pingback: .NET Core 3.0, VS2019 and C# 8.0 for ASP .NET Core developers | Wake Up And Code!
Pingback: Authentication & Authorization in ASP .NET Core 3.1 | Wake Up And Code!
Pingback: .NET 5.0, VS2019 Preview and C# 9.0 for ASP .NET Core developers | Wake Up And Code!