This is the ninth of a series of posts on ASP .NET Core in 2019. In this series, we’ll cover 26 topics over a span of 26 weeks from January through June 2019, titled A-Z of ASP .NET Core!
 A – Z of ASP .NET Core!
In this Article:
- I is for IIS Hosting
- Developing for IIS
- IIS Configuration in Visual Studio
- ASP .NET Core Module
- BONUS: Publishing to a VM with IIS
- References
I is for IIS Hosting
If you’ve been reading my weekly blog posts in this series (or you’ve worked with ASP .NET Core), you probably know that ASP .NET Core web apps can run on multiple platforms. Since Microsoft’s IIS (Internet Information Services) web server only runs on Windows, you may be wondering why we would need to know about IIS-specific hosting at all.
Well, we don’t need IIS to run ASP .NET Core, but there are some useful IIS features you can take advantage of. In fact, ASP .NET Core v2.2 introduced in-process hosting in IIS with the ASP .NET Core module. You can run your app either in-process or out of process.
From the 2.2 release notes of what’s new:
“In earlier versions of ASP.NET Core, IIS serves as a reverse proxy. In 2.2, the ASP.NET Core Module can boot the CoreCLR and host an app inside the IIS worker process (w3wp.exe). In-process hosting provides performance and diagnostic gains when running with IIS.”
You can browse an IIS-configured sample app on GitHub at the following location:
![]() IIS-configured sample: https://github.com/shahedc/IISHostedWebApp
IIS-configured sample: https://github.com/shahedc/IISHostedWebApp
NOTE: The actual web.config file has been intentionally left out from the above repo, and replaced with a reference file, web.config.txt. When you follow the configuration steps outlined below, the actual web.config file will be generated with the proper settings.
Developing for IIS
In order to develop for IIS on your local development machine while working with Visual Studio, you should complete the following steps:
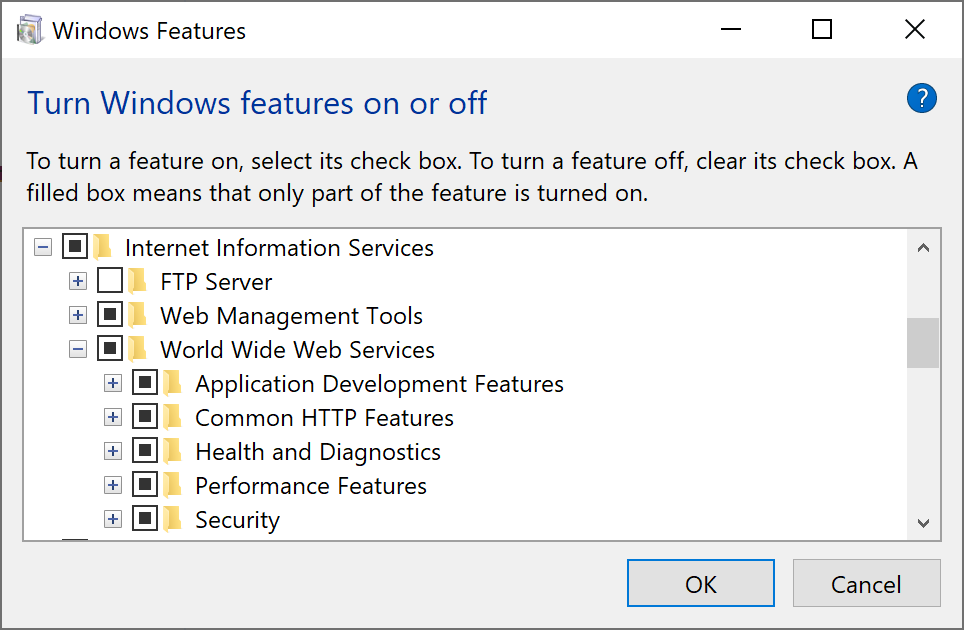
- Install/Enable IIS locally: add IIS via Windows Features setup
- Configure IIS: add website with desired port(s)
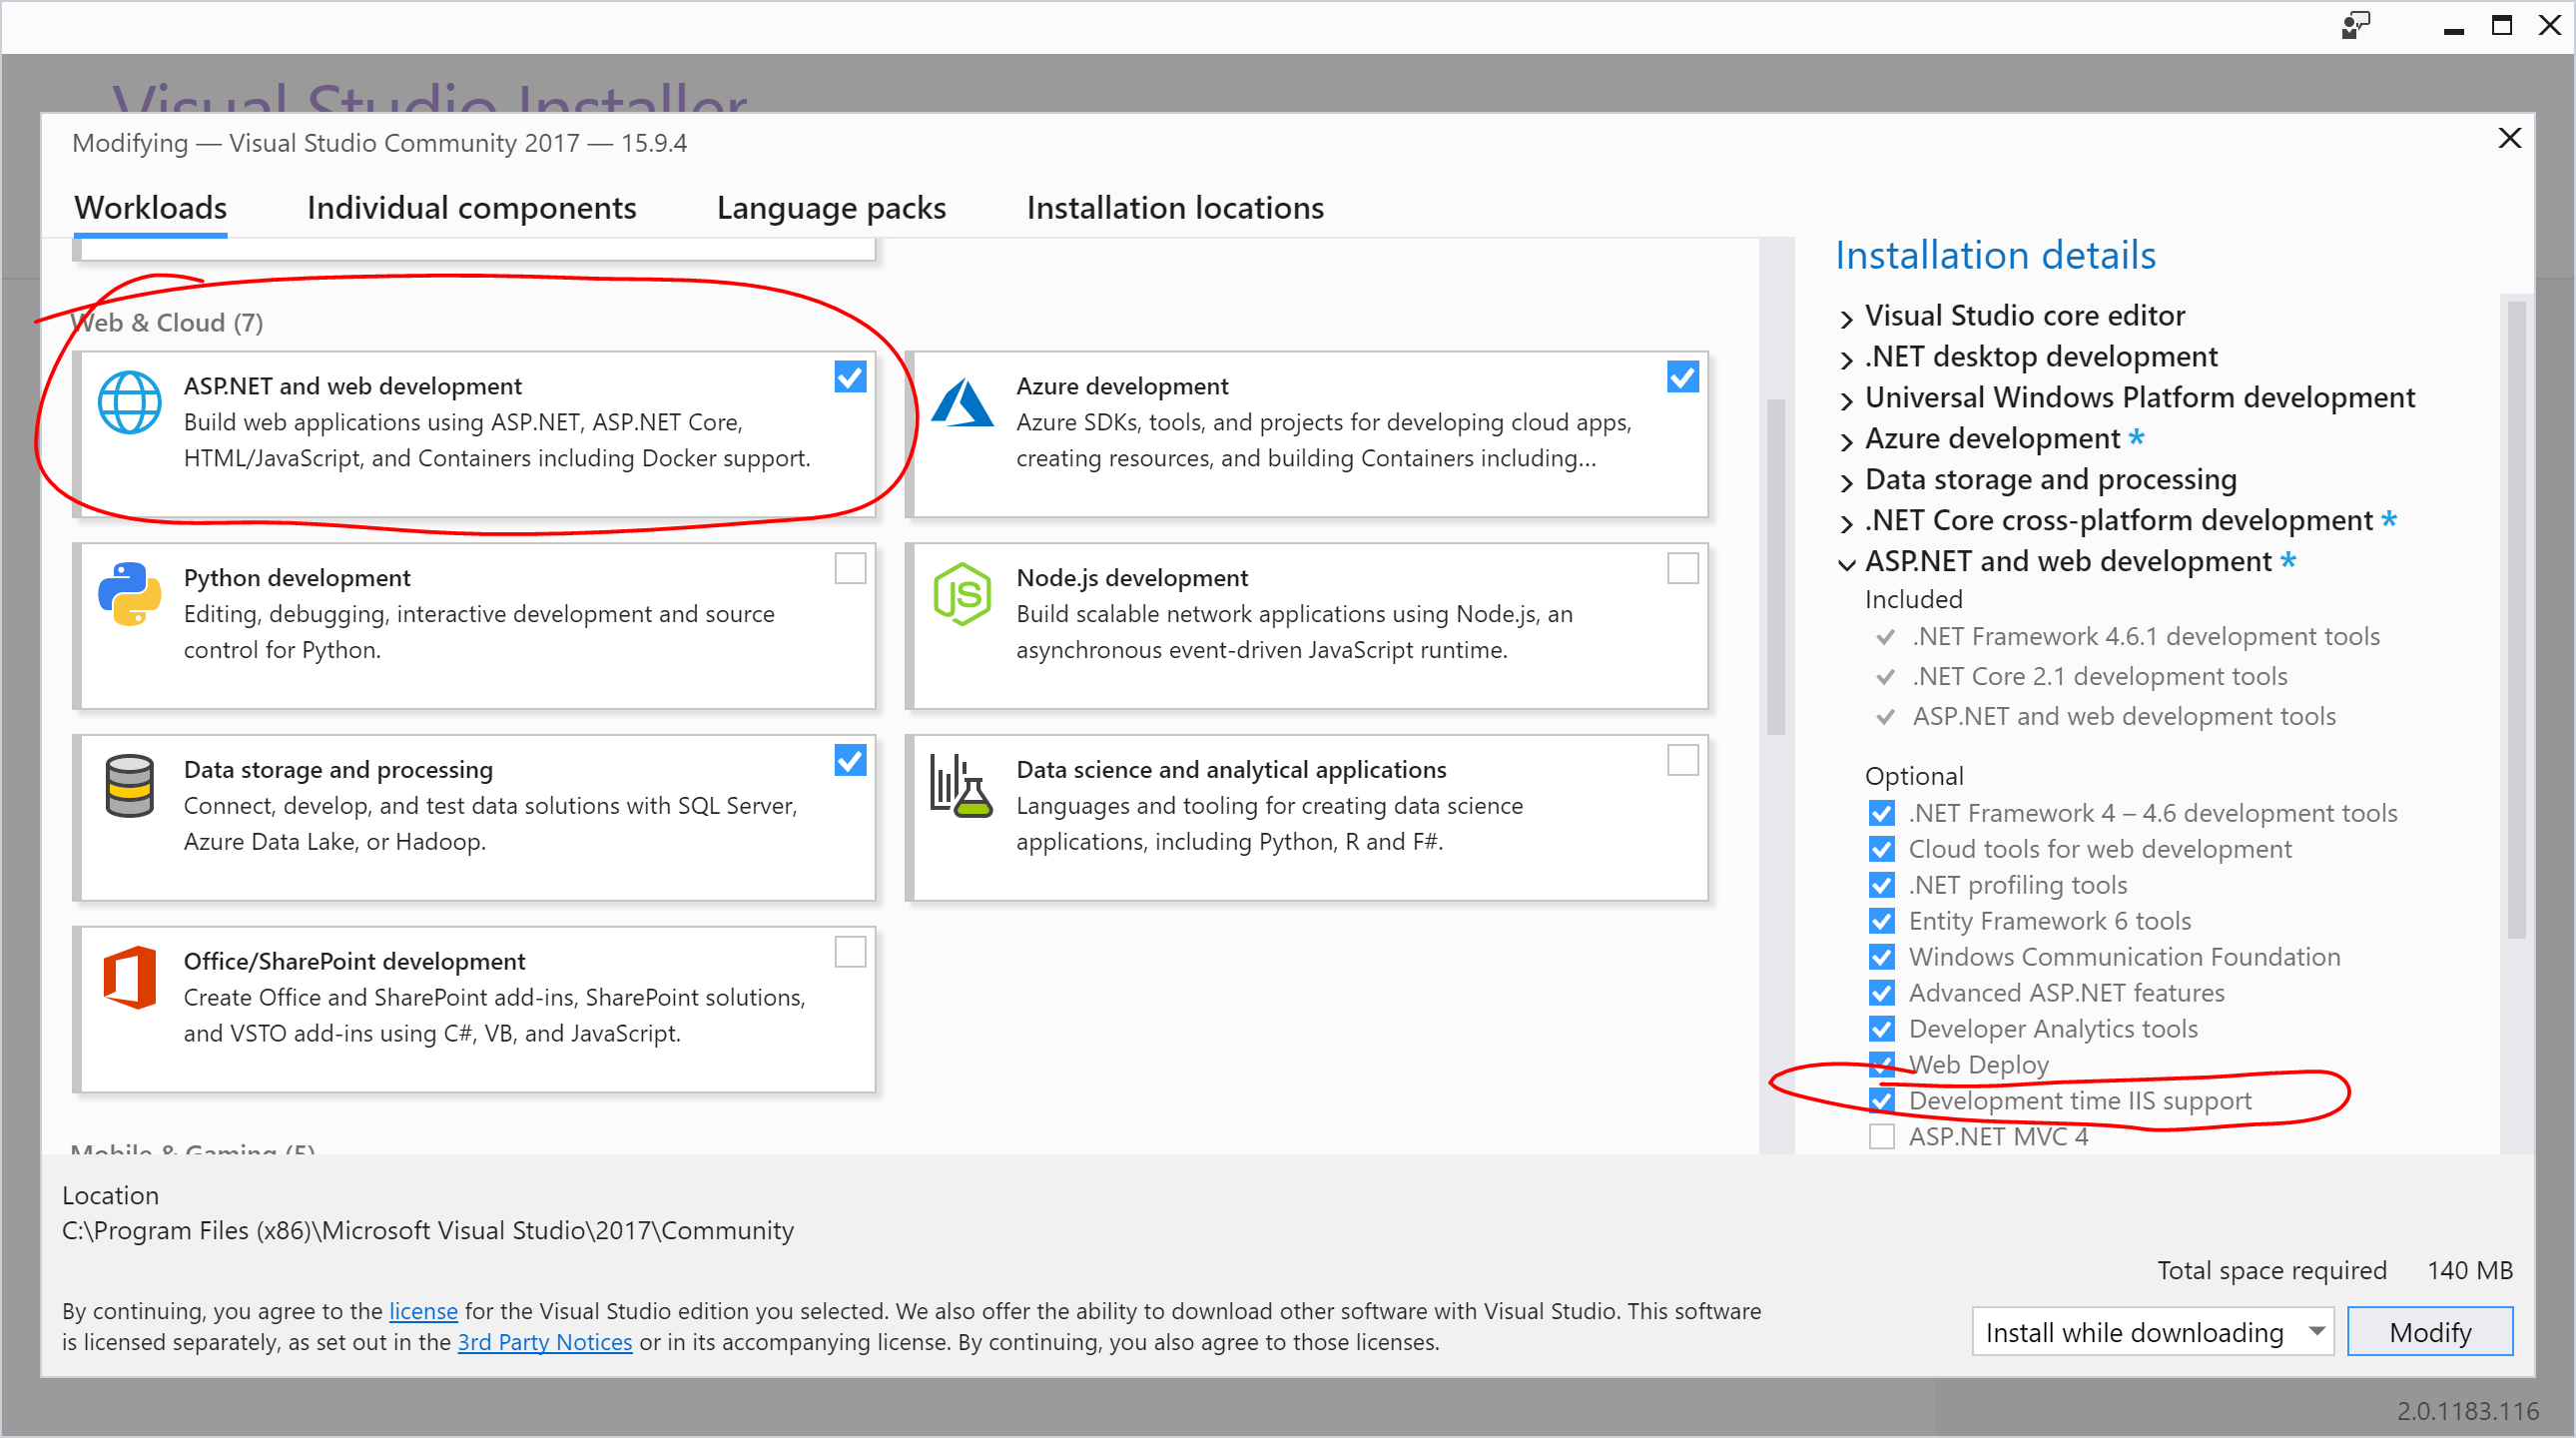
- Enable IIS support in VS: include dev-time IIS support during setup
- Configure your web app: enable HTTPS, add launch profile for IIS
NOTE: If you need help with any of the above steps, you may follow the detailed guide in the official docs:
- Development-time IIS support in Visual Studio for ASP.NET Core: https://docs.microsoft.com/en-us/aspnet/core/host-and-deploy/iis/development-time-iis-support?view=aspnetcore-2.2
After Step 1 (IIS installation), the list of Windows Features should show that IIS and many of its components have been installed.
During and after Step 2 (IIS configuration), my newly added website looks like the screenshots shown below:
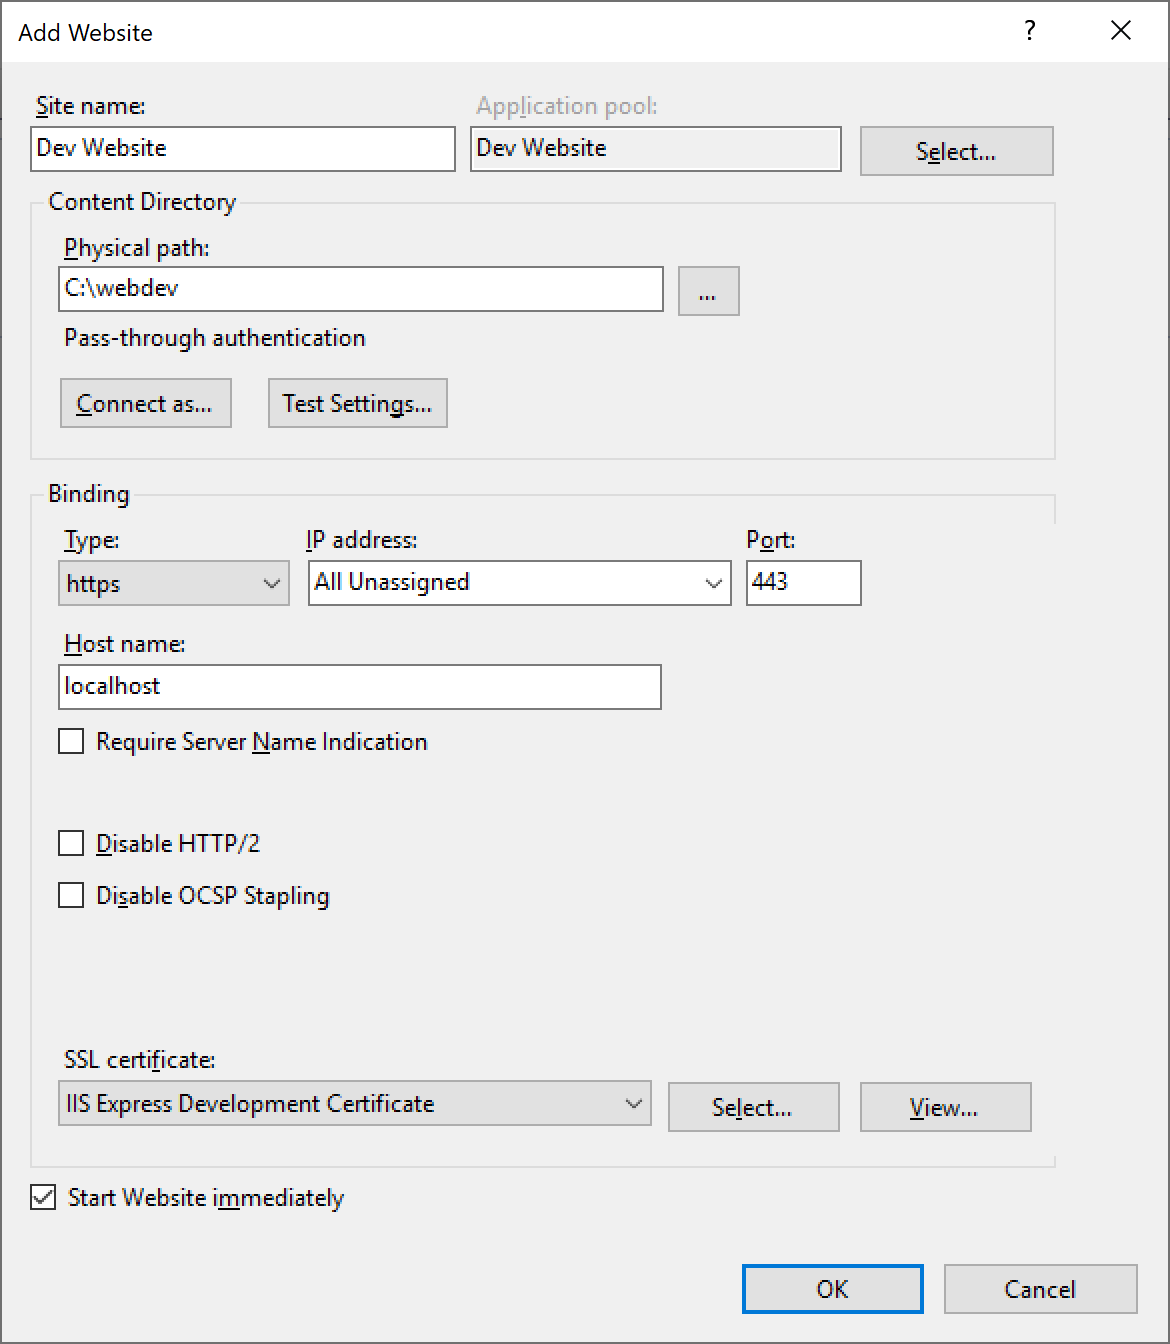
Add New Website
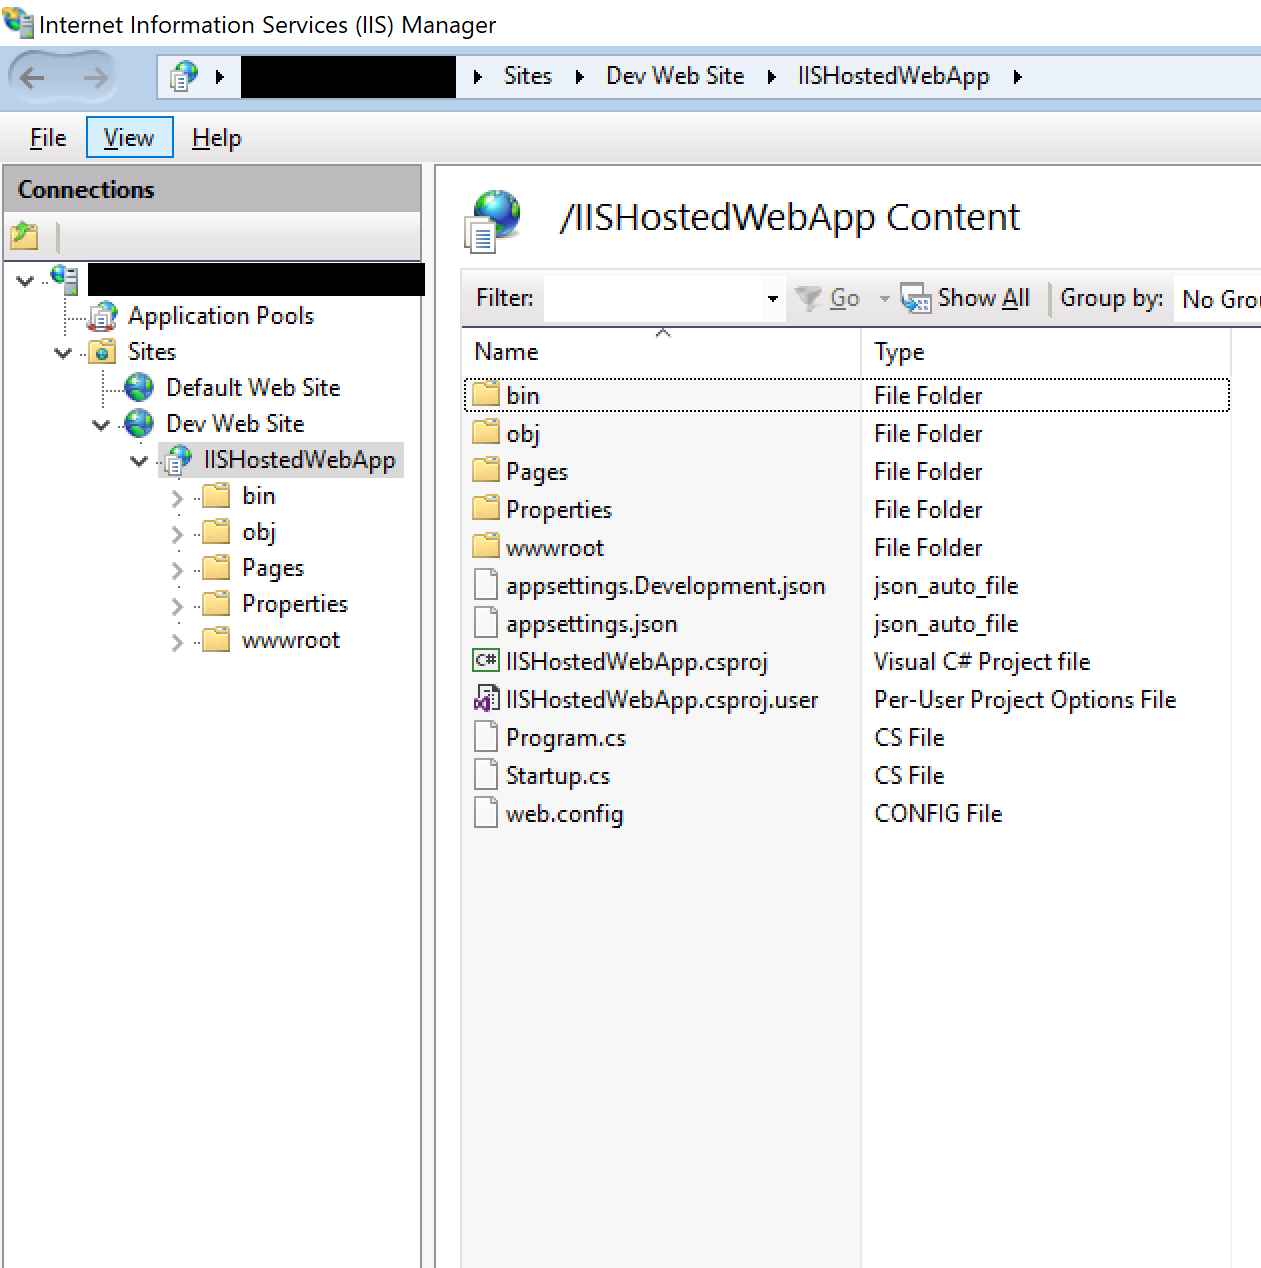
Explore Added Website
For Step 3 (IIS support in VS) mentioned above, make sure you select the “Development time IIS support” option under the “ASP .NET and web development” workload. These options are shown in the screenshot below:
After Step 4 (web app config), I can run the web application locally on IIS. Check out the next section to learn more about your web application configuration. In addition to the .csproj settings, you’ll also need a web.config file in addition to your appsettings.json file.
Optionally, you could set up a VM on Azure with IIS enabled and deploy to that web server. If you need some help with the setup, you can select a pre-configured Windows VM with IIS pre-installed from the Azure Portal.
If you need help with creating an Azure VM with IIS, check out the following resources:
- Create Windows VM in Azure portal: https://docs.microsoft.com/en-us/azure/virtual-machines/windows/quick-create-portal
- Create VMs running an IIS, etc: https://docs.microsoft.com/en-us/azure/virtual-machines/windows/tutorial-iis-sql
- (Pre-configured) IIS on Windows Server 2016: https://azuremarketplace.microsoft.com/en-us/marketplace/apps/apps-4-rent.iis-on-windows-server-2016
IIS Configuration in Visual Studio
After completing Step 4 using the instructions outlined above, let’s observe the following:
- Profile: Debug tab in project properties
- Project: .csproj settings
- Settings: launchSettings.json
- Config: web.config file
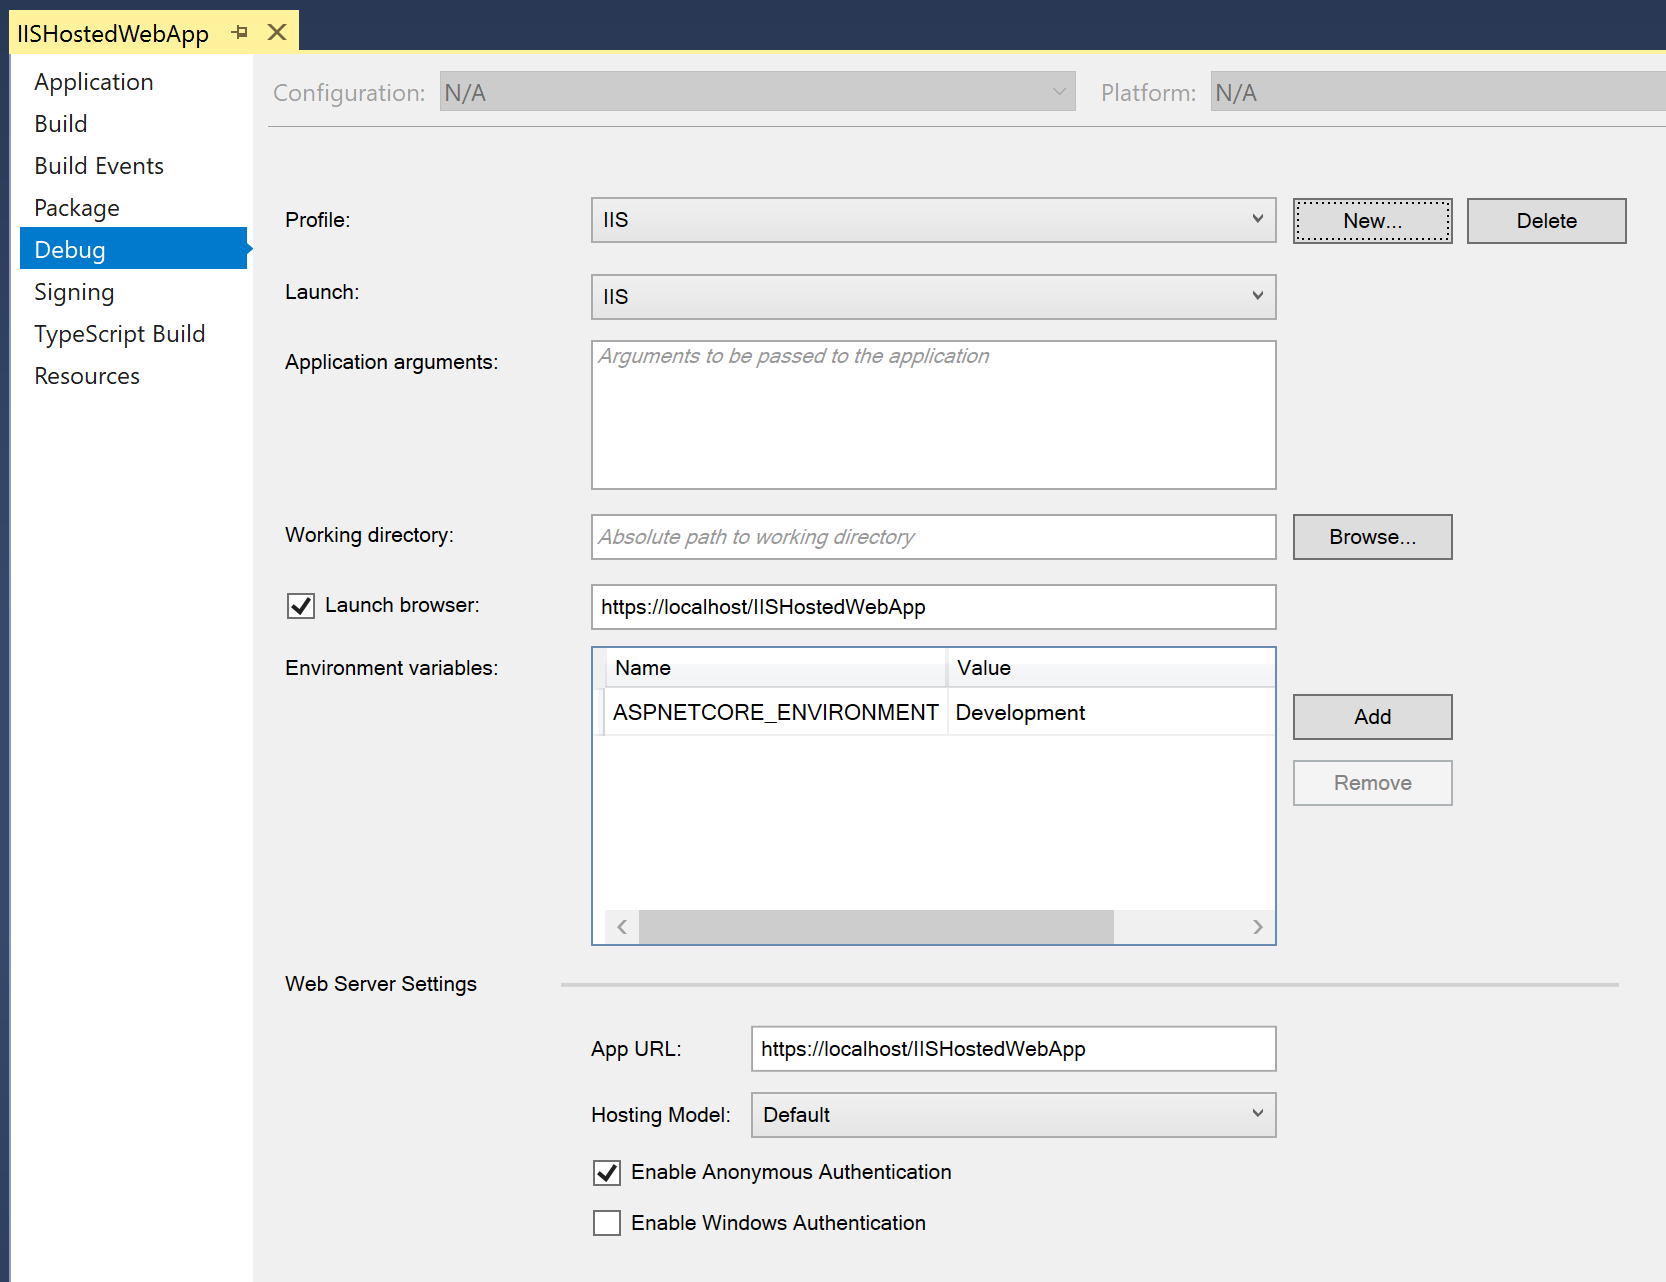
Profile: With your web project open in Visual Studio, right-click the project in Solution Explorer, and then click Properties. Click the Debug tab to see the newly-added IIS-specific profile. Note that the Hosting Model offers 3 options: Default, In-Process and Out-of-process.
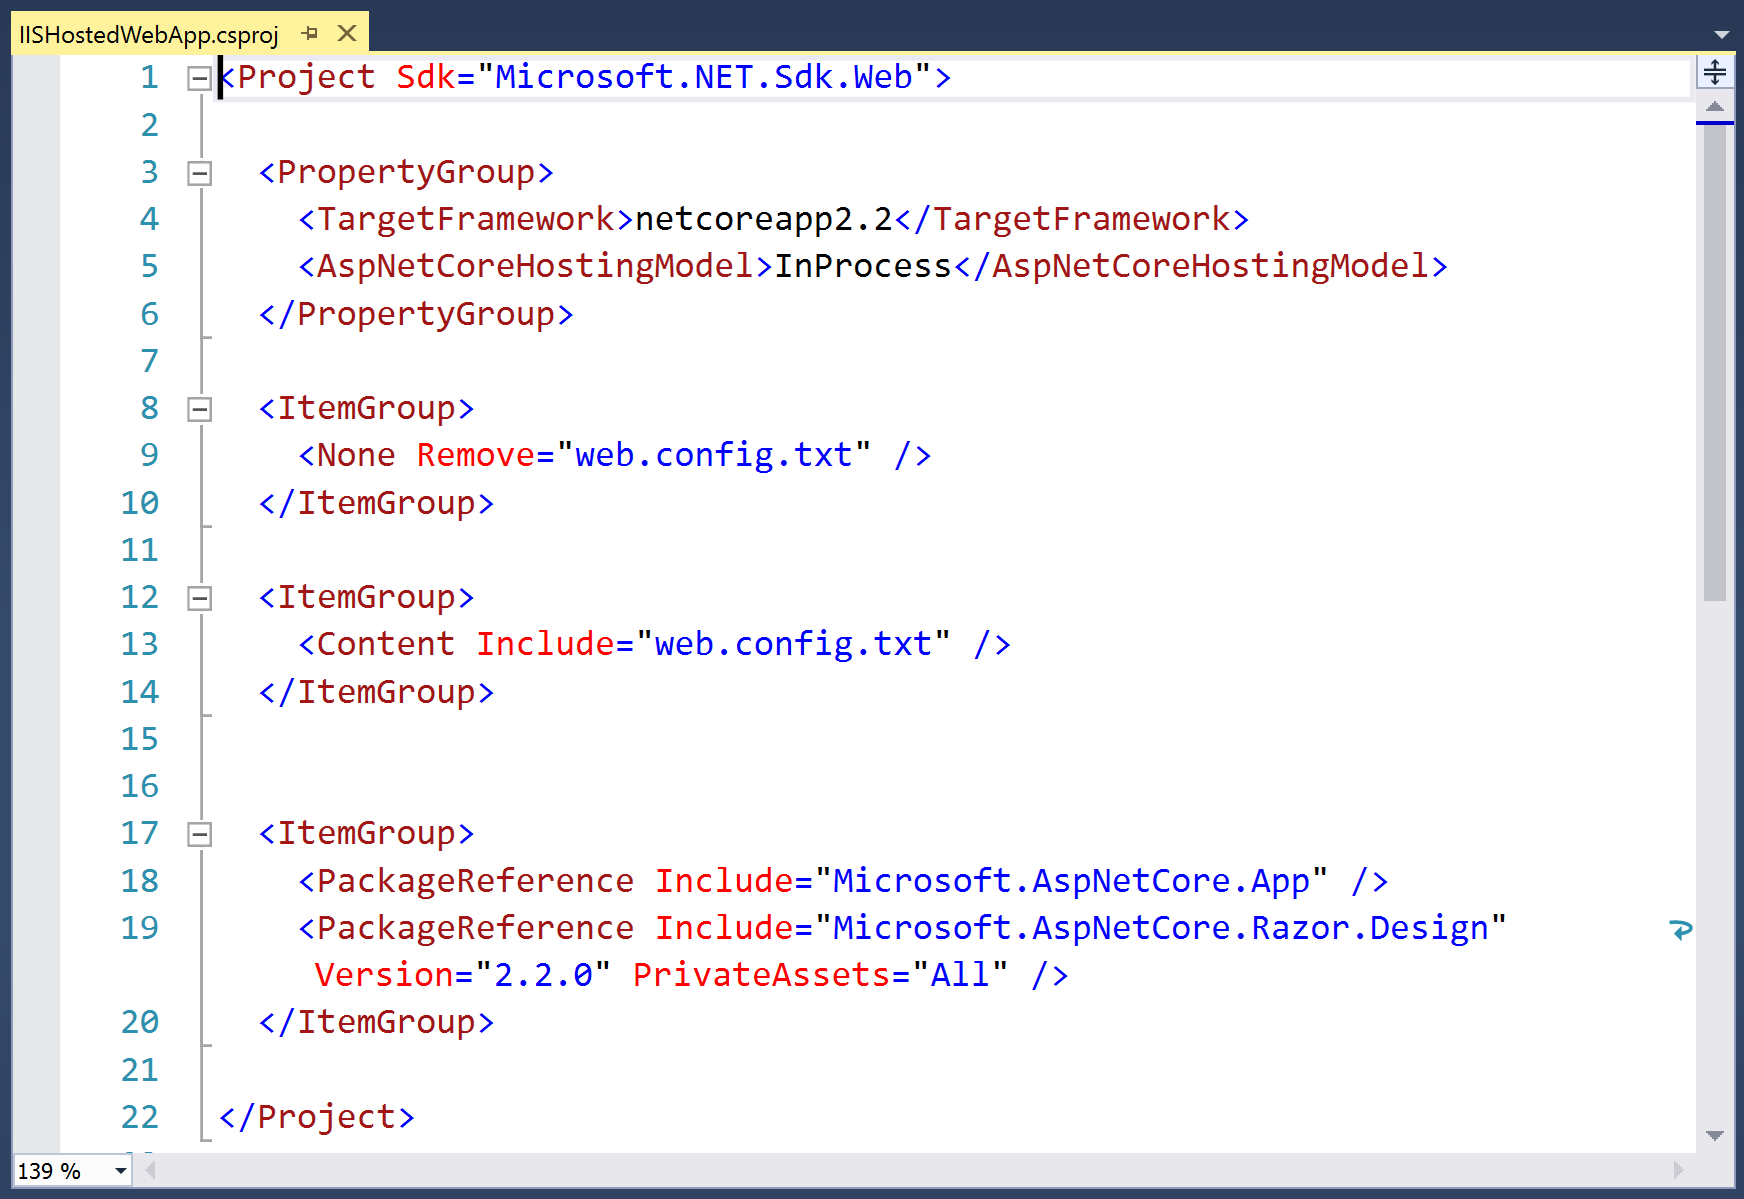
Project: Again in the Solution Explorer, right-click the project, then click Edit <projname>.csproj to view the .csproj file as a text file. Here, the <AspNetCoreHostingModel> setting is shown set to InProcess, and can be changed to OutOfProcess if desired.
Settings: Under the Properties node in the Solution Explorer, open the launchSettings.json file. Here, you can see all the settings for your newly-created IIS-specific Profile. You can manually add/edit settings directly in this file without having to use the Visual Studio UI.

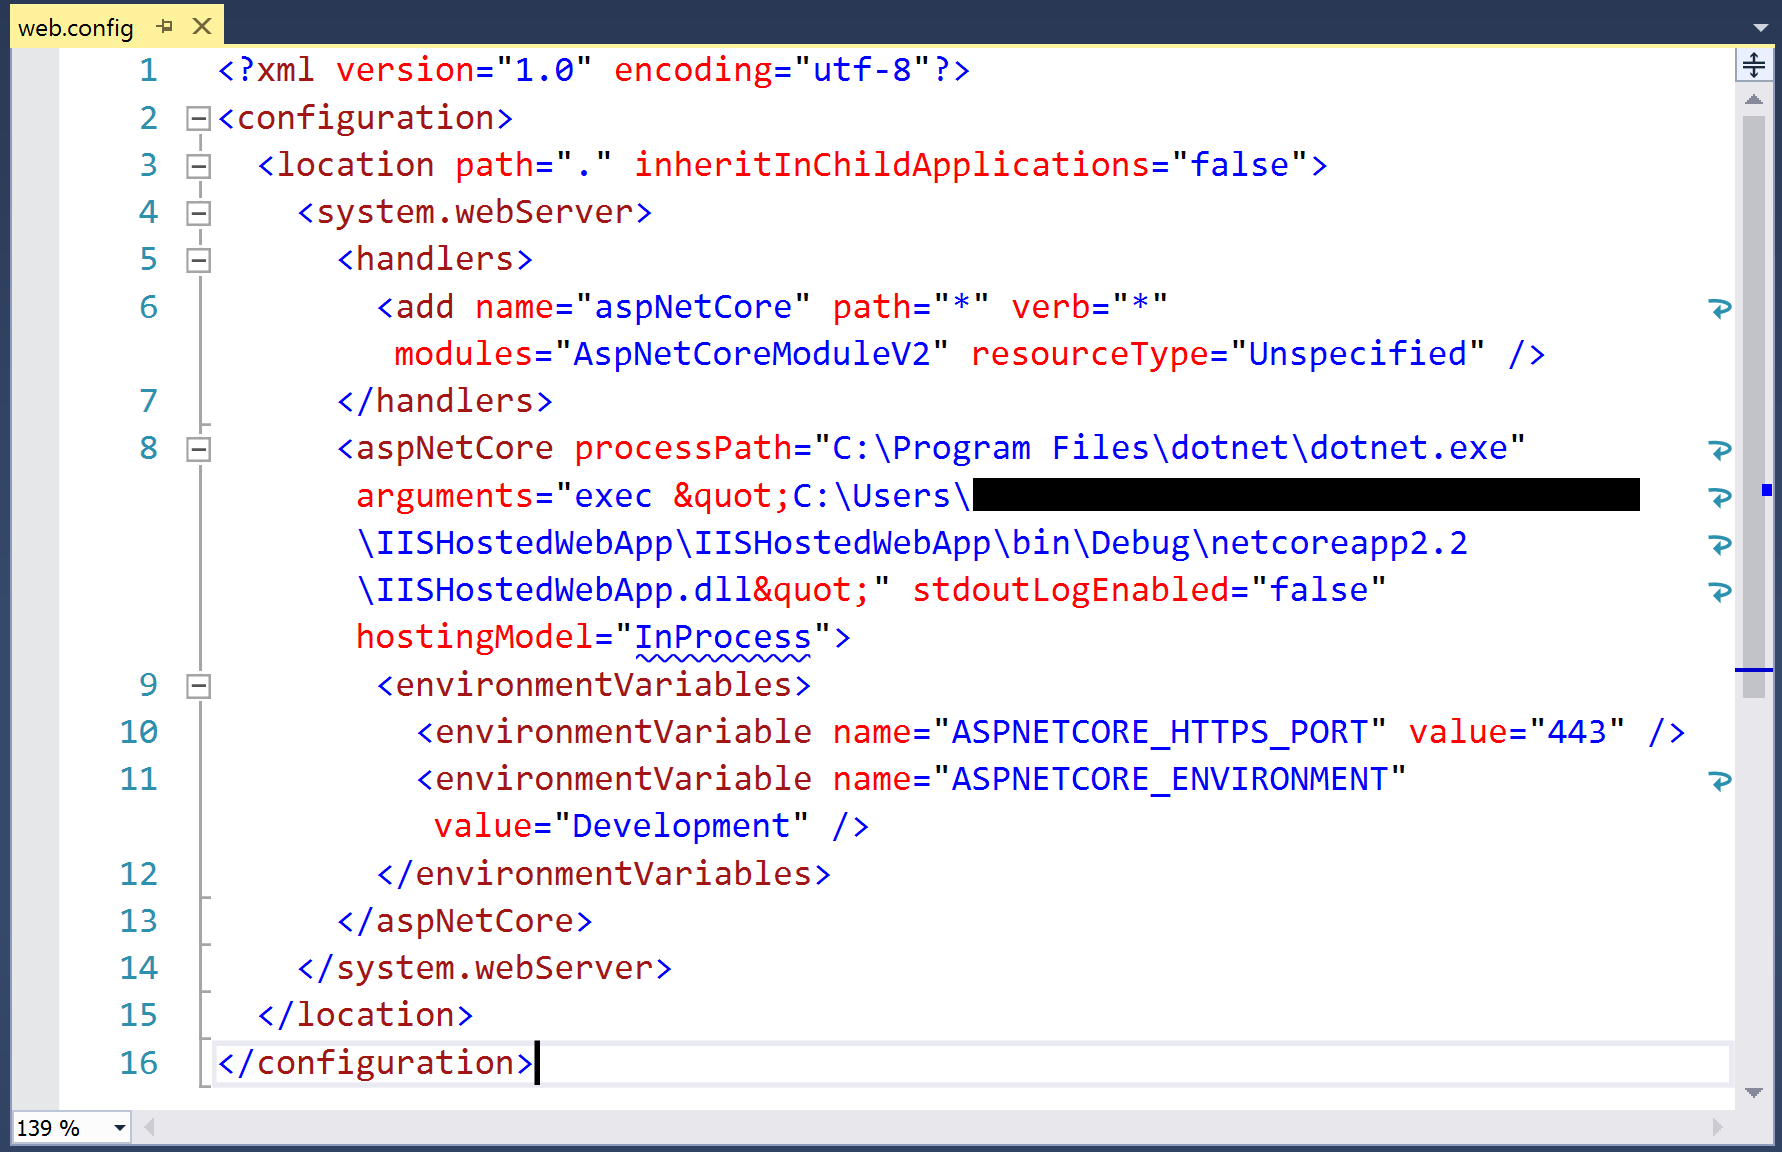
Config: You may recognize the XML-based web.config file from previous versions of ASP .NET, but the project’s settings and dependencies are now spread across multiple files, such as the .csproj file and appsettings.json config file. For ASP .NET Core projects, the web.config file is only used specifically for an IIS-hosted environment. In this file, you may configure the ASP .NET Core Module that will be used for your IIS-hosted web application.
Once your web app is configured, you can run it from Visual Studio using the profile you created previously. In order to run it using a specific profile, click the tiny dropdown next to the green Run/Debug button to select the desired profile. Then click the button itself. This should launch the application in your web browser, pointing to localhost running on IIS, e.g. https://localhost/<appname>
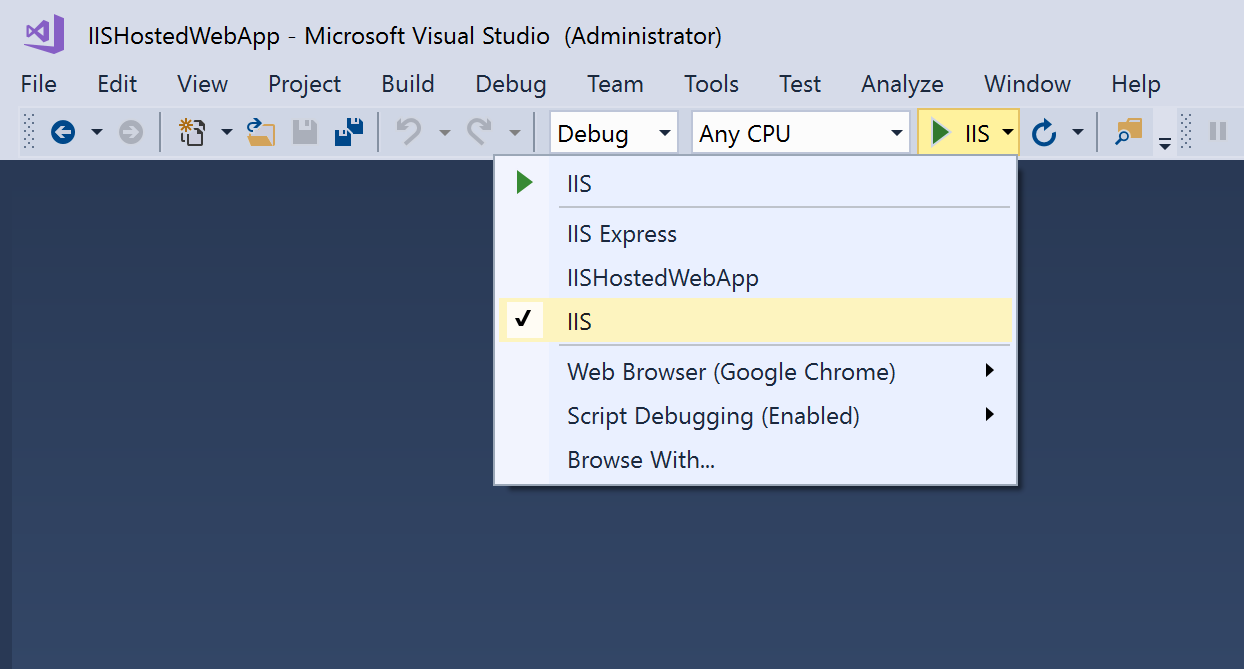
IIS Profile
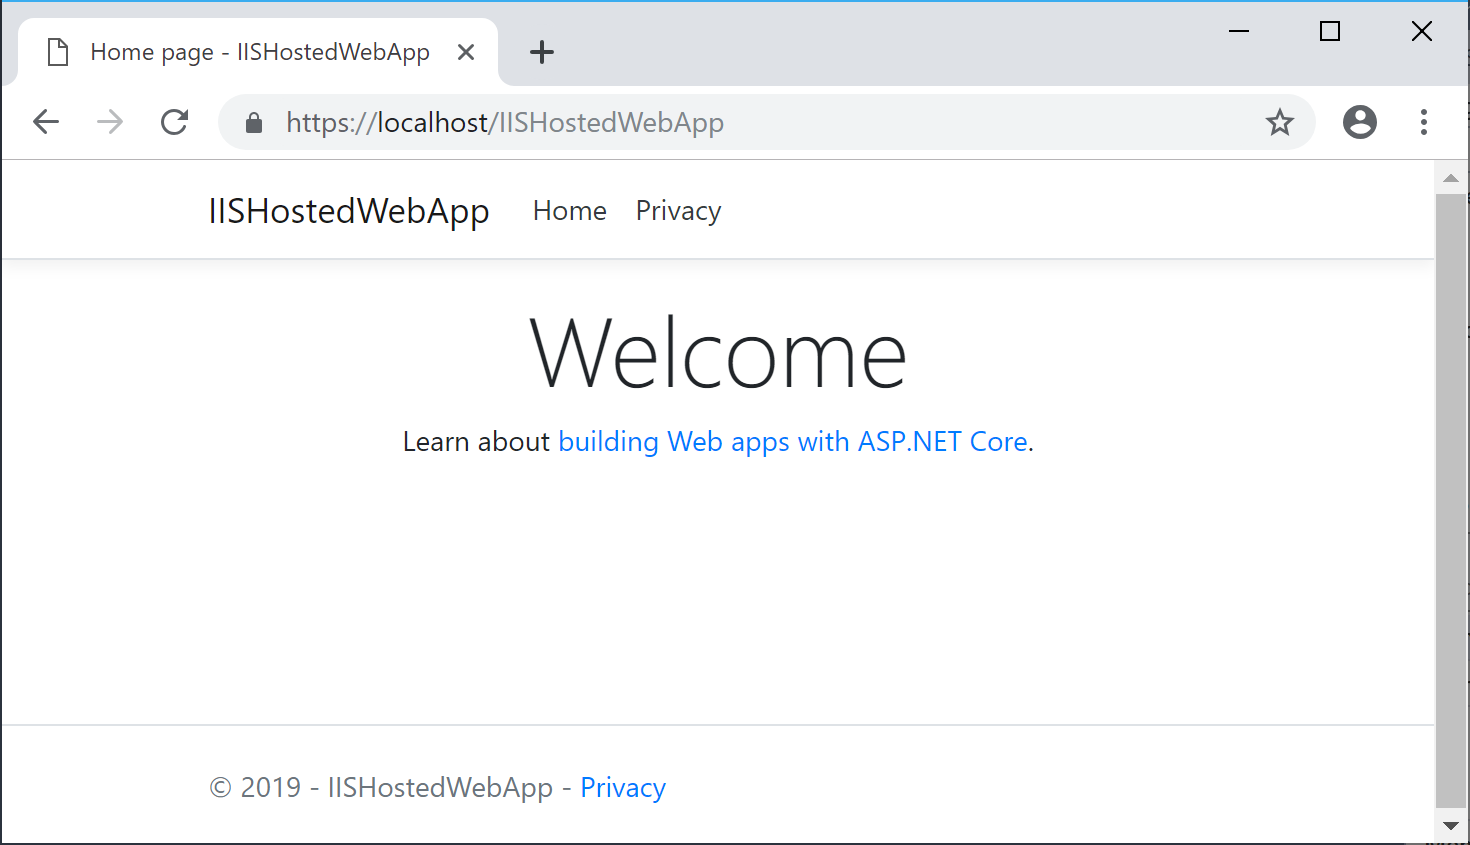
Running in a browser
ASP .NET Core Module
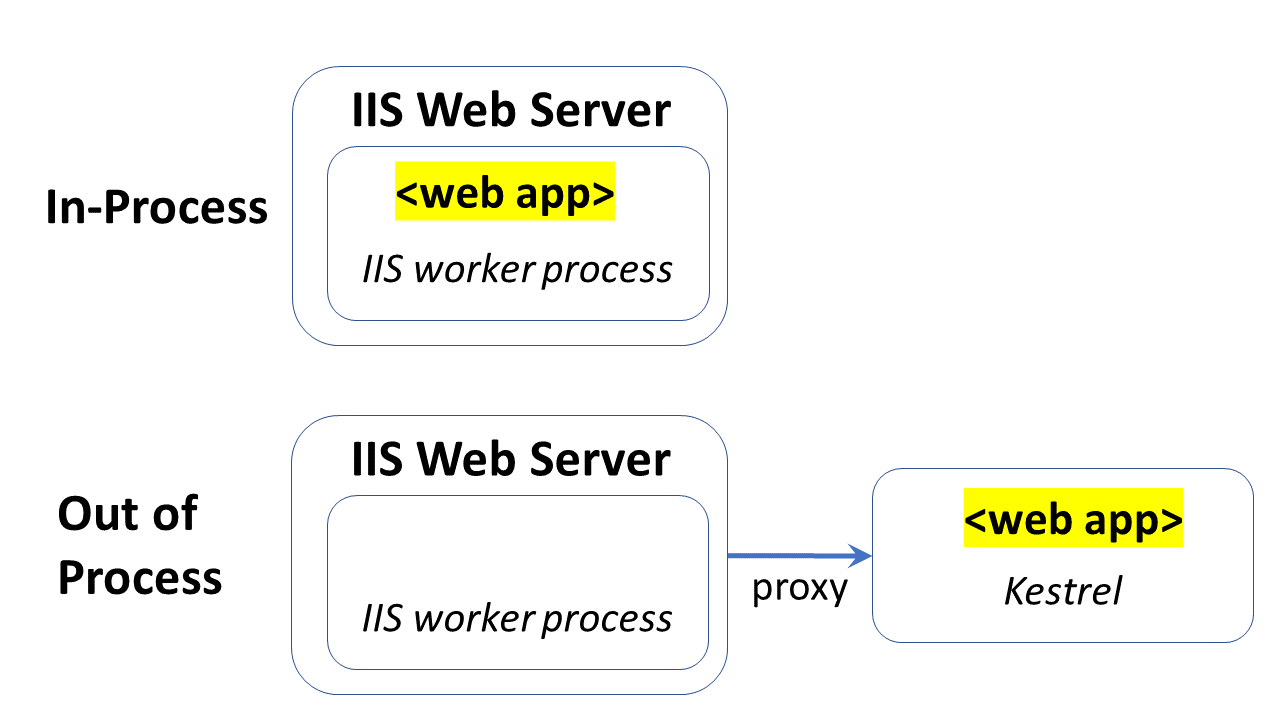
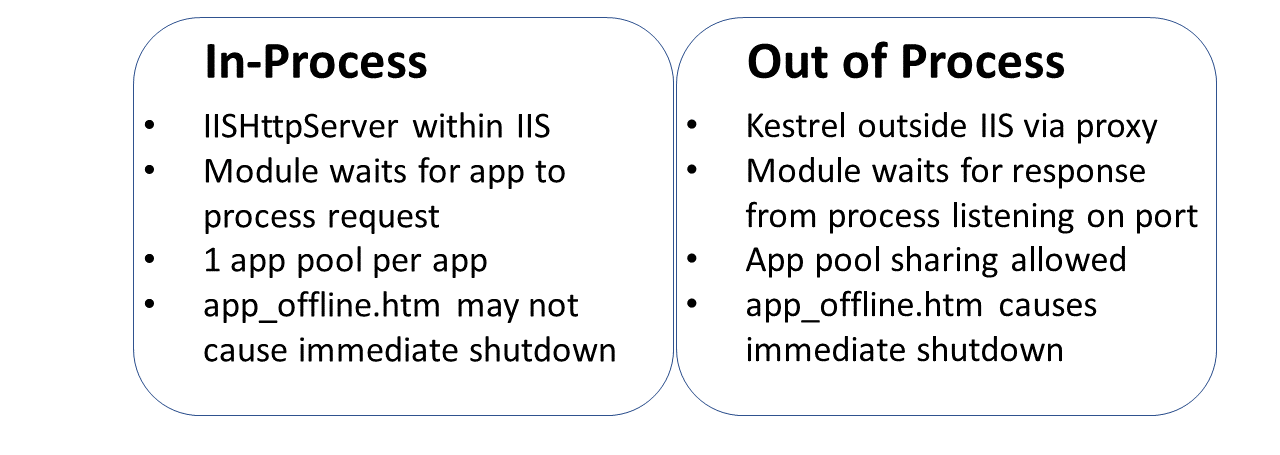
Now that your IIS server environment has been set up (either locally or in the cloud), let’s learn about the ASP .NET Core Module. This is a native IIS module that plugs into the actual IIS pipeline (not to be confused with your web app’s request pipeline). It allows you to host your web app in one of two ways:
- In-process: the web app is hosted inside the IIS worker process, i.e. w3wp.exe (previously known as the World Wide Web Publishing Service)
- Out of process: IIS forwards web server requests to the web app, which uses Kestrel (the cross-platform web server included with ASP .NET Core)
As you’ve seen in an earlier section, this setting is configured in the web.config file:
<PropertyGroup>
   <AspNetCoreHostingModel>InProcess</AspNetCoreHostingModel>
</PropertyGroup>
The lists below shows shows some notable differences between hosting in-process vs out of process.
How you configure your app is up to you. For more details on the module and its configuration settings, browse through the information available at:
- ASP.NET Core Module: https://docs.microsoft.com/en-us/aspnet/core/host-and-deploy/aspnet-core-module
BONUS: Publishing to a VM with IIS
You can publish your ASP .NET Core web app to a Virtual Machine (either on your network or in Azure) or just any Windows Server you have access to. There are several different options:
- Deploy an ASP.NET app to an Azure virtual machine: https://tutorials.visualstudio.com/aspnet-vm/intro
- Publish a Web App to an Azure VM from Visual Studio: https://docs.microsoft.com/en-us/azure/virtual-machines/windows/publish-web-app-from-visual-studio
- Deploy your ASP.NET app to Azure virtual machines by using Azure DevOps Projects: https://docs.microsoft.com/en-us/azure/devops-project/azure-devops-project-vms
Here are some prerequisites to be aware of:
- IIS must be pre-installed on the server with relevant ports enabled
- WebDeploy must be installed (which you would normally have on your local dev machine)
- The VM must have a DNS name configured (Azure VMs can have fully qualified domain names, e.g. <machinename>.eastus.cloudapp.azure.com)
References
- IIS in-process hosting in ASP.NET Core 2.2: https://docs.microsoft.com/en-us/aspnet/core/release-notes/aspnetcore-2.2?view=aspnetcore-2.2#iis-in-process-hosting
- Development-time IIS support in Visual Studio for ASP.NET Core: https://docs.microsoft.com/en-us/aspnet/core/host-and-deploy/iis/development-time-iis-support
- Host ASP.NET Core on Windows with IIS: https://docs.microsoft.com/en-us/aspnet/core/host-and-deploy/iis/
- ASP.NET Core Module: https://docs.microsoft.com/en-us/aspnet/core/host-and-deploy/aspnet-core-module
- IIS modules with ASP.NET Core: https://docs.microsoft.com/en-us/aspnet/core/host-and-deploy/iis/modules
- Hosting ASP.NET Core Applications on IIS: https://codewala.net/2019/02/05/hosting-asp-net-core-applications-on-iis-in-process-hosting/
Pingback: The Morning Brew - Chris Alcock » The Morning Brew #2698