This is the twentieth of a new series of posts on ASP .NET Core 3.1 for 2020. In this series, we’ll cover 26 topics over a span of 26 weeks from January through June 2020, titled ASP .NET Core A-Z! To differentiate from the 2019 series, the 2020 series will mostly focus on a growing single codebase (NetLearner!) instead of new unrelated code snippets week.
Previous post:
NetLearner on GitHub:
- Repository: https://github.com/shahedc/NetLearnerApp
- v0.20-alpha release: https://github.com/shahedc/NetLearnerApp/releases/tag/v0.20-alpha
NOTE: The NetLearner suite of apps doesn’t currently use custom tag helpers in the main branch, so you can check out the new sample code in the experimental subfolder, merged from a branch:
- Tag Helper Authoring: https://github.com/shahedc/NetLearnerApp/tree/TagHelpers/experimental/TagHelperAuthoring
In this Article:
- T is for Tag Helper Authoring
- Custom Tag Helpers
- Setting Attributes and Content
- Updating Pre/Post Content
- Passing Complex Objects
- Handling Conditions
- References
T is for Tag Helper Authoring
Tag Helpers are very useful for ASP .NET Core developers in creating HTML elements with server-side attributes. They work equally well in both Razor Pages and MVC views. Better yet, the syntax allows a front-end developer to easily customize the UI, with HTML/CSS knowledge.
If you need a refresher on built-in tag helpers in ASP .NET Core, you may revisit an earlier post in this series:
- Forms and Fields in ASP .NET Core: https://wakeupandcode.com/forms-and-fields-in-asp-net-core-3-1/
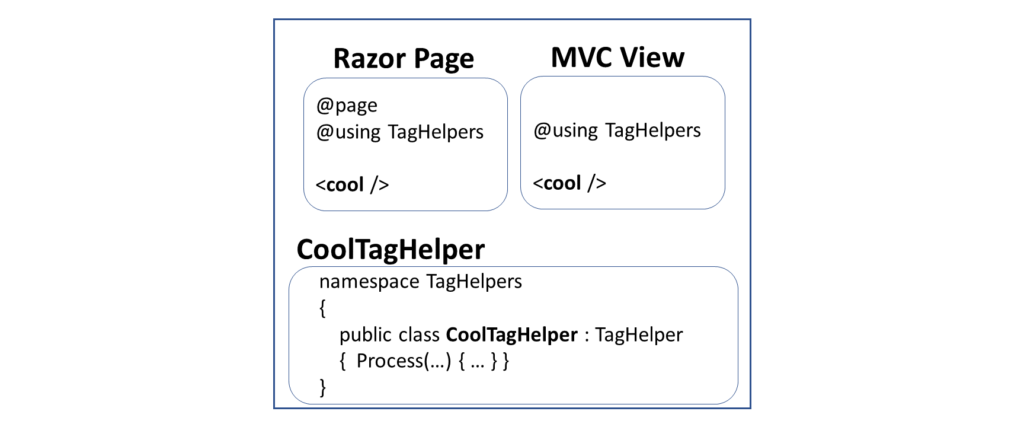
Authoring your own tag helpers is as easy as implementing the ITagHelper interface. To make things easier, the TagHelper class (which already implements the aforementioned interface) can be extended to build your custom tag helpers.
Custom Tag Helpers
As with most concepts introduced in ASP .NET Core, it helps to use named folders and conventions to ease the development process. In the case of Tag Helpers, you should start with a “TagHelpers” folder at the root-level of your project for your convenience. You can save your custom tag helper classes in this folder.
This blog post and its corresponding code sample builds upon the official tutorial for authoring tag helpers. While the official tutorial was originally written to cover instructions for MVC views, this blog post takes a look at a Razor Page example. The creation of Tag Helpers involves the same process in either case. Let’s start with the synchronous and asynchronous versions of a Tag Helper that formats email addresses.
The class EmailTagHelper.cs defines a tag helper that is a subclass of the TagHelper class, saved in the “TagHelpers” folder. It contains a Process() method that changes the output of the HTML tag it is generating.
public class EmailTagHelper : TagHelper
{
   ...
   // synchronous method, CANNOT call output.GetChildContentAsync();
   public override void Process(TagHelperContext context, TagHelperOutput output)
   {
      // ...
   }
}
The class AsyncEmailTagHelper.cs defines a tag helper that is also a subclass of the TagHelper class, saved in the aforementioned “TagHelpers” folder. It contains a ProcessAsync() method, which has a different signature (returns Task object instead of void) and grabs the child content from the output using output.GetChildContentAsync();
public class AsyncEmailTagHelper : TagHelper
{
   ...
   // ASYNC method, REQUIRED to call output.GetChildContentAsync();
   public override async Task ProcessAsync(TagHelperContext context, TagHelperOutput output)
   {
      // ...
   }
}
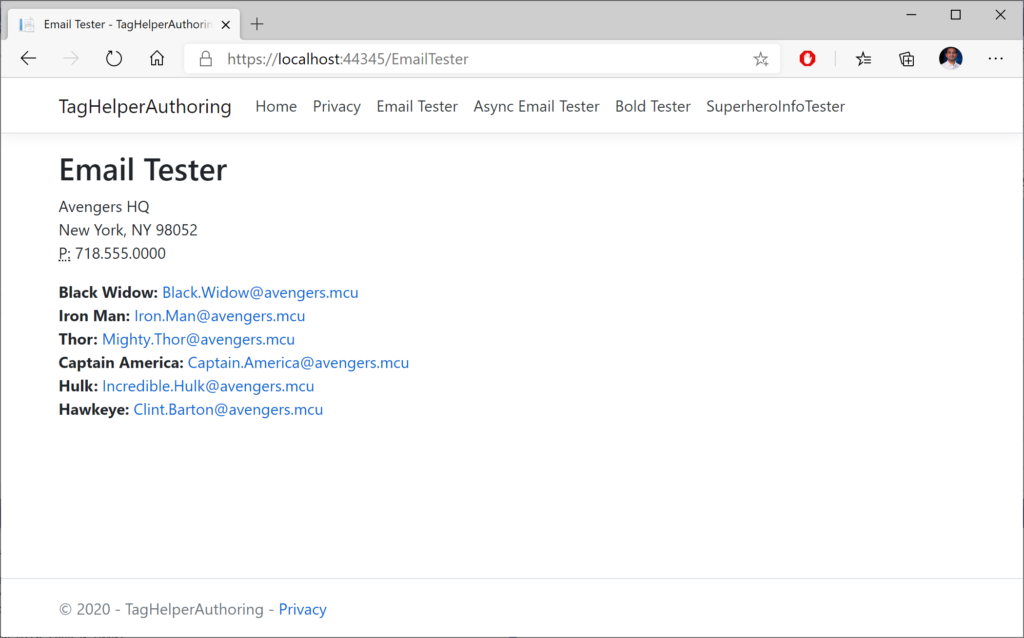
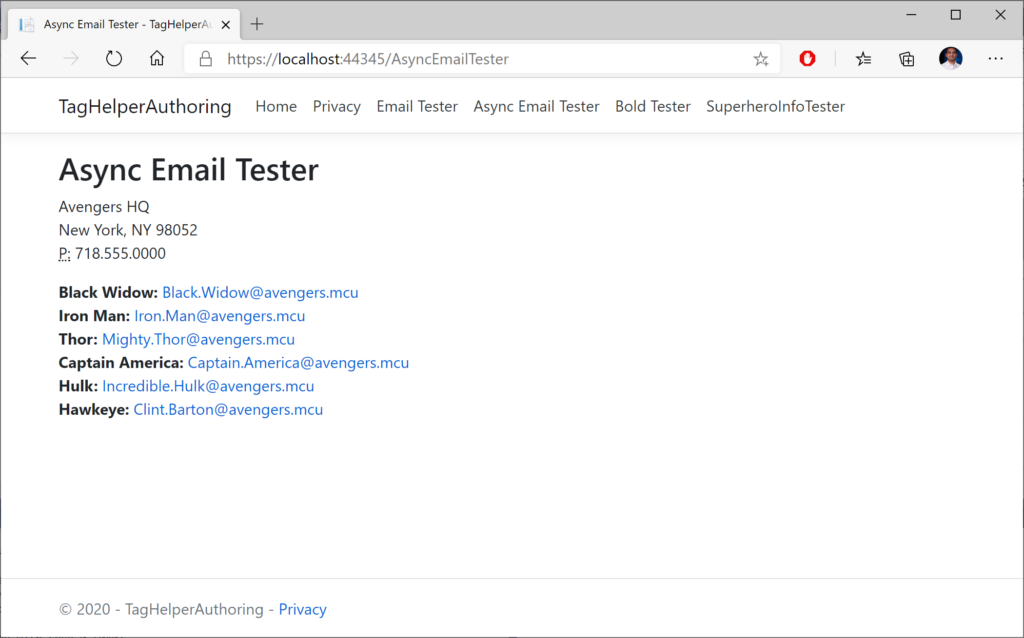
In order to use the tag helper in a Razor Page, simply add a using statement for the Tag Helper’s namespace, and then include a custom HTML tag that has the same name as the Tag Helper’s class name (without the TagHelper suffix). For the Email and AsyncEmail Tag Helpers, the corresponding tags in your Razor Page would be <email> and <async-email> respectively.
In the EmailTester.cshtml page:
<email mail-to="Black.Widow"></email>
In the AsyncEmailTester.cshtml page:
<async-email>Black.Widow</async-email>
Note that the PascalCase capitalization in the class name corresponds to a lowercase tag in kebab-case. In a browser, the end result includes a clickable email link from the Razor Pages. Both the non-async and async version of the methods produce similar end results.
Setting Attributes and Content
So how does the Process() method convert your custom tags into valid HTML tags? It does that in a series of steps.
- Set the HTML element as the tag name to replace it with, e.g. <a>
- Set each attribute within that HTML element, e.g. href
- Set HTML Content within the tags.
The process involved is slightly different between the synchronous and asynchronous versions of the Process method. In the synchronous EmailTagHelper.cs class, the Process() method does the following:
// 1. Set the HTML element
output.TagName = "a";

// 2. Set the href attribute
output.Attributes.SetAttribute("href", "mailto:" + address);

// 3. Set HTML Content
output.Content.SetContent(address);
In the asynchronous AsyncEmailTagHelper.cs class, the ProcessAsync() method does the following:
// 1. Set the HTML element
output.TagName = "a";

var content = await output.GetChildContentAsync();
var target = content.GetContent() + "@" + EmailDomain;

// 2. Set the href attribute within that HTML element, e.g. href
output.Attributes.SetAttribute("href", "mailto:" + target);

// 3. Set HTML Content
output.Content.SetContent(target);
The difference between the two is that the async method gets the output content asynchronously with some additional steps. Before setting the attribute in Step 2, it grabs the output content from GetChildContentAsync() and then uses content.GetContent() to extract the content before setting the attribute with output.Attributes.SetAttribute().
Updating Pre/Post Content
This section recaps the BoldTagHelper explained in the docs tutorial, by consolidating all the lessons learned. In the BoldTagHelper.cs class from the sample, you can see the following code:
[HtmlTargetElement("bold")]
[HtmlTargetElement(Attributes = "bold")]
public class BoldTagHelper : TagHelper
{
   public override void Process(TagHelperContext context, TagHelperOutput output)
   {
      output.Attributes.RemoveAll("bold");
      output.PreContent.SetHtmlContent("<strong>");
      output.PostContent.SetHtmlContent("</strong>");
   }
}
Let’s go over what the code does, line by line:
- The [HtmlTargetElement] attribute forces a Tag Helper to target a specific element, e.g. [HtmlTargetElement(“bold”)], which will target a <bold> tag in a Razor Page or MVC View.
- When one or more attributes are specified, e.g. [HtmlTargetElement(Attributes = “bold”)], the Tag Helper targets a bold attribute within an element, e.g. <p bold>
- Combining the above one after the other gives you an OR condition, in which either scenario can be matched.
- Combining them in a single [HtmlTargetElement] creates an AND condition, which would match a bold tag with a bold attribute, which is not very useful, e.g. [HtmlTargetElement(“bold”, Attributes = “bold”)]
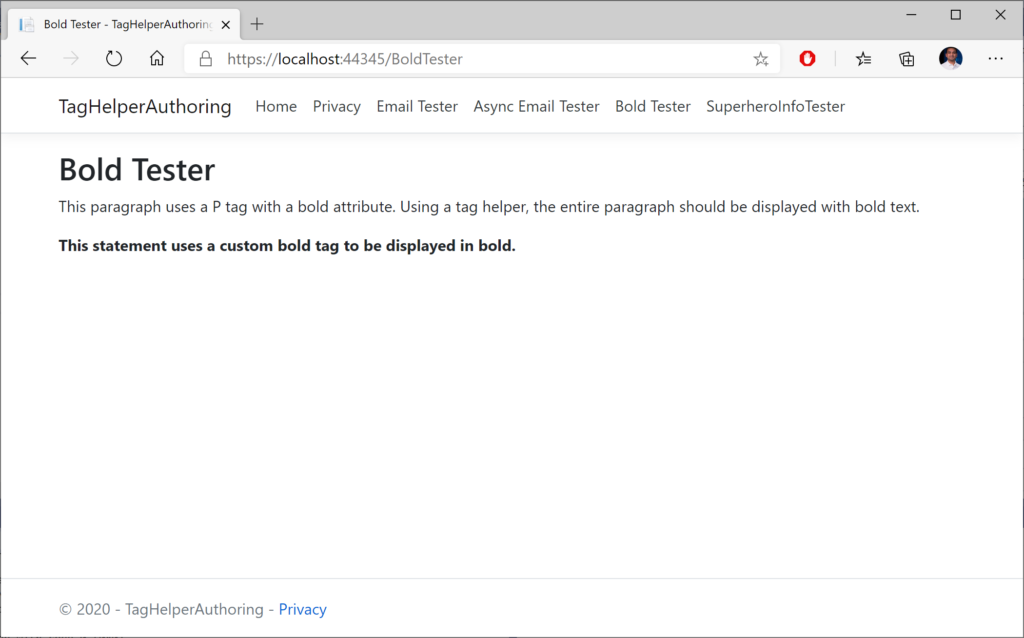
Here is a snippet the corresponding Razor Page for testing the above scenario, BoldTester.cshtml:
<p bold>This paragraph uses a P tag with a bold attribute.
Using a tag helper, the entire paragraph should be displayed with bold text.</p>

<bold>This statement uses a custom bold tag to be displayed in bold.</bold>
The tag helper affects both fragments, as seen in the screenshot below:
The statements in the Process() method accomplish the following:
- The RemoveAll() method from output.Attributes removes the “bold” attribute within the tag, as it is essentially acting as a placeholder.
- The SetHtmlContent() from output.PreContent adds an opening <strong> tag inside the enclosing element, i.e. just after <p> or <bold>
- The SetHtmlContent() from output.Postontent adds a closing </strong> tag insidethe enclosing element, i.e. just before </p> or </bold>
Passing Complex Objects
What if you want to pass a more complex object, with properties and objects within it? This can be done by defining a C# model class, e.g. SuperheroModel.cs, that can be initialized inside in the Page Model class (SuperheroInfoTester.cshtml.cs) and then used in a Razor Page (SuperheroInfoTester.cshtml). The tag helper (SuperheroTagHelper.cs) then brings it all together by replacing <superhero> tags with whatever SuperHeroModel info is passed in.
Let’s take a look at all its parts, and how it all comes together.
Object Model: SuperheroModel.cs
public class SuperheroModel
{
   public string LastName { get; set; }
   public string FirstName { get; set; }
   public string SuperName { get; set; }
   public bool HasSurvived { get; set; }

   public bool ShowInfoWithSpoilers { get; set; }
}
Razor Page: SuperheroInfoTester.cshtml
@page
@model SuperheroInfoTesterModel

...

<h3>Black Widow Info:</h3>
<div condition="@Model.blackWidowInfo.ShowInfoWithSpoilers">
 <superhero hero-info="Model.blackWidowInfo" />
</div>
...
Page Model for Razor Page: SuperheroInfoTester.cshtml.cs
public class SuperheroInfoTesterModel : PageModel
{
   public SuperheroModel blackWidowInfo { get; set; }
   // ...

   public void OnGet()
   {
      blackWidowInfo = new SuperheroModel
      {
         // ...
      }
      // ...
   }
}
Superhero Tag Helper: SuperheroTagHelper.cs
public class SuperheroTagHelper : TagHelper
{
   public SuperheroModel HeroInfo { get; set; }

   public override void Process(TagHelperContext context, TagHelperOutput output)
   {
     // ...
   }
}
Going through the above code:
- The tag helper is named SuperheroTagHelper, implying that it can be used for <superhero> tags in a Razor Page, e.g. SuperHeroInfoTester.cshtml
- The tag helper also contains a SuperheroModel object called HeroInfo, which allows a hero-info attribute, i.e. <superhero hero-info=”Model.property”>
- The SuperheroModel class contains various public properties that provide information about a specific superhero.
- The SuperHeroInfoTesterModel page model class includes an OnGet() method that initializes multiple SuperheroModel objects, to be displayed in the Razor Page.
Inside the tag helper, the Process() method takes care of replacing the <superhero> tag with a <section> tag:
public override void Process(TagHelperContext context, TagHelperOutput output)
{
   string htmlContent = $@"<ul><li><strong>First Name:</strong> {HeroInfo.FirstName}</li>
<li><strong>Last Name:</strong> {HeroInfo.LastName}</li>
<li><strong>Superhero Name:</strong> {HeroInfo.SuperName}</li>
<li><strong>Survived Endgame? </strong> {HeroInfo.HasSurvived}</li></ul>";

   output.TagName = "section";
   output.Content.SetHtmlContent(htmlContent);
   output.TagMode = TagMode.StartTagAndEndTag;
}
After initializing some HTML content to display a <ul> list, the above code in the Process() method accomplishes the following:
- Set the HTML element as the tag name to replace it with, e.g. <section>
- Set HTML Content within the tags.
- Set Tag Mode to include both start and end tags, e.g. <section> … </section>
End Result in Browser:
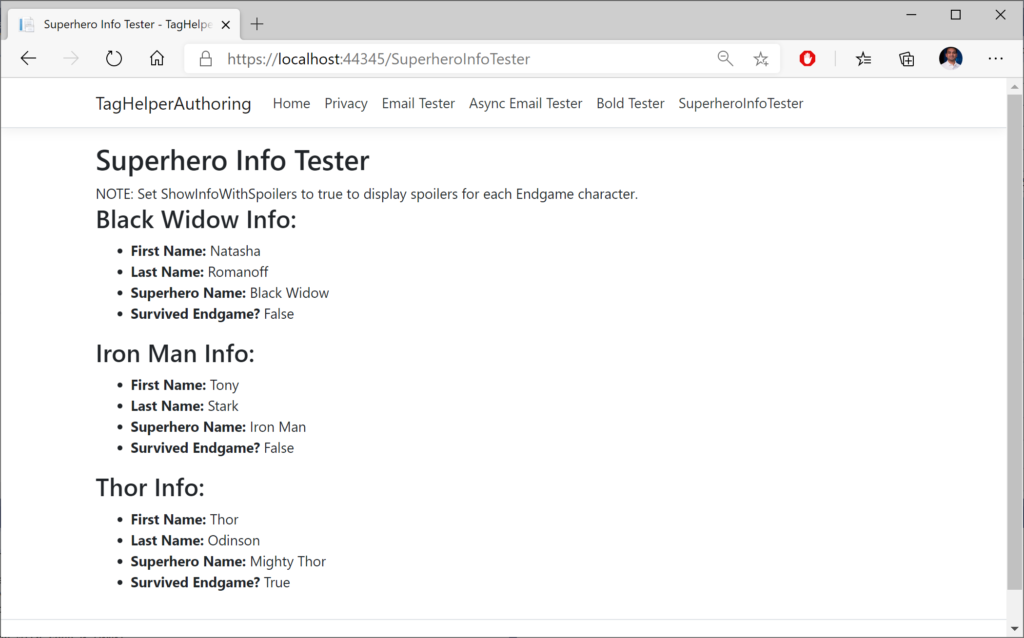
In a web browser, you can see that that the <superhero> tag has been converted into a <section> tag with <ul> content.
Handling Conditions
When you want to handle a UI element in different ways based on certain conditions, you may use a ConditionTagHelper. In this case, a condition is used to determine whether spoilers for the popular movie Avengers: Endgame should be displayed or not. If the spoiler flag is set to false, the character’s info is not displayed at all.
@page
@model SuperheroInfoTesterModel
...
<div condition="@Model.blackWidowInfo.ShowInfoWithSpoilers">
 <superhero hero-info="Model.blackWidowInfo" />
</div>
...
In the above code from the SuperheroInfoTester.cshtml page:
- the <div> includes a condition that evaluates a boolean value, e.g. Model.blackWidowInfo.ShowInfoWithSpoilers
- the Model object comes from the @model defined at the top of the page
- the boolean value of ShowInfoWithSpoilers determines whether the <div> is displayed or not.
References
- Tag Helpers in ASP.NET Core: https://docs.microsoft.com/en-us/aspnet/core/mvc/views/tag-helpers/intro
- Tag Helpers in forms in ASP.NET Core: https://docs.microsoft.com/en-us/aspnet/core/mvc/views/working-with-forms
- Author Tag Helpers in ASP.NET Core: https://docs.microsoft.com/en-us/aspnet/core/mvc/views/tag-helpers/authoring
